Wednesday 29 January 2020

Blucher 1809 French v Austrian

A rare outing for my Blucher French army against Simon's Austrians. Using the earlier French list I went for a large French Corps supported by a Bavarian Corps and the newly painted Italian Corps.

Scharnhorst finished with the Austrians having all their troops on table while the French had the Bavarian's arriving on the Austrian left flank. The Austrians needed to break the French army or capture all three on table objectives before nightfall to win:

Austrian infantry advance on the French while they await the arrival of the Bavarian's. The French hold the left while the Italians defend the town:

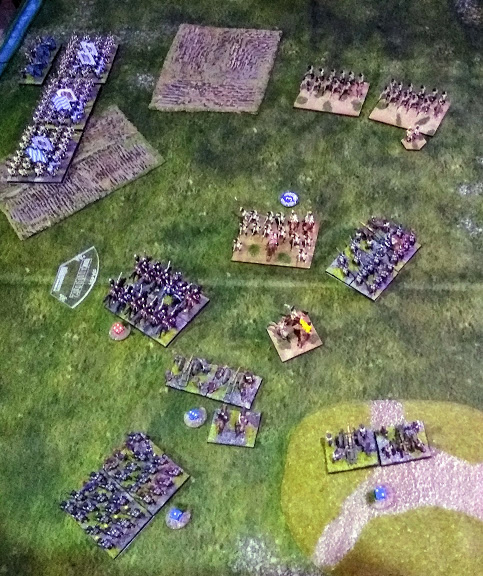
The Austrian advance continues:

The first attack against the Italian position goes in:

The situation gets worse for the Italian's as Austrian Kurassier's, Grenadiers and Hussars menace their flank:

The initial attack is repulsed:

On the left the two sides have opened fire on each other. One French brigade has been destroyed by massed Austrian artillery fire. The Italian's make a 'tactical withdrawal' leaving one brigade of infantry somewhat isolated:

On the left the French have made a breakthrough in the Austrian lines though the French infantry breaking through are almost spent. No sign of the arrival of the Bavarian's yet!:

The Italian's hold on supported by some French Dragoons:

Finally the Bavarian's arrive. With the terrain to be crossed and the Austrian right already under pressure it isn't obvious what they can achieve:

The Italian Chasseurs and French Dragoons drive back Austrian Kuriassier's. The remaining Italian infantry have retreated into the town:

The Dragoons smash through the Austrian cavalry:

Both sides have taken heavy losses now and are approaching their break points, the battle will definitely be over before nightfall:

On the left the French are gaining the upper hand with the remaining Austrian units isolated:

Of the front line Austrian's only the Advanced Guard remains but they are suffering badly from musketry:

Neither side can afford to lose another brigade now, battered French brigades hold on while the Austrian Advanced Guard is whittled down:

The Advanced Guard is finally broken winning the battle for the French:

This was a really close game which could easily have gone the other way. Simon didn't have much luck, he had a couple of turns with only 2 MO and I remember one turn in which he attacked with three units all at a large advantage and lost every combat!

The early French army is quite expensive so has few units making it fragile, especially if some of the army is off table. Until the Bavarian's arrived I could only afford to lose four units and even after their arrival only five. Simon's larger army had a six break point. Simon was very aggressive with his army which you need to be if you attack, used his massed artillery well and largely neutralised the Bavarian's with his use of terrain and attack plan while I think I made a few errors with the Italian's especially leaving them too isolated., I should have just garrisoned the town with one unit and deployed the rest behind the French.

Thursday 23 January 2020

Chain of Command "30 Day's to Dunkirk" Flank Attack at Gorre

Another play test for Jerry's PSC set in 1940. This time I had the defending BEF while Jerry took the attacking Germans.

The 1939 BEF Platoon is rather small even at full strength with a mere 27 men in total. Here Lieutenant Sadlier leads his brave band forwards:

With 12 supports available I chose a Vickers VC tank, a 1pdr anti-tank gun, a pre-game barrage, an extra senior leader, some AA MG and a single section of barbed wire. Things started well for the Brits with an 11 force morale compared to the Germans mere 8. The British were defending the top left of the table with the Germans attacking from the right and bottom of the table:

A German section appears in the farm complex:

Another German section deployed from the fields and headed towards the town:

The Vickers VB arrives and opens upon the Germans as they attempt to cross the field. The Germans appear reluctant to advance:

A Panzer III takes a long range shot at the Vickers, hits it, but fails to do much damage:

The Vickers continues to mow down the advancing German squad:

The Germans make it to the town but the Vickers crosses the hedge and guns them down breaking the squad:

Unfortunately for the Vickers a Panzer 38t arrives and forces the Vickers crew to bail out:

Meanwhile a British section in the barn has been exchanging fire with the German squad in the farm, The Panzer III has advanced but well placed smoke has largely prevented it from firing:

The 1 pdr anti tank gun deploys and fires at the Panzer 38t. Despite hitting it several times the fire has little effect illustrating how poor the British AT capability is:

The British place more smoke to block the Panzer 38t as they will soon have the Panzer III to deal with:

A second British section deploys along the hedge behind the barn. Two German squads are moving up to engage them:

The British open fire on the German squad in the open. The results are disappointing and it is looking grim for the section:

The British mortar drops more smoke to block most of the Germans from firing:

The Germans launch a handgrenaten attack, the odds are heavily in favour of the British though especially after they interrupt the attack and fire on the Germans at point blank range:

Only one German survives and he flees leaving a wounded senior officer behind. The remaining two Brits and a wounded corporal hold the hedge but are pinned:

German force morale is now down to 2 but the British have taken heavy losses. Out of sight the Panzer III and Panzer 38t have pinned the 1 pdr anti tank gun leaving the British with no answer to the German armour. Despite the large force morale difference in their favour the British will have to hope to finish off the last German squad before the German tanks wipe them out:

The last British section and Lieutenant Sadlier deploy. Opening fire on the Germans opposite and with some help from the pinned section next to them they manage to kill the German senior leader breaking the German's morale:

The surviving Germans prepare to flee:

An interesting game with the British only just winning, even when Jerry was down to 2 force morale I wasn't confident of winning as I could do nothing to his tanks and I had very few men left. The Vickers VC did well to take down one German squad by itself, aided by their reluctance to move despite Jerry urging them forwards!

I think there is one more game in the campaign, if Dave and Jerry play it I'll be interested to hear how it went or perhaps I will play it.


Tuesday 21 January 2020

Rommel Mid War Soviets v Germans

The first outing for the 10 mm Mid War Soviet army found them taking on Andy's Germans in the "Breakthrough" scenario. With the Soviets attacking I was able to use pretty much all of my force so had massed artillery, numerous tanks and a load of infantry.

The table was fairly open with Andy only having 12 terrain choices. To win the Soviets needed to capture two out of four German held objectives and hold their own objective:

Looking at the objectives and the German deployment the Soviets decided to attack the German objectives on their right and centre. Both were in open ground. The first difference in the way the Soviets operate quickly became apparent, almost all the Soviet artillery can only be used in the first Soviet tactical phase, as they couldn't contact the Germans in the first phase the mighty Soviet artillery stayed silent:

Soviet armour and motorised infantry mass around the objective on the right:

The Soviet infantry attack the centre objective supported by massed artillery:

The Germans are heavily outnumbered on the right and are taking losses as are the Soviets, the Soviets are hoping their numbers will prove decisive:

The Germans counter-attack an isolated T-34 brigade:

German forces are weakening in savage fighting:

The Soviet infantry have almost taken the centre objective using massed attacks supported by artillery:

Soviet armour surges around the objective on the right, the Germans are very weak now and only just holding on:

The centre objective is about to fall to the Soviet infantry:

The objective falls! The Germans have little to counter attack with while the Soviets still have an uncommitted Motor Rifle division in reserve:

The right hand objective also falls to the Soviets. Again the Germans have little left to counter with though, while there are a lot of Soviet elements in the area, most of them are badly damaged:

On the right a German counter attack retakes the objective:

The Soviets respond with an so far uncommitted Tank Brigade:

In the centre the Soviets are firmly in control and are mopping up the surviving Germans:

The right hand objective is taken for the second time. The Germans have nothing left and retire from the field:

The battle ended around turn 12 so well before nightfall. After some initial great combat dice for the Soviets and corresponding poor combat dice for the Germans the outcome never really looked in doubt.

The Soviets certainly play differently to the Allies or Germans, while their armour is rated Green compared to the Veteran Germans and the Soviet armour is rated lower than the German armour sheer numbers and the huge artillery support results in the Soviets both taking and inflicting heavy losses.

The fact that the artillery support is only available in the first Soviet tactical phase does limit what they can do and, I think, results in the Soviets attempting a few decisive attacks in a single tactical phase rather than the Allied or German method of using multiple tactical phases each turn.

On reflection I think the Germans would have been better off not contesting the objective on the right and forming a shorter line holding the other three objectives with more terrain to defend from.

The other option Andy considered was a much more aggressive counter-attacking defence taking advantage of the fact that the Soviets can't use their artillery defensively. It's an interesting idea especially as we have both become much more 'defensive' when defending in our Rommel games and might make more use of the German's quality and ability to use multiple tactical phases.

Next time we will play an historical scenario so I'll be waving goodbye to the massive Soviet artillery park!