Friday 27 September 2019

Cruel Seas Kreigsmarine v US Navy

My second game of Cruel Seas saw four of my Kreigsmarine E boats attacking Mike's American convoy.

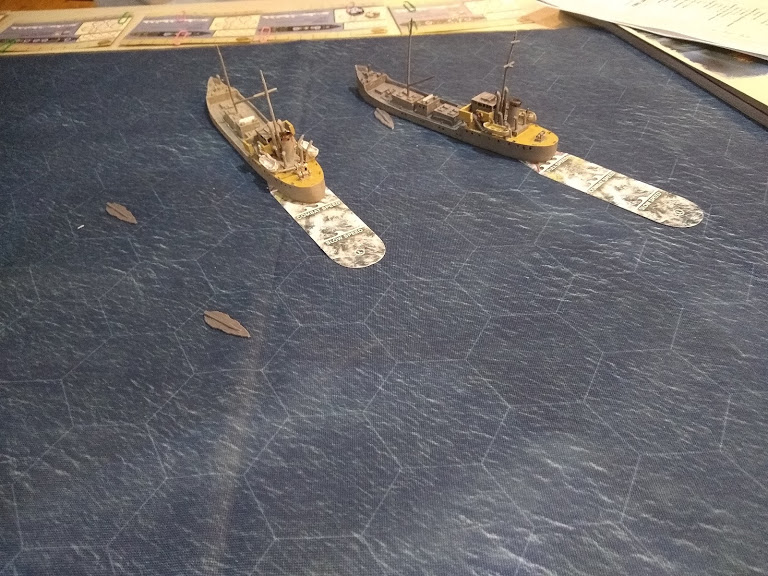
The German objective was to take out the two merchant ships which were defended by a Corvette, an Armed Trawler and two USN PT boats.

The convoy comes into sight as the E Boats ready themselves to strike:

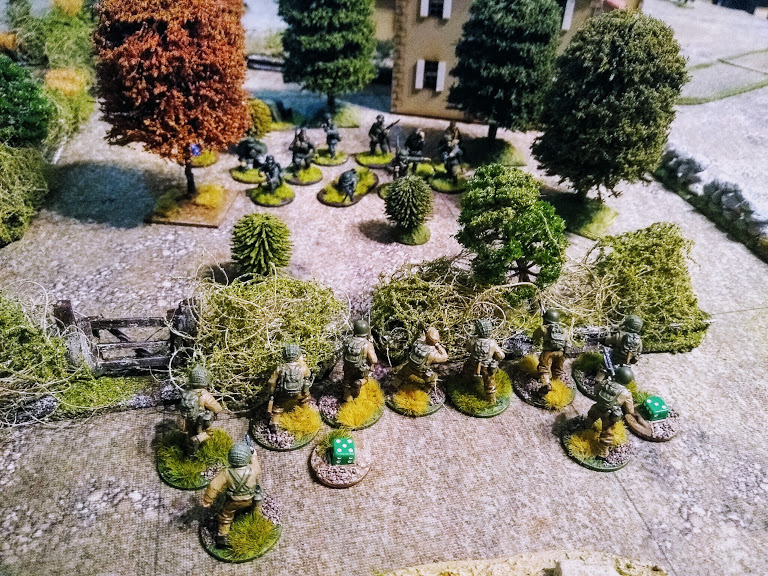
The escorts defend the merchant ships:

The convoy spots the Germans and starts to scatter!:

The first E-Boat starts an attack run, firing a torpedo into the mass of ships and raking an American PT boat with fire:

A second E-Boat joins in, concentrating on the already damaged PT boat. The PT boats have a massive amount of firepower for their size so the Germans aim to sink it quickly:

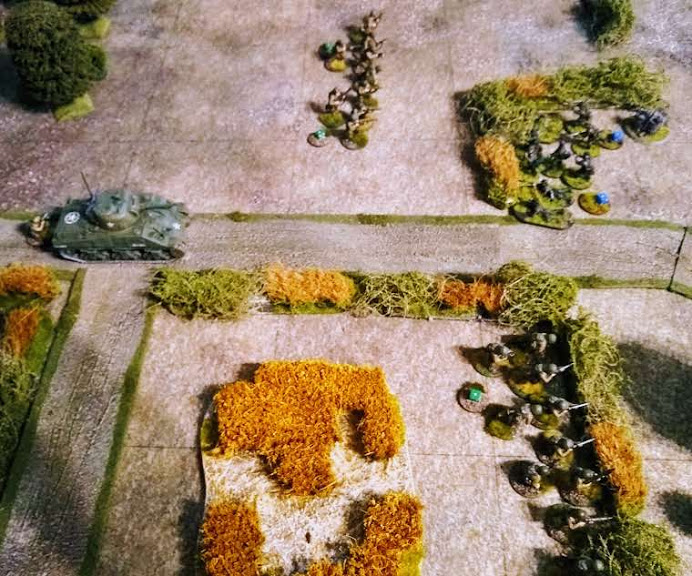
The German plan is to concentrate on the rear of the convoy as it seems poorly defended especially if the rearmost PT boat can be knocked out. The third E-Boat joins in and finishes off the American PT boat:

The Americans return fire from the Armed Trawler and the Corvette. One E-Boat takes some damage. The fourth E-Boat launches two more torpedoes and heads for the middle of the convoy:

The Corvette and the surviving PT boat gang up on the E-Boat heading for the middle of the convoy and sink it. The E-Boat has succeeded in it's task of drawing the escorts away from the merchantmen and has also managed to get it's torpedo's away!:

The torpedo hits home! Cheers turn to curses for the Germans as the torpedo fails to explode, probably sabotaged by French dock workers:

More torpedoes are launched at the merchantmen while they also come under heavy gunfire. Another E-Boat has been badly damaged but continues to fight on:

The escorts are now out of position to defend the convoy. The Armed Trawler has taken a lot of hits:

Another torpedo strikes home will it explode this time?:

This time the torpedo does explode sending the merchant ship to the bottom:

The three remaining E-Boats close in on the second merchantman. More torpedoes are launched:

The damaged E-Boat now has two guns out of action and it's hull is barely holding together. The American PT boat and the Armed Trawler pour fire into it. None the less it manages evade almost all of the incoming fire and inflict enough damage to sink the Armed Trawler!:

The slow moving merchantman is unable to avoid the two torpedoes smashing into it's stern. Again the Germans wonder if they will actually explode:

German precision engineering has not been sabotaged this time and both torpedoes go off obliterating the merchant ship:

With both merchant ships sunk and two escorts down the Germans have achieved their objective for the loss of one E-Boat sunk and one heavily damaged. The Corvette and the remaining PT Boat are undamaged for the Allies and have substantial firepower. Having used up most of their torpedoes the Germans break off the attack and return home.

I must admit I enjoyed this game more than I thought I would, the experience of the first game helped and it played much quicker as I was more familiar with the rules.

My plan to distract the slow moving escorts with one E-Boat while sending the other three rapidly to attack the merchant ships from the rear paid off. The torpedoes provided some added drama especially after the first failed to explode (which also happened to me in my first game!).

Mike was unlucky with his shooting, the damaged E-Boat that survived living a charmed life as it avoided fire from all around and even managed to sink the Armed Trawler.

So all in all it was well worth painting up the ships and I might even buy a set of the rules and a few merchant ships......

Thursday 26 September 2019

Chain of Command American Armour

With Gary and I aiming to start the '29 let's go' campaign on Monday I realised I needed to add two more Sherman's to the Americans in order to play the campaign.

Such is the ease with which I can paint these tanks now they arrived on Sunday and were finished by Monday afternoon!

One standard Sherman:

Rather than do three the same I bought one E8 version, it is a monster compared to the others:

I'd earlier finished a Stuart as well:

Finally a Greayhound armoured car

Together these give the Americans a fair few support choices, I still need to add an anti-tank gun and maybe a flamethrower team but haven't bought them yet.....

Blucher Portuguese

One unit I didn't have for my Peninsular forces was any Portuguese cavalry. Essex make suitable figures so I ordered a unit when I needed to order some bases from Essex.

The figures are not the most inspiring ones I've seen and the uniform was simple for a Napoleonic unit making them quick to paint:

Once based they looked better than I thought they would, in all honesty I can't see them getting many games but if needed they will be there!

I also finished off a few spare Cacadores I had:

Chain of Command WW2 German's

One of my favorite Airfix kits was the StuG III so I thought I should add a StuG from the Warlord games range to the German force:

It came out a bit lighter than the other German tanks I've done, probably because I'd run out of the shade I'd used on the older ones!

Friday 20 September 2019

ADLG Elamites v Assyrians

The Elamites have always been one of my favorite Biblical period armies having seen them depicted (invariably losing) on the amazing Assyrian relief panels in the British Museum so when Simon suggested a Biblical ADLG game I thought I'd use them.

As regards composition the army is heavily bow-orientated, pretty much every element being bow armed. I usually take an ally with a choice of Babylonian, Bedouins or Assyrians and in this case took Babylonians. Simon brought middle Assyrians by co-incidence so it was a great historical match-up though not a great match-up for the Elamites as previous meetings between the two armies have usually resulted in the Elamites being cut down in droves by the far superior combat abilities of the Assyrians!

Most of the terrain fell on the Elamite side of the battlefield and they deployed with the Babylonians on the left, archers in the centre and a mixed Elamite command on the right. The Assyrians had some javelinmen and chariots on their right, more chariots in the centre and the dangerous elite impact swordsmen on the left:

As can be seen the Elamite army is much bigger and there seems to be a great opportunity for the Babylonians on the left to outflank the Assyrian line. The Elamite infantry move to either side to avoid the approaching chariots while their light horse and own chariots delay the Assyrian advance:
 
The Assyrian javelinmen come under fire while the Babylonian chariots and cavalry advance:

The Elamite light horse and chariots are hit by Assyrian shooting:

The Elamite chariots engage the advancing Assyrians to delay them:

The Babylonians are slow getting into action allowing the Assyrians to bring some more troops over to face them:

The Assyrian infantry are also getting close to the Elamite infantry:

On the right the Elamite chariots continue to resist bravely:

The Babylonians have failed to take full advantage of their position with the Babylonian general unwilling or unable to commit many of his men to combat:

Babylonian and Elamite infantry are now under heavy pressure from the Assyrian infantry:

On the left the Elamite chariots have been destroyed but they have greatly disrupted the Assyrians allowing the Elamite foot to engage the Assyrians from a much better position:

The Assyrian elite swordsmen have charged home. Elamite archers resist valiantly but are badly out-matched in the combats. The Babylonian mounted have totally failed to make progress and the opportunity is fading fast:

The Elamite camp has been captured while the surviving Elamites on the right prepare to take on Assyrian chariots:

The bowmen are cut down with the Babylonian mounted failing to take advantage of their opportunities:

On the right the Assyrian chariots close on the Elamite infantry. One Elamite has headed off to attack the Assyrian camp:

Fighting continues on the left, the Elamites are close to breaking while the much smaller Assyrian army is damaged but still going:

The light infantry in front of the chariots stop the Elamite infantry shooting at the chariots. This skirmish screening is something I'm not keen on in ADLG:

A lone Elamite archer tries to fight off numerous Assyrian infantry. The Babylonian mounted's contribution has been limited to eliminating a single Assyrian heavy chariot though even then the archers did most of the damage to it!:

Assyrian chariots charge home and damage the Elamite infantry taking the army over it's break point for an Assyrian victory:

This was a bit of a disappointing defeat for the Elamites really, my plan was sound and worked well but the Babylonians just didn't get enough pips to exploit their advantage, for several turns they only had a single pip apart from the generals one, if they had had even one more pip on a few turns the result would have been very different.

As ever with ADLG I made a number of mistakes, I should not have split the Babylonian cavalry into several groups (though to some extent that was forced by lack of pips), having the Babylonian general included in a chariot unit meant he couldn't leave to command other troops and I could have placed my camp better.

I'd have liked to have the Babylonian general as brilliant as well (he was only competent) but with a command rating of 3 that wasn't really possible. I'm not sure how you rate the command capabilities of an army 3000 years ago and I often feel with ADLG lists it would be fairer to give them all the same command value and choice of generals as the ability to choose a strategist for example seems to be limited to 'generals people have heard of' which obviously disadvantages armies about which little is known!

This game was certainly an improvement on my last ADLG against Simon though as I put up more of a fight......

Tuesday 17 September 2019

Chain of Command Americans v Germans

Last night saw the first game for my newly painted (finished that morning!) American force for Chain of Command.

Gary used a late war German list with 2 LMG per squad and we played the delaying action with Gary defending. I had a basic American infantry platoon plus a Sherman and a preliminary barrage.

For a change I brought along some Spanish/Italian buildings I'd got for SP but not used often and set the game in Italy with the Germans defending the town on the left and the Americans advancing from the right:

An American squad deploys tactically in the wood while the supporting Sherman goes on overwatch:

The second American squad deploys behind a hedge on overwatch:

The American movement brings on a reaction from the Germans who deploy a squad in a field and open fire on the Americans in the wood:

The third American squad deploys on the right with the Lieutenant and takes advantage of a double phase to rush forward:

The third squad reaches the hedge line in front of the Roman ruins:

No Germans appear so the third squad continues it's advance towards the village:

The Germans reveal themselves and expect to open fire first but the Americans interrupt using a CoC dice to get the first shot. Their fire is largely ineffective though despite being at close range:

The Germans open fire with much greater effect, three Yanks are down and they take 8 shock!:

The Lieutenant rallies the squad and returns fire, things are looking desperate for the Americans here:

The rifle team breaks and runs while the BAR team are pinned. The Lieutenant retires to bring up support (or runs away according to the Germans!):

The Germans assault the BAR team wiping it out though they take three Germans with them:

While the combat on the right was going on the two American squads and the Sherman on the left were gaining the advantage over the single German squad facing them and slowly pushing forward:

A panzerfaust squad ambushes the Sherman! The shot misses though and the Germans sneak off before the Americans can react:

The Americans continue to advance, the German squad opposite is reduced to only three men (though still fires with 14 dice as it has 2 LMG!) and German morale is starting to fall:

The Panzerfaust team pops up again and fires at the Sherman. This time the shot hits! It is looking bad for the tank when it takes 5 hits but the Sherman's armour saves 3 of them. The tank takes two shock and it's hull MG is out of action:

The American squad in the wood and the Sherman combine to wipe out the Panzerfaust team. The German squad reduced to three men is proving remarkably resilient and is holding on:

On the right the Germans fall back after wiping out the rest of the American squad facing them:

The Germans are determined to knock out the Sherman and deploy a second Panzerfaust team. The Americans are equally determined to defend the tank though and use another CoC dice to interrupt with the squad in the woods which shoots dead both crew. German morale is falling fast:

 The German squad in the centre has been wiped out and the Americans advance again:

The last throw of the dice by the Germans sees their final squad deploy and open up on the American squad in the open:

The German fire is very effective but the Americans quickly take their revenge blasting the Germans with both the squad in the centre and the Sherman:

The Germans are almost wiped out and their morale collapses giving the Americans a victory in their first outing:

An interesting game which could have gone the other way if the Germans had managed to knock out the Sherman.

The Americans certainly play differently, though they have larger squads than average their firepower is very poor (only 12 dice outside SMG range compared to 23 for a German squad!) which is mitigated to some extent by re-rolling any 1's when firing. The ability to move and fire is useful in some situations but, on initial experience, I think the Russians, Germans and British all seem more effective. One of the things I like about CoC is that you have to learn how to use each nation to it's best effect so I'll have to consider what went wrong, what went well and how to improve!