Wednesday 17 May 2023

LaSalle British v Italians

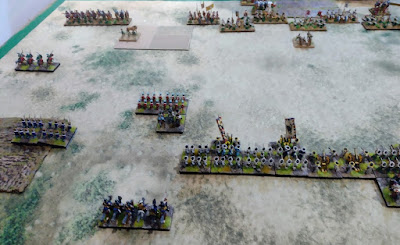
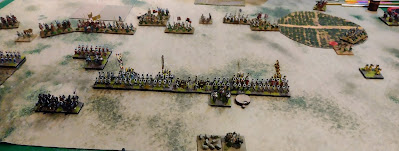
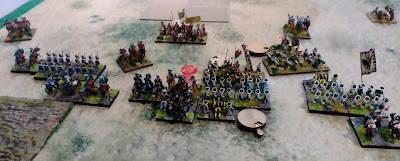
Two years after buying the rules Gordon and I finally got around to playing Sam Mustafa's LaSalle 2nd Edition! I used my Peninsular British army while Gordon had his Italians. We used the introductory scenario with 200 points of troops each.

The army enters the table in march column:


On the left the British deploy into line:

More British advance towards the town while the cavalry cross the stream:

The Italians have their cavalry on the British left facing infantry and artillery:

Firefight in the town:

British lines open fire as Italian infantry advance towards them. Italian cavalry lurk in the background:

The Italian cavalry charge home. I thought I could make an emergency formation change into square but was sadly mistaken on this point and the British line routs!

The two armies battle it out:

British Heavy Dragoons attempt to emulate the Italian cavalry's success against Italian infantry in mass:

The attack fails miserably and the Dragoons are repulsed:

Long lines of British infantry:

On the left musketry abounds:

The Dragoons have left their attached RHA far behind:

The Italian cavalry are forced back and withdraw to regroup:

The Italians have captured the town but lost an infantry battalion:

The Italian Guard Dragoons charge into the British line infantry who promptly disintegrate again:

The British are making progress on their right though:

Charge! The British attack:

One Italian unit breaks, the other stands firm:

Night falls with the battle still undecided:

The British had lost two quite expensive battalions, the Italians three somewhat cheaper ones. As the Italians held the town it was probably a minor Italian victory, mainly down to their cavalry being so successful!

One reason we hadn't played before was that the rules from an initial reading seemed a bit confusing, they are superficially similar to Blucher but in fact quite different! Once we had played a couple of moves though things became easier and the game moved quite quickly.

They are similar though in that how you use your 'momentum' to carry out actions is the critical part. Unlike Blucher both sides know how many MO they have for the turn but that is somewhat complicated by the individual turns actions passing from side to side via 'interruptions' which really makes you think about when to attempt to move, shoot, rally and change formation. Higher momentum gives better options and more flexibility whereas if you have a turn of low momentum you have to keep things simple! 

As ever with Sam's rules much to think about especially if we add in the advanced rules and definitely worth exploring further.


Tuesday 16 May 2023

What a Cowboy rules try out #2

Another try-out of What a Cowboy, this time with my Desperados taking on Dave's Lawmen and Jerry's Mexicans in a three-way fight!

One of my gang, "Black Bart" has been captured by the Law and is languishing in jail. My gang need to rescue him, Jerry's Mexicans want to kill him and Dave's Lawmen want to uphold the law:


A Deputy keeps an eye on Bart:

Outside the General Store Wishbone loads up his chuck wagon:

It's lively in the saloon!

The stage to Tucson prepares to depart from the Grand Hotel:

The town of Billington is quiet before the storm:

The Desperado's! Left to right "Wild Billy" Williams (Gunslinger), "Big Frank" Cannon (Gunslinger), "Desperate Danny" Reagan (Shootist) and "Frenchie" Dupont (Greenhorn):


First confrontation. Wild Billy takes aim at a Deputy in the Grand Hotel:

Big Frank joins in and guns the Deputy down:

Big frank then goes on to confront Sheriff Pat Garret in the alley. Garrett had crept up on Big Frank but Frank won the fast draw:

The Greenhorn Frenchie has been lurking behind the hotel:

Suddenly a Mexican appears behind Big Frank! The Mexicans have been battling it out with a couple of Deputies and some Law henchmen:

Big Frank turns to face the Mexican hoping Garrett does not recover from his shock quickly:

Desperate Dan approaches the Sheriff's Office and encounters another Mexican:

Wild Billy to the rescue! The Mexican is down:

Wild Billy then takes out the Sheriff as well:

Desperate Dan and Frenchie finish off the Mexican by the jail:

Frenchie enters the jail and releases Black Bart:

Bart and the gang retire from the town having achieved their objective:

Another fun game which ran much better than the first one now we understood the rules better! There was also more use of the 'Bonanza' tokens, cards and abilities as we remembered them more often.

Poor Dave's Lawmen suffered from being caught between the Desperados and the Mexicans and were not helped by the 'Legend' Pat Garrett being unable to hit the proverbial barn door, rolling a succession of 1's for his shooting and falling in a hail of lead from Wild Billy and Big Frank!

I anticipate the town of Billington will see more action in the future.... 

Saturday 6 May 2023

ADLG-R Holy Roman Empire (aka Austrians) v Louis XIV French

Taking a break from our Cold War Commander campaign Simon and I played an ADLG-R game for a change. I used the Holy Roman Empire list (aka Hapsburg Austrian) against Simon's newly painted Louis XIV French army. 

For a change I went for a higher quality army with better generals (including a Strategist) instead of my usual preference for numbers!

The Austrians have fewer cavalry but more artillery and deploy in the usual infantry centre with mounted wings which the French match:


Austrian Hussars advance to slow down the French cavalry while the Hungarian infantry head for the safety of the fields

With fewer artillery and Impact infantry the French need to get into contact with the Austrian infantry and begin to advance:

One Hungarian infantry unit on the Austrian left looks a bit isolated:

The French begin to close in but are taking some hits from Austrian shooting:

The Austrians have committed an error allowing the French cavalry to charge into the all musket armed Hungarians. On a more positive note the French infantry are suffering badly from Austrian musketry:

The Hungarians are routed in the initial contact! The Austrian Cuirassiers that should have protected them but for my incompetence charge into the French cavalry to restore the situation. The infantry combat is going much better for the Austrians though, one French unit had broken already though another has got into combat:


Another French infantry unit charges home, on the Austrian right their superior musketry is rapidly gaining an advantage:

More French infantry flee and the Austrian Cuirassiers attempt to finish off the French cavalry:

On the right the Austrians have almost finished off the French:

The French cavalry are also dispersed eventually:

The last two French infantry units rout breaking the French army:

An impressive win for the Austrians that never really looked in doubt. The Austrian infantry with their longer shooting range (being firelock armed later pike and shot), regimental guns and elite status for two of the units proved their worth against the French infantry who were Impact foot (hence better in the initial charge but the same afterwards) especially with the two Austrian guns contributing quite a few hits. We will probably be back to CWC for our next game!