More action from the CoC 24 Hours to Basildon campaign last night against Gary.
In the initial encounter a platoon of the LDF had inflicted some damage on the invading Germans before falling back in scenario 1 "Lark's in the Park".
The second engagement, "What's Behind Bully Tonight" followed which went disastrously wrong for the British in a heroic but failed attempt to hold the Germans up on the outskirts of Margaretting in which the local LDV platoon was effectively destroyed as a fighting force.
The campaign allows the British two (or possibly three depending on results) platoons to call on so for the third game I would have to use the somewhat better Home Guard platoon who are more numerous, slightly better equipped and have some useful support options available. The downside of course is that if this platoon gets wiped out before it manages to hold the Germans up significantly the campaign will be over!
The third scenario, "In the Steps of Boudiccea" finds the British defending the A12 road between Ipswich and Colchester. The position is a reasonably strong one with two areas of buildings, Docklands and Elmfield, providing a base to attempt to stop the German advance. With seven support points available I chose a Smith Gun, the usual Vickers MMG and a minefield to block the road.
I wasn't sure how to approach this as taking heavy losses as I did last time would result in the loss of the campaign but, on the other hand, there are only five scenarios in the campaign of which I need to win at least two so time was running out. As a result it was pretty much see how it goes and make the plan up as we go along!
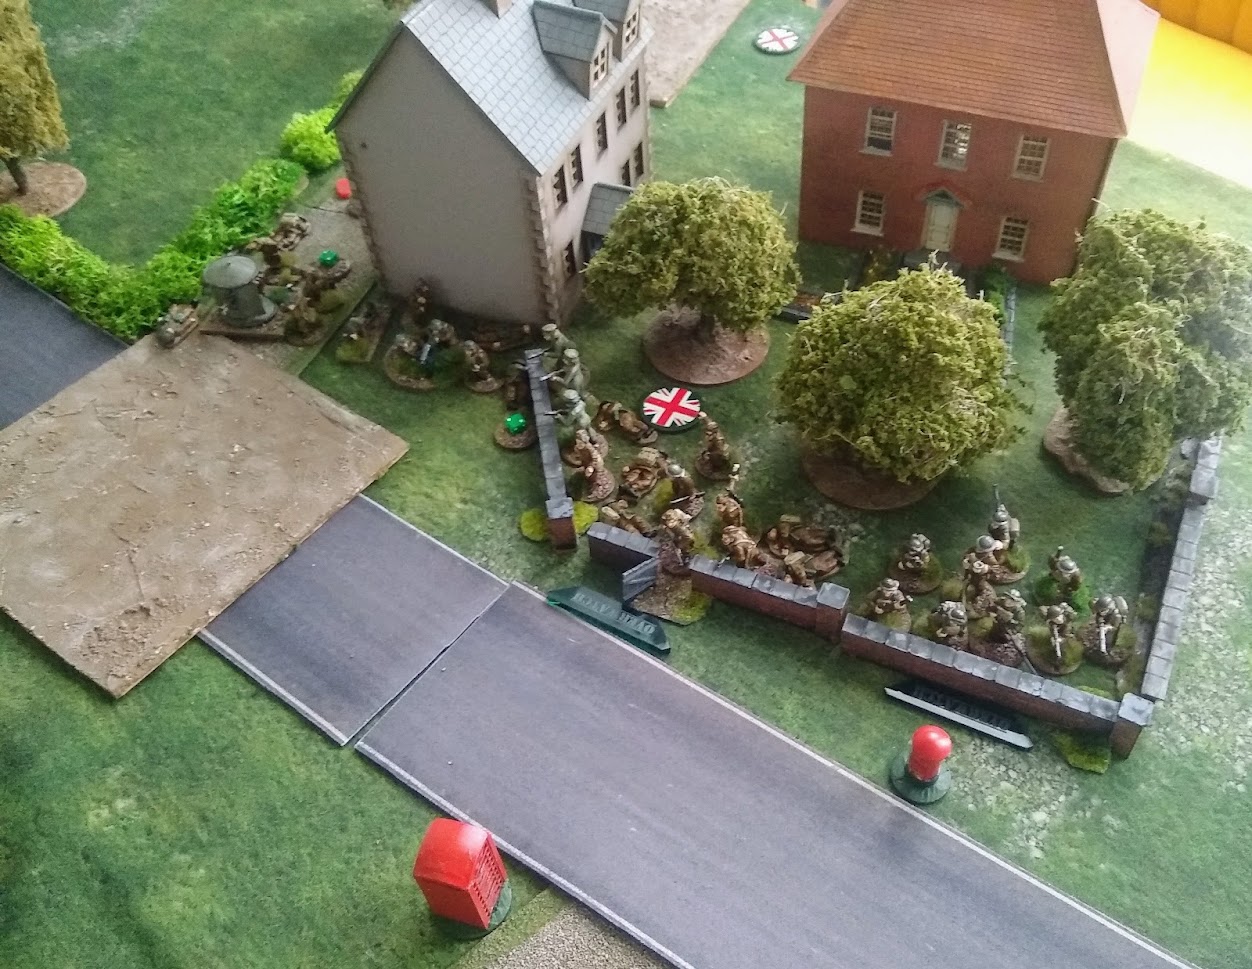
The table set up with another of Gary's great buildings providing the centrepiece of the Docklands estate. The British have placed a 'real' minefield on the road junction and some dinner-plate mines to defend the flank of Docklands. The German objective is to move two units off the road by Docklands:
The main house even has some really nice flower beds that Gary made:
The patrol phase ended with the Germans having deployment points near Elmfield and on the table edge they would approach from while the British points were all around Docklands. The first German squad appears and starts to move towards Docklands through the light woods:
A second squad appears in the open approaching from the other direction:
The British do little other than position an ATS team in the main Docklands house:
The German squad in the open is joined by an infantry gun and a 2cm mortar team. The Germans are building fire support to cover the advance of the squad through the woods:
The Germans in the woods continue to advance without meeting any resistance:
Another small response from the British, the small BAR team moves out of Docklands and begins to make a speculative outflanking movement against the Germans:
The Germans continue their walk in the woods, no opposition as yet:
The BAR team move towards the German JOP with the vague idea of capturing it:
The Germans have the same idea! Leaping the fence they advance on the British JOP and the road they need to exit from:
Now is the time for the British to act! They just need to deploy and catch the Germans in the open. Unfortunately the Germans have a second phase and close down the JOP. The battle could be over very quickly if they can't be stopped:
At last a reaction from the British. Two sections deploy in Docklands and open fire on the Germans:
The results are disappointing though, just a couple of shock:
The sergeant attempts to issue some orders but is distracted by a 5th Columnist berating him about potential damage to her flower beds and garden wall:
The Germans have hopped over the hedge so only one British squad can target them. Will they make a dash for the exit or stay and fight it out? If the Smith Gun and Vickers MMG can deploy quickly the British might still have a chance:
An aerial reconnaissance photo of the situation!:
The Germans decide to open fire rather than making a dash for it. Their fire is remarkably effective with numerous hits and results in one ATS girl down and a corporal killed:
Meanwhile the third German section has been moving along the road to support it's comrades. One is shot down though so they hop over the fence and into the woods:
The third Home Guard squad deploys to add to the fire on the Germans behind the hedge. They immediately take two casualties and a lot of shock. The British really need their supports to arrive soon or it will be all over:
The third squad falls back before it breaks:
One final shot as they retreat wounds the corporal:
The German squad, infantry gun and mortar team that was hoping to provide fire support to the attack on Docklands were rather obscured and have been firing somewhat ineffectively so they decide to move up to get a better sight line to the action:
At last the Smith Gun arrives and begins to take on the Germans behind the hedge. Is there still time to stop them?:
Even better news is that the Vickers MMG and Home Guard Captain have deployed to quickly form a strong firing line. Maybe all is not lost yet:
The British rifle squads put down covering fire on as many Germans as possible leaving the Smith Gun and Vickers to do the damage hopefully:
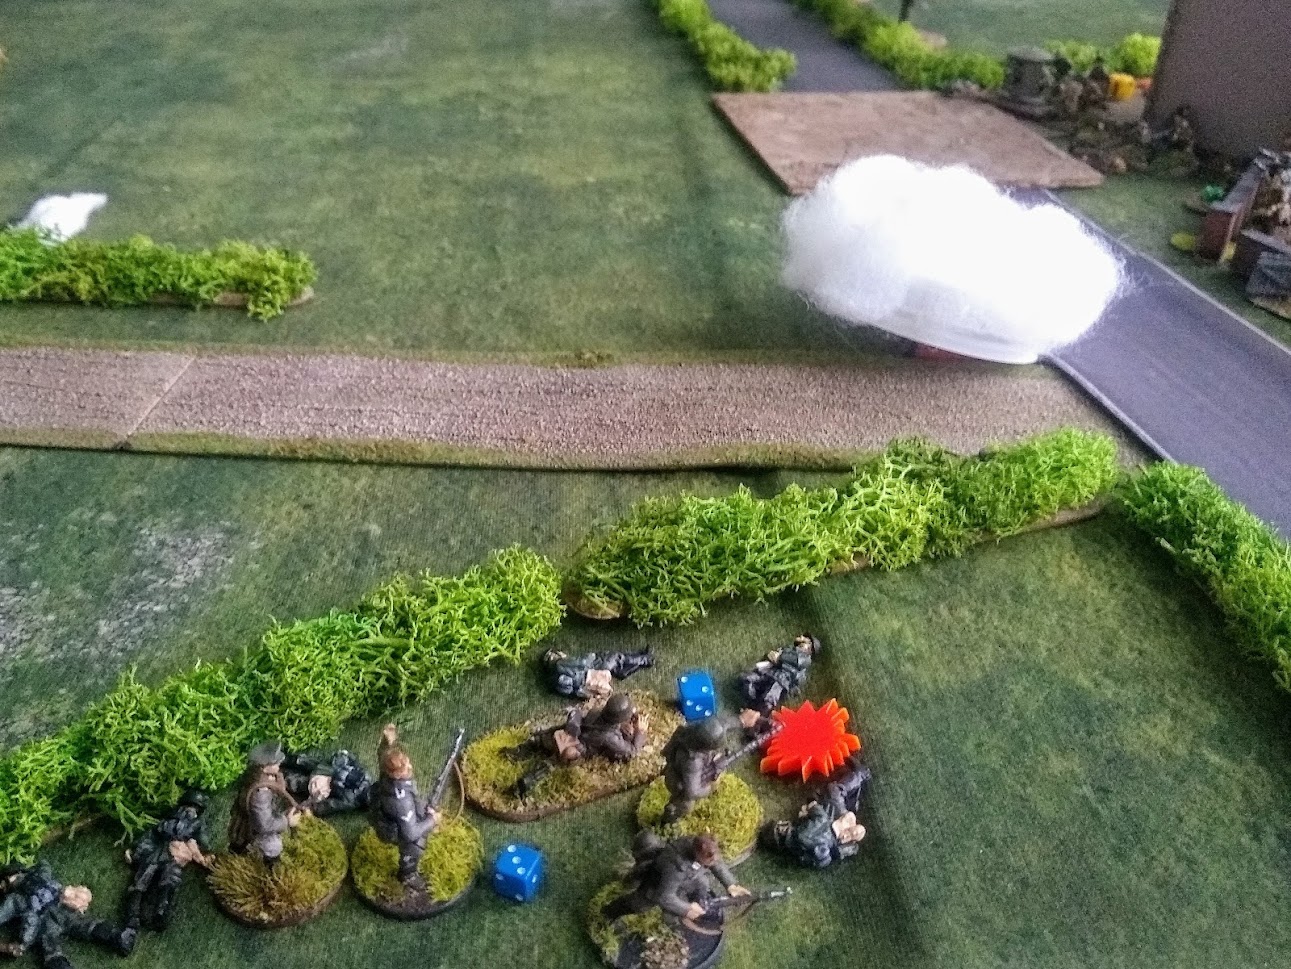
The Germans behind the hedge are now taking a pasting with casualties and shock mounting quickly. It does not look like they will be leaping over the hedge any time soon:
In desperation they hurl a smoke grenade to try to make it harder to hit them:
The smoke helps but losses continue to mount and the squad is pinned:
Keeping the pressure up the last few German survivors break taking German force morale down to 2 while the British are still at 6:
The Germans decide to withdraw! The valiant defenders of Docklands give three hearty British cheers having given the invaders a bloody nose and bought time for the Army to organise further resistance to stop the German drive on London:
A close game that looked like it was going to be an easy victory for the Germans for a while, and where we could both have taken different decisions at a number of points. As ever the deciding thing was the balance between deploying too early or not getting to deploy at all as almost happened to the British.
The butchers bill was six riflemen and a corporal from the Home Guard core platoon plus one ATS and two crew from the support elements. With a FM advantage of four four of the casualties from the core platoon return immediately with one of the remaining three being killed (the corporal) and the other two missing the next game. The Germans lost 8 men which translates (I think) to four dead, two missing in the next game and two returning immediately. As the platoon had already lost four men it will be down a whole squad in the next game giving Gary a tough choice as to replacing it with his second platoon or not especially as we rolled for support for the next game and only got two points each!
For the British the C-in-C's opinion improved from -2 to -1 while the men's opinion also improved from -2 to -1. The dead corporal obviously wasn't very popular as the men didn't care about him at all!
Looking forward to the next game where the Germans will attempt to push past the British again. After the shock of the heavy defeat at Margaretting British morale has soared and they are even more determined to defend their green and pleasant land against the Nazi barbarians! The Nazi's on the other hand now have plenty to think about and will have realised that they still have a fight on their hands!


Hurrah for the Home Guard! It certainly looked rather dodgy for them until your dice worked out and you could bring on the Smith and Vickers.
ReplyDeleteThanks Tamsin it was indeed looking dodgy! This is my first experience playing with only four command dice which is definitely challenging especially when Gary had added the 'red' dice so had six.
ReplyDeleteThis game I got a lot more CoC points and one of the special rules for the campaign is that as the Home Guard you can trade two CoC points for an extra command dice which helps when you really need to do something.