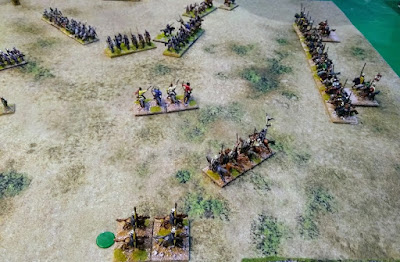
Another practice ADLG game against Gordon, this time he wanted to use Feudal Germans for a competition in Bournemouth.
Looking at suitable historical opponents I was a bit limited in choice as I don't have any Feudal European armies. However, Frederick II, Holy Roman Emperor, lead the 6th Crusade to try to regain Jerusalem. Although there was little fighting it seemed like an opportunity to use some rarely employed figures from my "assorted Arab" collection as Ayyubid Egyptians.
Having decided on the army I also went for an unusual composition of almost all mounted and mostly elite elements with two commands of Mameluk's and Turcomen and a small allied command of Syrian lancers and Bedouin light horse.
Initially at least things went well as Gordon decided I would have more rough terrain infantry than him and went for a fairly open table! His army consisted of two heavy foot commands and one of medium knights. My plan was to move my entire army to the right flank and overwhelm Gordon's knight's. It would involve the loss of my camp but hopefully the gain of his in exchange:
The army begins to move round the German flank, leaving a couple of skirmishers to hold back the massed German infantry:
The flanking move makes good progress. Two elite Turcoman light horse try to drive off a single German light horse on the far right:
The Mameluk's turn and prepare to engage the German knights. The German's have started to reverse their foot centre to redeploy to the flank but progress is slow. Unfortunately for the Egyptians the two elite Turcoman light horse have both managed to die to the single German light horse:
Arrows pepper the German knights resulting in some hits:
Some German knights charge forcing the Mameluk's to evade. The German foot from the centre are rapidly closing the gap at the end of the German line:
The Mameluk cavalry return. One disadvantage of such a flanking move is that there is no room to evade quite quickly when the German's advance:
A few more shooting hits are achieved:
The Mameluk's are forced to accept combat:
Shooting casualties mount for the Germans but they are doing well in the combats:
The small Egyptian army is starting to be overwhelmed with the German foot finally getting into action:
More Egyptians are destroyed, the Egyptian camp has been captured as well:
The Egyptians are close to breaking but there are still some crucial combats and the Germans have taken a lot of shooting casualties. Which way will they go?:
Sadly they go in favour of the Germans and the Egyptian army collapses in flight!:
A fairly close game and I think I gave Gordon a tougher game than some of our recent ones.
My plan was sound and could easily have worked. The two elite Turcoman light horse dying to a single German light horse was disastrous as it prevented me from taking Gordon's camp and allowed his infantry from the centre to redeploy quickly.
There were also a couple of other occasions when my troops failed to take advantage of their situation (I think perhaps I had used up all my luck in my game against Simon last week!).


No comments:
Post a Comment