Saturday 12 October 2024

Bag the Hun Japanese v Australian

Another run out for Bag the Hun with my Japanese taking on Jerry and Dave's Australians. I had four Zeros and four Jacks while Jerry had four Beaufighters, Dave had four Kittyhawks and there were six Hudson bombers to escort.

I'd also made some rather crude paper templates in an attempt to speed up the game when attempting to do anything other than fly in a straight line!

The Japanese approach:


Kittyhawks race to intercept:

Jacks head for the bombers while the Zeros attempt to hold off the Australian fighters:

Beaufighters chase a pair of Zeros:

Zeros approach the bombers from either side:

One of the Jacks explodes and another is critically damaged:

A Zero is shot down at long range by a Beaufighter. At this stage the Japanese had not managed to get off a single shot!

At last a success for the Japanese, the remaining Zero brings down a Hudson:

The Hudsons reach their target minus another one shot down by a Zero:

Something of a fight-back by the Japanese as a head on attack by a Jack causes critical instrument damage to a Beaufigher flown by a Junior Ace:

Another success for the Japanese as a Kittyhawk explodes:

Another fun game with a load of planes which went a bit quicker as we have (slightly) more idea what we are doing and the paper turning templates helped a lot.

The final score (I think) was all four Zeros shot down, one Jack shot down and one critically damaged against two Hudsons, one Kittyhawk and one critically damaged Beaufighter for the Australians.

Considering their dismal start not a bad result for the Japanese. The Beaufighter is a tricky opponent with its massive firepower (14 against 8 for the Japanese planes) and robustness so I think I'd have been better off targeting them to start off and then trying to deal with the Hudsons and Kittyhawks. I've painted up some Buffalos for the Australians so maybe we will try them next time.

Sunday 15 September 2024

Test of Honour Campaign Games 1 and 2

Simon and I thought we would start off a simple Test of Honour campaign having enjoyed our previous games. Before we started I managed to paint up some more figures to replace the previous generic Ashigaru that I wasn't that happy with.

The first scenario is a random encounter between the two hero's and a few followers. 

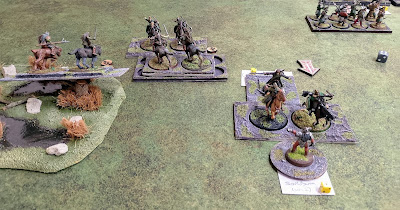
My force, led by 'The Widow' moves up. Both sides are somewhat wary of getting shot at:


The enemy Hero moves round a building to attack an archer:

The Widow closes in on the opposition Ashigaru:

One is immediately cut down:

Both Hero's concentrate their attacks on followers:

Casualties mount on both sides:

The objective is to take out the opposition Hero, neither side is getting anywhere near this as followers continue to fall:


Finally the cinematic confrontation occurs!

The Widow manages to inflict a serious wound on her opponent but fails to finish him off and is cut down in turn by the wounded Hero:

A win for Simon's Hero who in the post game round up is 'eager for battle' in the next game. The Widow survived the fight but was captured, beaten and released so will start the next game slightly injured.

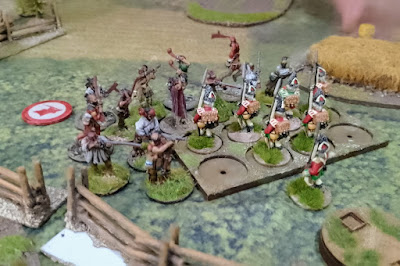
On to game two in which the defeated Widow vows revenge and attacks an outpost guarded by her enemy. This time the forces are larger with the Widow selecting a Samurai follower, groups of spearmen and archers and a single spearman to make up the numbers. Simon went for a different approach with a horde of followers and just his Hero:

In this game there are three objectives and whoever controls the most after five turns wins. As defender Simon has to keep 1/3 of his force off table as reinforcements leaving him outnumbered at the start.

The Widow, thirsting for revenge, quickly cuts down the opposing Hero!

With only Ashigaru left Simon is struggling already:

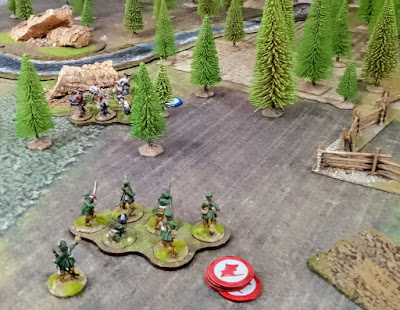
Ignoring the fire from the bowmen the Widow quickly closes with them and starts slaughtering the impudent peasents:

They rapidly fall under her whirling blades:

Those who don't fall flee for their lives:

A very short game in which, once Simon's hero was eliminated, his mob of followers stood little chance especially as his reinforcements refused to arrive repeatedly! 

The ToH system of giving three activations per hero, two per Samurai follower and only one for others makes it difficult to use massed cheap units which is probably a good thing.

I've played quite a few ToH games now though most of them I've not written up as, while they have great narrative, in a time limited evening, it is difficult to take even remotely decent photos of the action with so few figures employed and lots of turns. 

It is an enjoyable game and I'm looking forward to continuing the campaign soon.

Tuesday 3 September 2024

Bag the Hun Japanese v Australian

Another BtH game, this time Dave and I had the Japanese escorting a bomber force attacked by Jerry's newly painted Australians. Dave and I had four Zero's each plus three Betty bombers while Jerry had four Beaufighters and four Kittyhawks.

The Japanese head for the target:


The Australian's climb to intercept:

Dave's flight of Zero's decides aggression is the bast tactic:

Dave's Zero's attack the Beaufighters from the rear while mine engage frontally:

Kittyhawks attempt to get through to the Betty's:

Pilots desperately try to get a shot off or avoid being shot:

The first kill goes to the Japanese as a Zero takes down a Kittyhawk with catastrophic structural damage. The pilot manages to bail out successfully:

The Betty's fly on ignoring the melee around them and even managing to get a few shots off of their own at a Beaufighter that attempts to tail them:

More hits are scored on both sides:

A Beaufighter loses an engine and flees:

The Betty's make it through undamaged. With most of their planes damaged the Australians break off and head for home:

Another great game of Bag the Hun. The end result was one Kittyhawk and one Zero shot down with several Australian planes taking serious damage but managing to break contact successfully. 

Before the game I felt the Beaufighters with their massive frontal firepower (twice that of the Zero!) and far greater robustness would easily take out the Japanese but it didn't work out like that, partly because the Zero's were much more manoeuvrable and partly as being a lot bigger the Beaufighters were easier to hit. 

We all enjoyed the game and have a few ideas how to make it play easier next time. Gluing the dice holders down and making labels for the stands certainly made it easier to see which plane was which! 

Tuesday 27 August 2024

ADLG Early Carthaginian v Hittite

A return to ADLG after a long gap saw my Early Carthaginians take on Gordon's Hittite army in a practice for a competition Gordon has entered. Looking at the Hittite list I felt I'd be heavily outnumbered in chariots and, with the Carthaginians not being the most mobile of armies, trying to protect the flanks of the army with terrain would be a good idea!

The terrain fell nicely for me with a hill and field to defend. The Hittites set up in much longer line with a strong force of chariots as expected:


The Hittites advance quickly sending some light horse to dispute the hill:

The Carthaginians prepare to occupy the hill:

They just manage to get over the crest giving them an uphill advantage against the attacking Hittite heavy chariots:

There isn't much facing the Carthaginian right who are confident they will be able to brush aside the Hittites facing them:

On the left there are large numbers of Hittites moving up but they will not be able to get into the fight for a while:

The whole battlefield from above. The situation looks promising for the Carthaginians:

The Carthaginians are cutting through the Hittites on the hill:

The last chariot resists:

On the left the Carthaginians pull back to gain time:

The hill is cleared of the enemy and the right pushes forward:

The Carthaginians turn to face the Hittites after their 'tactical withdrawal':

Battle rages on:

On the right the last few Hittite chariots are mopped up:

More chariot on chariot action:

The Hittite army breaks and flees:

A fun game and for once I seem to have picked a decent army composition and avoided making any serious mistakes! Gordon's mighty chariot force was a bit intimidating but, by luck or judgement, they got split up and attacked piecemeal allowing the Carthaginians to pick them off gradually.