Monday 29 November 2021

ADLG Kushite Egyptian v Medes

In our latest ADLG game my Kushite Egyptians took on Gordon's Medes, a re-run of a game we played quite a while ago which Gordon triumphed in.

This time I went for two mixed commands of mounted and foot with brilliant generals and an unreliable small foot command entirely of bowmen and medium swordsmen giving a substantial army with a 26 break point. Unlike last time I also opted for the new 'armoured' light chariots available in V4 of ADLG rather than the previous (now downgraded in my opinion!) heavy chariots.

Gordon won the initiative and decided to attack in the plains. I got a waterway to narrow the table and put down the maximum terrain I could then deployed the all-infantry command on the left with the two mixed commands in the centre and on the right:


The Medes had deployed with two mixed corps of their own on their right/centre and an entirely cavalry command on their left. They immediately began to advance as did the Kushite centre and right:

One Kushite light horse moves over to slow the advance of the Median right, with luck it will take the Medes a while to get these troops into action:

Feeling that they have an advantage facing the palm tree plantation and on the right the Kushites push forward quickly moving the archers up on the left to defend the flank:

On the far left the Kushite light horse hold up the Median advance again:

On the right the Kushites advance into missile range. The fire proves especially effective with hits sprouting all along the Median line:

On the left the Kushite archers manage to get a few shots off at some distant Median cavalry inflicting more damage. The light horse are still doing their holding job well:

Fighting has broken out in the palm grove with both sides having wins and losses. The Median cavalry wing retires but is followed up by the Kushites:

On the left the delaying Kushite light horse have been dealt with while in the centre the two lines will clash soon. Kushite archery has already inflicted some hits on the Medes:

The Kushites continue to press the Median cavalry wing:

The centres clash! The combats slightly favour the Medes but, unlike the Kushites, some of the Medes have already taken hits weakening their effectiveness:

In the palm grove the fight proves to be brutal with around equal losses on both sides. The Median cavalry have been forced back almost to the table edge:

In the centre the Kushite archers and chariots overcome the odds, holding off the Median cavalry and managing to destroy an already weakened Median spear element:

A closer view of the fight in the centre and palm grove:

On the left there are still a lot of Medes out of the action, a couple of Kushite swordsmen continue to slow them down:

Having taken a lot of shooting hits and lost several elements the Medes are close to breaking, their cavalry are forced to turn to face their pursuers:

A couple more elements destroyed in the centre and the Kushites are victorious!:

Pharaoh watches on as the Medes break and flee: 

So revenge is sweet for the Kushites and my ADLG winning streak extends further! I guess some of the lessons Gordon has taught me must finally have sunk in and I think I've improved at both choosing a more competitive army composition and deploying it with some sort of plan.

The Kushites also shot very effectively (perhaps helped by Gordon's fondness for medium cavalry archers and mediocre spearmen), much of Gordon's army didn't really get into the game and when they needed to the Kushites also fought well.

As the Byzantines, Carthaginians and Kushites have all had outings recently that leaves the Late Romans or Huns to see some more action or maybe a new army that I'm working on......

Saturday 20 November 2021

Blucher Franco Prussian War French v Prussian/Bavarian

Among the armies I've had for a long time but never really used much are some later 19th century forces done for 'Principles of War'. I have French, Prussians, Austrians and Italians and started converting the French and Prussians to use with 'Blucher' quite a while ago, even going as far as painting up some more French. However, the project gradually lost steam and was abandoned for a long time.

Finding some adaptations for the FPW for Blucher on the web inspired me to finish off the armies over the last week or so (just rebasing really, nothing too onerous) and give the rule changes a run out.

Basically the changes involve doubling the range of the French infantry to reflect the superiority of the Chassepot rifle, making the Prussian artillery more effective than the French and altering the cavalry v infantry combat to make the cavalry much less efficient. They also allow cavalry to fire but I didn't bother with that.

The other big change is to give the Prussians 2 D6 for momentum while the French only get a single D8 (or two D4). To give it a try I set up both armies on a relatively open table with the Prussians/Bavarians attacking the French:


The Bavarians move up their cavalry:

With a poor momentum score the Prussians stand and wait. This may not be a bad thing as they can use their superior artillery to soften up the French in front of them:

The French have moved some Turco's over to support their outnumbered cavalry while Bavarian infantry advance to extend the Bavarian line:

The Prussians begin to advance:

The first combat is a traditional cavalry v cavalry one with the Bavarian Cuirassiers taking on French Lancers. The Lancers repulse the Cuirassiers:

Prussian artillery continues to bombard the French:

The Bavarians close with the French infantry:

The French move forwards against the Prussians:

Having watched their Cuirassiers fail the Bavarian Chevaux Leger try their luck. Again the French Lancers triumph!:

One of the Bavarian artillery batteries has used up all it's ammunition. Fire from the French infantry is taking it's toll on the Bavarian infantry who have moved to close the range in the hope that this will make the firepower of both sides more equal:

Most of the artillery is out of ammo on the other flank, again long ranger French infantry fire is whittling down the Prussians:

The Bavarian line starts to crack:

French Cuirassiers advance while the main battle lines exchange fire:

The Bavarians are under heavy pressure:

Another Bavarian brigade breaks:

Prussian infantry are suffering from accurate French fire:

Battered French infantry brigades are replaced by fresh Zouave ones:

The Bavarians continue to fall back:

At this point I called it a day, most of the surviving Prussian and Bavarian brigades were heavily damaged and, while the French had some losses, they were in much better shape.

As regards how the rule adaptions worked there was certainly a difference between the two armies. The French infantry fire far more effectively than the Prussians making it hard for the Prussians to close to a range where they fire as effectively. On the other hand the much more efficient Prussian artillery did considerable damage to the French before the lines closed. 

However, in a more 'complicated' battle than the line the up one I chose to try the rules out the difference in MO dice would definitely have more of an effect, the French found it quite hard to move though that is mitigated by the fact that once their infantry get in range they don't need to move much!

The other issue with the game was that I didn't use any points values, just deployed everything I had. The French are much better quality than the Prussians and considerably better than the Bavarians especially.

All in all I enjoyed trying out the rules and getting the figures back on the table, the French especially are one of the nicer armies I've painted and it is a colourful period. I probably need to add some more artillery batteries (and some guns for the French crews who don't have any actual gins!) plus perhaps some more Prussian infantry, all of which could easily and cheaply be acquired from Lancashire games.

Tuesday 2 November 2021

Chain of Command "Many Rivers to Cross" PSC Game 2 "Farm and Forest"

Having driven the Germans back from the village in the first scenario the Soviets now face the challenge of continuing their counter-attack and pushing forwards again. This time Gary's Germans have a strong defensive position based on a large farm complex. The Soviets are still limited to man-portable support weapons while the Germans can't bring any support on until turn 2.

With an impressive 15 support points I went for a barrage, an engineer team, four entrenchments, an AT rifle (as I was sure Gary would pick a tank this time) and the two MMG which had worked well in the first encounter.

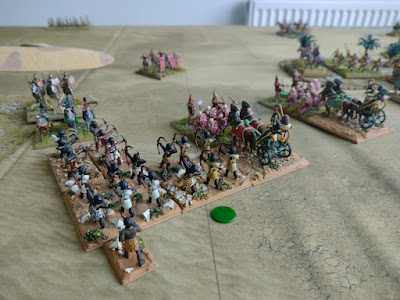
The patrol phase limited the Soviets deployment points greatly and the approach on the left was heavily defended by minefields and wire:


The initial appearance of the Soviets with an infantry squad deploying in the forest on the left:

The Germans, mindful of the effective 'Wrath of the Gods' Soviet barrage deploy quickly themselves with one section taking up residence in the farm building next to the orchard:

A second German section arrives in entrenchments to defend the side road:

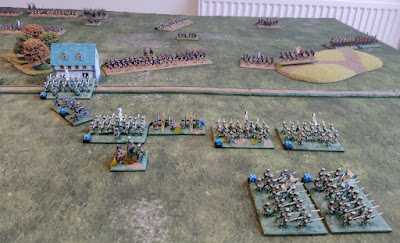
Thinking that attacking on the left was impractical the Soviets set up a firebase facing the farm. With a squad of sailors and two MMG, all entrenched, they have a lot of firepower:

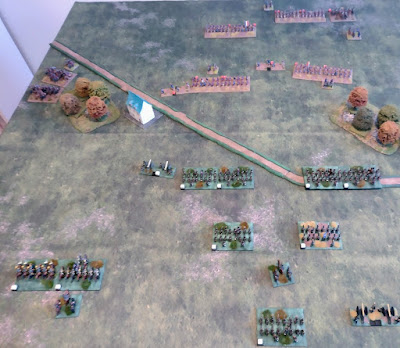
Continuing the build-up of forces another Soviet squad begins to advance through the woods on the right:

The Germans are not idle themselves though and another section arrives at the farm. Having ended the turn their support options are now available and a Panzer III rumbles forward. Having only a single AT rifle to take on the tank is not ideal for the Soviets:

The tank moves up to engage the Soviet firebase:

Ambush! The Soviet AT rifle team appear and loose off a shot at the Panzer III. It misses. They quickly retire to safety before the tank can respond:

Fire from the sailors and the two MMG has driven the Germans back from the windows of the farm building:

A double turn gives an opportunity to the Soviets. They rush forward the squad on the right to attempt to close with the farm complex without taking too many casualties:

So far so good:

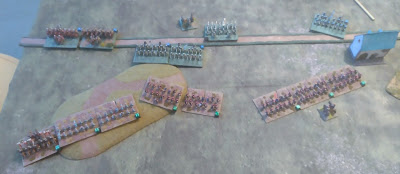
The dash forward continues and the squad manage to reach the fence line. There is a depleted German section in the orchard but they remain out of sight for now. The Panzer III can't get a shot at them either without moving:

The Panzer III is still a major threat though. The sailors and MMG crew are starting to take hits and one MMG has started to move into the forest to allow the AT rifle to take it's place in the entrenchment:

The Soviet squad at the farm moves along the fence out of sight of all the Germans. The small German squad in the orchard retreats behind the fence into the farm complex:

Fire from the Panzer III and the German sections in the farm buildings is rapidly taking it's toll on the Soviet firebase. Several men are down and the Leytenent is wounded and unconscious. The AT rifle, having already missed in a second ambush, deploys are tries again. It get's a critical hit but the only effect is a point of shock and a reduction in speed for the Panzer III. It isn't going anywhere though so that's not a problem:

Return fire from numerous German MG and the tank wipes out the AT rifle team and continues to cut down the sailors and MMG crew. Not many Germans are being hit in reply and the situation is looking desperate with no way to counter the tank now for the Soviets:

There is a small amount of success though as the German section in the blue farm building has taken a few losses and is now pinned:

The Soviets pour in more fire and the German section breaks!:

Having reached the orchard the squad on the right had been awaiting developments in a bit of a stand-off. They decide to move around the orchard to the rear of the farm:

They move to the rear of the farm and engage the German mortar team in close combat. With many more men and attacking from the rear the odds are very much in the Soviets favour:

The resulting fight is short and brutal. Two Russians are killed and the mortar team is wiped out. This is especially pleasing to the Soviets as one of the mortar team was "Boris", a turncoat Russian farm worker who was fighting with the Germans (apparently his father had owned the farm originally and been sent to the Gulag!). The traitor is felled:

The Germans are now in a desperate situation with one section broken, another in the other house badly damaged and the Soviets breaking into the farm complex. They decide to withdraw and the Soviets have achieved their mission:

A game which certainly could have gone either way, initially the Russians took the worst of the firefights but as the game went on the luck swung the other way a bit. The table was more interesting than it appeared on the map with limited sight lines and a number of choices for both sides.

I have to admit when the AT rifle team went down I thought it was all over, without that the Russians could do nothing to the Panzer III which was very effective in the game. However, partly due to the large number of support points I had which gave me substantial firepower against Gary's infantry and partly due to my taking a chance rushing a section to the farm complex which paid off, in the end the tank wasn't quite enough to swing the game.

The sheer size of the Soviet squads also played a part, the sailors in particular took huge losses (5 men) but were in action to the end only becoming pinned and never breaking. Gary's ten man sections just couldn't absorb the losses the same.

In total the Soviets lost 13 (8 from the core platoon and 5 from the supports) casualties while the Germans lost 10. At the end the Soviets had a force morale advantage of 1 so of the 8 men from the core platoon 3 will never return, 2 will miss the next game and 3 will be available from the next game.

The next scenario is 'Farm and Road' where the Germans have to blow up some culverts. The situation is looking good for the Soviets but there is still time for the Germans to turn it around!