Tuesday 30 April 2019

Rommel Late War Americans v Germans

Last night saw the third instalment of Andy and I's Rommel campaign. This time we moved on to Normandy with both the Americans and the Germans choosing from the Late War lists.

I went for a large army at 108 points while Andy had 89 points. With a 19 point difference Andy elected to defend in the very appropriate 'Breakthrough' scenario.

The game started badly for the Germans as they only got 10 terrain choices resulting in a very open battlefield. In this scenario the Allies place two Allied objectives which I played in open terrain on my left and the Germans two more Allied objectives which Andy placed in towns in his centre.

To win the game the Allies have to hold two out of four objectives at nightfall while retaining one they start with.

The Allies stacked up on the left against the objectives in the open while leaving some units to threaten the other two objectives if the Germans abandoned them:

Most of the action was going to be on the Allied left where the majority of the Armoured CC was deployed. The Infantry RCT was deployed to defend the substantial Allied artillery park and the flank of the Armoured CC:

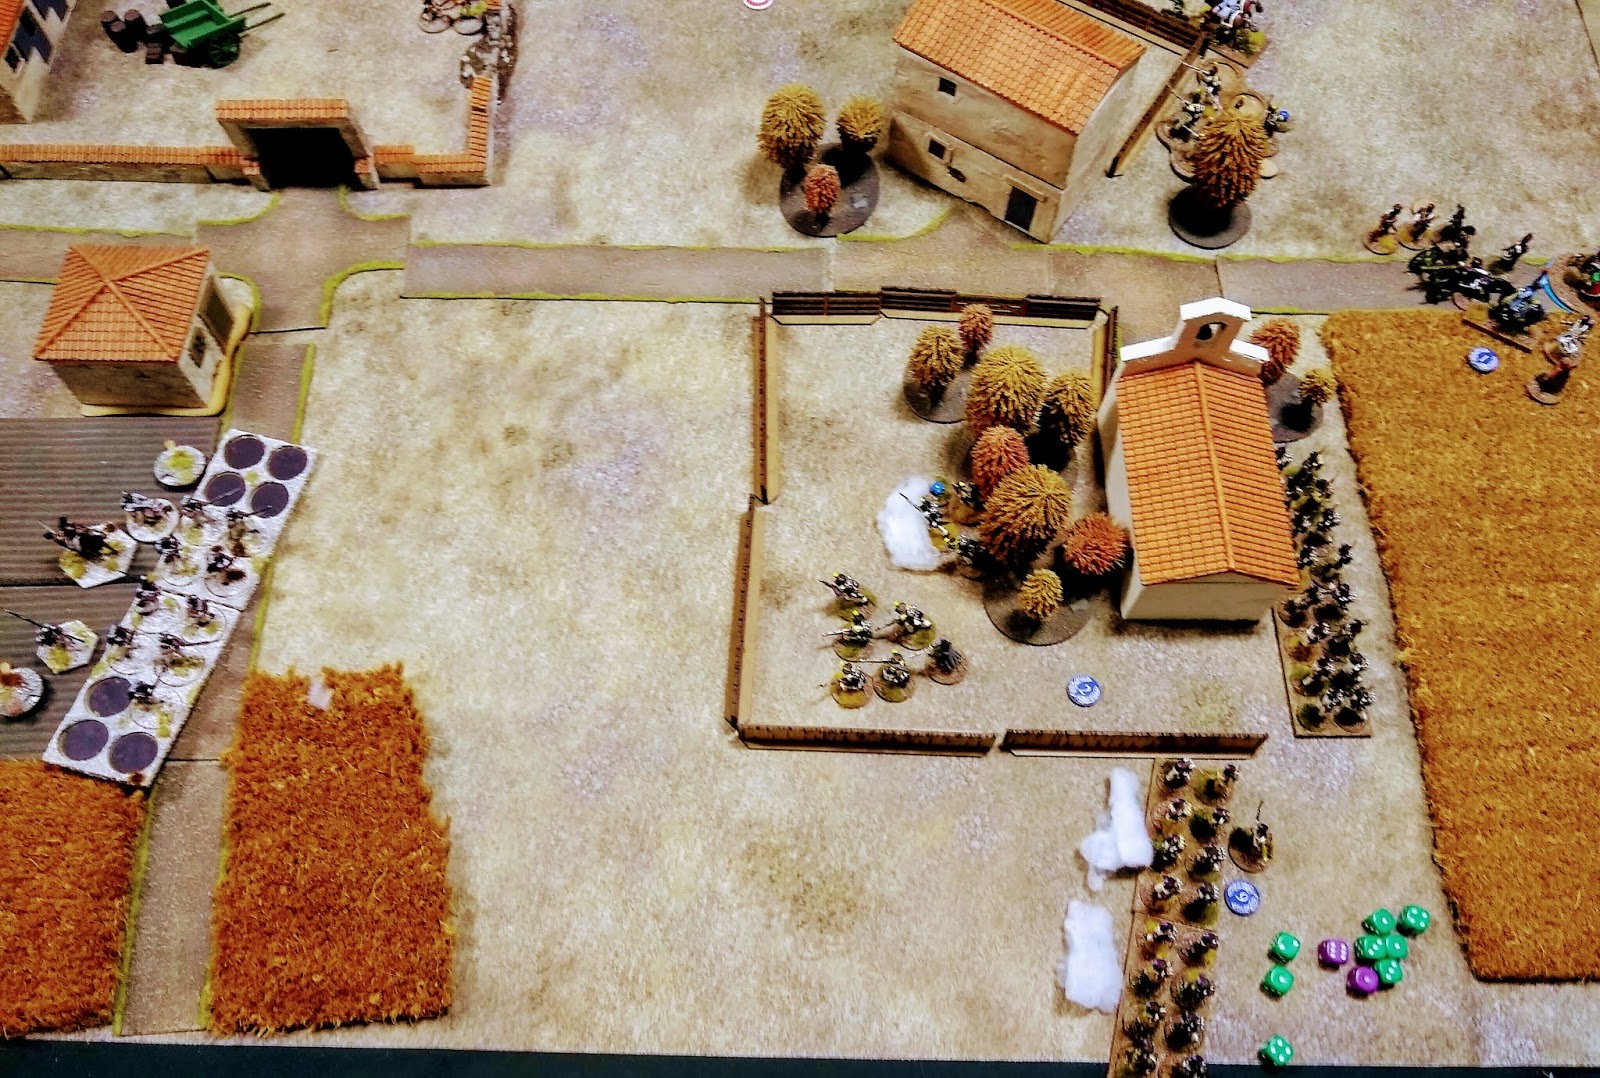
With the ability of the late war Germans to deploy numerous field fortifications the Allies push forward hard immediately to try to take at least one and ideally two objectives before the Germans can react:

The initial attack (using the massive artillery and air support I figured out in our last game) does some damage to the troops holding the nearest objective but fails against the second one:

A follow-up attack almost captures the nearest objective but a single German Paratrooper battalion grimly hangs on against all odds:

The Germans reveal their deployment and move some units across to counter the Allied outflanking movement on the left end of the line:

The Germans quickly deploy their prepared positions. They decide not to contest the objective the sole Paratrooper holds and fall back.

The Americans take their first objective and the adjacent wood that the Germans have also abandoned. They make a surprise attack on the other objective and do a lot of damage to the German defenders but fail to capture it. Finally in a very sneaky move they carpet bomb the German artillery which is condensed in a single square. Carpet bombing inflicts one hit per group in the square and, as artillery only have one hit, wipes them out. The Germans are shocked and demoralised by this!:

The Germans are forced to move the tough Panzer Grenadiers and PzIV which were facing off the flanking Americans to the objective to replace the battered Paratroopers and Stug that was defending it. While it makes the objective hard to take (again!) the flank is now very weakly held:

The Americans push the Paratroopers and the Stug on the left back exposing the objective to future flank attacks:

It looks like the second objective will fall! A single damaged PzIV holds it as the Americans attack again:

It's the Americans turn to be rattled though as the Germans use 'rapid reaction' to rush another tank into the fight and the attack fails narrowly!:

Night is about to fall and the American Armoured CC is pretty much spent with all the units having taken heavy losses. There is one last chance for the Americans though as the so-far unengaged Sherman's and the slightly damaged Hellcats from the Infantry RCT are able to make one last attack on the objective. The weakened Germans fall and the objective is taken giving victory to the Allies, the breakthrough in Normandy is on!:

Both of us really enjoyed this game, every game we play seems to get more thoughtful and actually feels like you are commanding an army.

My evolved tactics of using maximum heavy artillery support, surprise attacks and airstrikes to support one major attack each turn work well and are I think historical. The downside is that the attacks are very Op intensive and the turns pass quickly though sometimes I used a second tactical phase to try to mop up survivors from the first attack.

The carpet bombing was a great surprise to Andy (I thought after the way my artillery was so useful in the last game might encourage him to use more artillery himself) but won't work again as next time he will disperse them so they can't all be flattened at once. Dispersal leaves them more vulnerable to attack though, as ever in Rommel there are pluses and minuses to everything you do (if I had instead carpet bombed the first objective before I attacked it I'd have taken it easily).

Andy's use of fast reaction equally shocked me, I hadn't thought of that and it looked like it snatched victory from me. Another thing I have learned though is that you need to use all your forces so as the day was coming to a close I moved the unengaged Infantry RCT which had been doing the dual task of protecting the flank and threatening the other objectives to a place where it could make a final assault on the objective I'd concentrated on with it's tanks rather than having to use the remnants of the Armoured CC which was totally battered by now.

Our next game will probably be replaying the 'Juno' D-Day scenario on June 6th. Such is my enthusiasm for Rommel now that I bought a 6ft long stretch of coastline to add to the mat we use for Rommel and have ordered all the extra British tanks needed for the scenario (some Comets basically) and some Sherman DD's plus a Sherman Flail tank. If I get time I might even build a few defences for the Germans as I doubt they will be hard to make.

Roll Call Sharp Practice Game 5 French v British

The last game of the competition saw the French matched against Jenny's British army. The scenario this time was to capture a British spy who was in a walled compound nearer to the British deployment point than the French. The French were limited to deploying a single officer per turn and, initially, I assumed this would be the same for the British.

However, it quickly became apparent that this wasn't the case and the British had no deployment restrictions! As a result they had got to the spy, got considerable forces around the compound and were ready to escort him off the table before the French even arrived.

At this point the scoring system meant that there was no point in either of us continuing so we did the score at that point and played on for a while:

The British advance Line Infantry on either side of the compound which is held by Light Infantry. The spy is already uncatchable moving back to the British deployment point with some more Light Infantry:

British Line on the French left are engaged by Voltigeurs while another group of Voltigeurs on the right exchanges shots with the British Light Infantry in the compound:

The French Horse Artillery (out of shot in the centre) opens up on the British Line and they take more losses:

They attempt to advance but are now under heavy fire:

The French Fusiliers form an impressive line but don't have anything to shoot at!

The British Line on the French left have taken a pasting and start to fall back:

Half the Fusiliers advance to open fire and put even more pressure on the British:

The British Line flees. On the French right desultory skirmishing has resulted in a few losses for both sides:

At this point we called it a day.

So, after my second SP competition what do I think? I enjoyed playing both competitions, the people I played were all great to play and there was none of the exploiting loopholes (or even barn doors) in the rules that I thought might happen.

However, I'm not sure I'll play again for a number of reasons:

a) The scenarios are very unbalanced on average and really need looking at again by someone who has played them several times. Games 2 and 4 were reasonably balanced perhaps, I think Game 1 is hard for the allies and game 5 was just impossible for the French. The moveable deployment point for the Spanish gives them a huge advantage in most of the scenarios and made game 3 very hard for the French.

b) The balance between the French and Allied army lists is also poor. The French have very limited choices and their Line Infantry are rated poorly with no possibility to choose veteran units (there must have been some!) or add interesting allies. The Allied player can choose between British (with a number of different choices for the infantry), Portuguese with good cheap skirmishers or Spanish with the moveable deployment point and the cheap but very effective Militia (and even Line troops that are better than the standard French Line).

c) The scoring system. You only score points for achieving the mission (maximum 4 points), how many morale points you have left at the end (maximum 5 if you had no losses) and your officer traits (complicated to work out and somewhat variable). As you don't score anything for damage inflicted on the enemy once you have achieved your objective or think you can't achieve it there is no point going on as all you will do is lower your own score through losses largely. To encourage people to fight on you should definitely score points for enemy losses.

d) The officer traits could also do with balancing as many of them are orientated towards the Allies (such as always firing controlled volleys which the French can't do).

At Britcon I think 5 of the top 6 players used Allied armies and I'd be surprised if it was not the same at Roll Call (I left before the results were announced). The Allied entries also go much quicker than French ones.

It's obvious that unlike most other periods in competitions (and I'm used to playing 'competitive' periods) that the people who play SP don't take it seriously (which is good) but it's a shame that it seems to favour the Allied side so much.

It would also be nice to be able to use other armies such as Austrians, Prussians and Russians but I suspect that the organisers and maybe the players don't want to play unhistorical match-ups or play on 'generic' terrain which is fair enough really.

I might enter again as I don't want to play ADLG competitions, FoGR outside the one day Oxford competitions has very few entries and Blucher competitions seem to have died off (plus they didn't use Scharnhorst which is the most fun part).

Roll Call Sharp Practice Game 4 French v Portuguese

Game four's mission was to burn down some buildings in a Spanish village opposed by James' Portuguese. This was another scenario I'd played at Britcon.

The French Horse Artillery deployed covering the Portuguese deployment point while the Fusiliers started to move towards the nearest two buildings:

The Portuguese infantry start to deploy but have to arrive in column and are immediately targeted by the French artillery:

The Portuguese take losses and shock from the artillery. They send some Cacadores forward to try to shoot the gun crew:

Meanwhile the French send their Dragoons to the left towards the furthest building on the left. One group of Fusiliers is approaching the other building on the left while some Voltigeurs have started setting fire to the nearest building on the right:

The right hand Fusiliers form line and exchange fire with the Cacadores. Voltigeurs begin to move to outflank the Portuguese on the right:

Fire from the Cacadores has killed one of the gun crew and also cut down the French drummer boy. The French are enraged!:

The Fusiliers on the left have reached the second building and start setting fire to it. The large building on the right is in flames and the artillery continues to pound the Portuguese:

The Dragoons have dismounted and head towards their target building but get blasted by Portuguese artillery. Three are killed but the survivors press on:

On group of Cacadores attempts to charge some Fusiliers but comes up just short:

The second building is now in flames but the Cacadores gather their wits and charge home on the other Fusiliers:

The Fusiliers fall back from the Cacadores but inflict enough losses on them to break them and they run off into the distance:

Meanwhile on the right the Portuguese have determinedly pushed forward their Line Infantry and begin exchanging fire with the French. They will need to defeat the French before the Voltigeurs (behind the large building on fire) can get into action behind them:

The Voltigeurs pause to drive off a group of Cacadores that had been sniping from behind the hedge. Portuguese fire is taking effect on the French Fusiliers and the other Voltigeurs:

Portuguese morale is now close to breaking:

The Portuguese Line charge forward dispersing the Voltigeurs but fire from the Fusiliers and the flanking Voltigeurs breaks them and the Portuguese retire:

This the most enjoyable game of the weekend. The scenario was much better balanced and James did well to recover from the initial damage done by the artillery to his compressed line troops. His aggression with his lights and the Line he did get into action paid off and caused some worrying moments for the French. There was also more movement than I find usually in SP which often just degenerates into a firefight.

Sunday 28 April 2019

Roll Call Sharp Practice Game 3 French v Spanish

Game 3 was against Jez's Spanish. Jez played at the Redcar and Middlesbrough clubs where I played in my much younger days and we figured it must be 30 years or so since we last played a game!

The mission in this game was to cross a wide river which had two fords and get as many men as possible across.

The Spanish can have a moveable deployment point (no one else can) which Jez used to good account to get three units of skirmishers deployed across the river before the French had even got started:

The other big problem for the French was the Spanish 40 strong Militia unit which created a wall of fire that would flatten anything that got in the way:

There was little hope of the French successfully advancing anywhere and the chances of getting across the river seemed remote:

The French tried advancing on the right but didn't get very far:

The Spanish Militia start to cross the river and the French retire from the field:

Again this game was largely decided before it started, Jez's army composition was very good, the moveable deployment point and a scout allowed him to deploy so far forward that the French were pinned before they got going at all. The ridiculously cheap Spanish Militia also allowed him to cut off a vast swath of the table where if the French advance into range they will have 40 odd dice firing at them admittedly only hitting on 6's but still devastating.

Roll Call Sharp Practice Game 2 French v British

The second mission of the competition found the French attempting to rescue a captured French officer held in a church by a single group of Alex's British. The British had to dice to see if they could bring units on when activated and started at the other end of the table to the church while the French start close to the church and quickly start bombarding it with their Horse Artillery:

The British in the church are being whittled down and the Voltigeurs move forward to add their fire in. The French are hoping that the captured French officer won't get killed in the crossfire:

The British had failed to bring anyone on to the table while the third group of Voltigeurs was closing in on the British deployment point. Just in time the British got some Hussars to arrive and threaten the Voltigeurs:

The Voltigeurs retire from the Hussars while Gerard bring up the French Fusiliers in support:

The British in the church are wiped out and the prisoner rescued. The second group of British Hussars menaces the Voltigeurs:

One group of Hussars charges the Voltigeurs and catches them running away. Gerard lines the hedge with the Fusiliers to try to hold the British back:

Amazingly the Voligeurs defeat the Hussars and send them packing:

The second group of Hussars has charged the French Horse Artillery but again perform feebly being repulsed and then shot down by Gerard's Fusiliers:

This time it is the opposition who decide to withdraw, with the prisoner rescued and their cavalry dispersed the situation was not going to improve for them.

I played this scenario at Britcon as well and have to say it is rather unbalanced against the Allies. Attacking the men in the church is pretty much bound to fail while shooting them all is comparatively easy (though at the risk of accidentally killing the prisoner) and with the deployment restrictions on the British they are very unlikely to get any support up in time.