Sunday 30 April 2023

Chain of Command Case Yellow Campaign Game 2 'Blitzkrieg' German v British

The second game in the Case Yellow campaign saw my Germans taking on Rory's BEF in a 'Blitzkrieg' scenario. To win the Germans have to exit two teams off the opposite table edge, reduce the BEF force morale to 0 or make them withdraw voluntarily. The British can win by playing two CoC dice to call up support before the Germans can achieve their victory conditions

The support roll gave me a mighty 18 support points and Rory an insignificantly less 15SP! Assuming that Rory was bound to take AA guns I didn't bother with the Stuka and went for the Adjutant (1), Jean Claude (1), 5th Columnist (1), Entrenchment (1), Pioneer Team (1), Pre-game Barrage (2), Red Dice (2), le.18.7mm gun (4) and StuG III (5).

Force morale started at an unhelpful 8 for the Germans and a as good as it gets 11 for the BEF (feeling confident after Rory had won his last two games!).

The Germans are attacking from the right, the British defending the left:


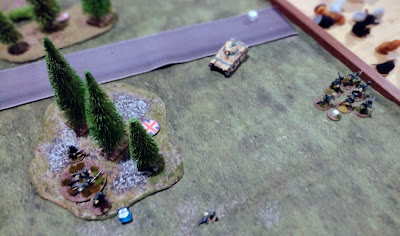
British JOP's with the German ones in the distance. A minefield was discovered at the crossroad:

The British deploy their mortar crew in the woods. Jean-Claude lurks in a hedge behind the British lines and takes a shot causing two shock on the mortar team:

Unfortunately a nearby Morris C9 AC spots him and promptly shoots him dead!

The first German troops deploy, the Red section behind a stone wall. They are accompanied by the StuG (just out of shot):

The British attempt to deploy an AT gun to take on the StuG. However, Captain Mainwaring (the 5th Columnist in disguise!) persuades the crew that now is certainly not the time to arrive and the gun does not appear:

The British have deployed a MMG and a section to engage in a firefight with the Red section. Despite the odds the Germans are inflicting more damage:

Yellow section deploys in the wood to add their fire commanded by Feldwebel Beckenbauer:

The StuG and the British AC have been exchanging fire. The StuG survives a critical hit from the AC then fires back and forces the AC to flee:

British resistance starts to crumble! The survivors of the MMG crew run for it:

The StuG moves up to add its HE shells:

The British mortar crew put up some smoke (the round counters) but it fails to block the German's view:


The StuG continues to fire:

The British section turns and routs:

The British deploy a 2pdr AT gun:

The StuG retreats to safety while the German infantry pour fire into the AT gun:

The fire is too much for the gun crew who take hits and shock:

Just as it appears everything is over for the British and the Germans will break through the British roll 4 sixes from their five command dice. This ends the turn (which is bad for the British!), signifies the fall of rain and, crucially, gives them a free CoC dice. As they already have one they can immediately end the game with the arrival of their support forces! Victory goes to the British.

For a while it looked like an inevitable German win but Rory's refusal to retreat saved the day. He only needed three more fives from his command dice anyway so it was certainly closer than it looked on the casualties (the Germans only lost two men in the game). Both sides found it hard to bring men on through pre-game barrages which probably affected the British slightly more especially once I deployed 'Captain Mainwaring' as the 5th Columnist! 

Oddly enough the men's opinion went up after this defeat having gone down following the first game's victory! The platoon is still  in excellent shape to continue the campaign next time....

Tuesday 25 April 2023

Nimitz Royal Navy v Kriegsmarine 'Murmansk' campaign Part 1

The recent release of 'Nimitz' by Sam Mustafa, a WW2 big scale naval set of rules, generated a fair bit of interest at my club with a few people wanting to try it. It isn't something I'd usually be keen on but Sam's rules are always innovative and, even when I wasn't that keen on them ('Longstreet' and 'Maurice' for example) they take a different approach to many other sets.

Another factor was that while Andy and I both love playing 'Rommel' we had pretty much exhausted them between us and the games were becoming less interesting so as Andy was keen to play as well I thought I'd give it a go!

I had a quick run through of the battle rules with Dave a few weeks ago which went well, very easy to pick up and very much in the Mustafa way in that it concentrated on the bigger picture rather than the minute details .

Andy and I then jumped literally in at the deep end with a Halsey campaign, I had 200 points of British while Andy had 200 points of Germans. My task was to escort a convoy past Norway on it's way to Murmansk.

My force is split into 9 'Task Forces' six of which are dummies and three of which contain ships (green tokens). Andy's force had five TF I think. The board also shows the position of storms which help/hinder both sides!. The day is split into three periods (AM, PM and Night) with the convoy only moving at night (I assume to represent their slow progress not that they anchor during the day!):


The Germans sortie out from Altafjord:

A German flying boat attempts to spot one of the RN TF's:

It fails so another German scouting plane is sent out:

The Germans close in! TF's 4, 5 and 7 have been revealed by the Germans to be dummies:

Action stations! A German destroyer investigates TF 6 and finds a whole fleet of RN ships (HMS Rodney, Howe, York, Belfast, Spartan, Jervis, Khartoum, Kelly and Jackal):

Given the odds we don't play this on table and use 'Mikawa' to resolve the fight:


The action is short and the German destroyer is sunk but not before it reports back on what it has found:

Having found the main RN fleet the Germans make numerous air attacks on them:

Some aircraft are shot down, some driven off but a few get through and successfully make bombing runs:

Th fleet desperately fights off the Germans:

HMS Spartan takes a bomb hit doing considerable damage:

HMS Belfast is also hit:

Storms move and are dissipated, TF plough on and the convoy starts to make it's way across the danger zone:

TF 6 (the RN main fleet) moves to engage the Germans:

The Germans launch more air strikes:

HMS Spartan is sunk!

The opposing forces are converging and battle is imminent:

The Germans discover TF9 which consists of HMS Implacable, Norfolk, Offa and Orwell. They decide to engage at night as that way the Implacable won't be able to launch any aircraft:

At this point we were on to the night phase of Day 3 so we decided to fight the battle on the table then break to continue later:

The opposing forces - the Germans have the Hipper and three destroyers:

Just a note that the Belfast was further damaged in one of the air attacks:

The opposing forces deploy, the RN wish to save the Illustrious and Orwell which deploy ready to disengage. The Norfolk  and Offa prepare to hold up the Germans:

German shooting is poor and the Norfolk and Offa race in to engage the Hipper and a Destroyer. The RN demonstrate excellent gunnery sinking the German Destroyer:

The Implacable and Orwell have successfully disengaged and the other two German destroyers are literally left in the dark. More in hope than expectation the Norfolk and the Offa launch torpedoes at the Hipper. The Devonshire misses but the Offa's torpedoes strike home devastatingly sending the mighty Hipper to the bottom of the sea!

So with Day Three now at an end the overall position is below:

The RN is half way to exiting the convoy to Murmansk and has lost HMS Spartan with HMS Belfast badly damaged. TF 6 and 9 have been identified by the Germans while TF 2, 3 and 8 remain unidentified.

The Germans have lost the Hipper, two Destroyers and a few aircraft. TF D has been identified and now only consists of two Destroyers while the other two German TF are yet to be identified. 

A really enjoyable game in which we made a few mistakes with the rules and, certainly in my case, perhaps didn't do some things I should have! The whole thing is very thoughtful and I suspect, like Rommel, while apparently simple it is also subtle. It is certainly more thought provoking than the similar 'Scharnhorst' campaign system for 'Blucher' and, in a similar way, sets up more interesting games than the usual just try and kill the opposition ones.

Hopefully we will be able to continue the campaign soon, will the convoy battle through or will the wolves manage to get among the sheep and sink them?!

I must have been inspired as I've now ordered all the ships I chose for this campaign (all the models above were Andy's very pretty ones). A bit like CWC the forces needed are relatively cheap and easy to paint up which is a good thing.

Friday 21 April 2023

Chain of Command Case Yellow Campaign Game 1 'Probe' German v British

Having discovered that, surprisingly, there is another club which meets in a café near where I live and play CoC campaigns I thought I'd join in one.

The campaign is a little different to our usual Pint Sized Campaigns in that there are several participants on each side and you can play as many games in each campaign phase as you wish given the time limit. This also means you (probably) won't play the same person every game. It's an interesting concept and should work well with a lot of enthusiastic participants.

The campaign is based on the German invasion of France in 1940. As they were short of German players I joined the German side using a 1st Wave Platoon which is strong in numbers but gives 4 extra support points to the opposition every game.

My first game was against Alex who used the British Regulation 1940 Platoon. With only 3 support points I chose an Adjutant, Jean Claude the sniper and a 5th Columnist. Alex had a small French tank (an R35 I think), a couple of minefields and some wire.

The scenario was 'Probe' where the attacking Germans have to get a team off the opposing table edge. The French countryside is initially peaceful:


The patrol phase sees both forces advancing towards the farm. The minefields and wire block (to some extent) the Germans on the right:

The Germans are pleased to get jump off points fairly far forward:

Two German sections deploy, both on overwatch:

The British respond with an allied French R35 tank. With only 3 support the Germans couldn't choose anything to damage a tank so it is almost invulnerable:

The German section by the barn moves along the edge of the minefields and wire:

While one German squad makes it's way around the minefield to the stone wall a third squad and the mortar team deploy to replace them in front of the barn:

The R35 fires HE at them and the first casualty of the attack takes a hit:

The Germans push on reaching the fields beyond the minefield with Feldwebel Beckenbauer urging them on:

Further HE fire from the Renault puts another German Landser down:

Rather surprisingly no British forces have deployed yet. Where are they?! The German section on the right continues forward into the fields:

The British appear to have left it too late to deploy, the Germans close down the only British jump off point on the right of the table. They do have the Renault to fire at any emerging Germans but will it be enough?

To keep up the pressure on the (still non-existent) British the 4th German section deploys on the left:

Led by Obergefrieter Mueller the rifle team make a dash for the table edge! The Renault fires it's MG but only manages to put one German down and wound Obergefrieter Mueller:

With a double turn and a CoC dice to use the German rifle squad makes it off the table to complete the mission:

Total losses for the Germans were three men, one of whom was killed with the remaining two missing the next game. As no British troops deployed at all and the Germans had nothing to hurt the tank not a single shot was fired by the Germans!

One of the more unusual games of CoC I've had, Alex felt he didn't have a suitable opportunity to deploy his British and relied on the Renault to stop the German advance. However, early war tanks are not that powerful at all (for example with few crew the Renault can't fire it's machine gun and main gun at the same time) so the Germans could just ignore it and accept the losses from it's occasional fire while crossing the table, admittedly with some nice movement rolls which helped.

My next game will be a Blitzkreig scenario against Rory's British in which I'll have a mighty 18 support points with Rory getting 15 so we should see plenty of kit on the table!