Wednesday 27 February 2019

10mm WW2 American Reinforcements

Having enjoyed my recent game against Andy I thought I'd add some reinforcements to the 10mm WW2 American army. Looking at the Mid-War list I could add some M10 tank destroyers which can also be used in the Late War list. Of course I couldn't just order three tanks from Pendraken, for some reason six seemed reasonable so I added a further three different tanks to the order to give more variety to the Late War list.

After a few days a very heavy package arrived. Bit odd as I'd only ordered six tanks.

As expected I got three M10's (which were a fair bit larger than the M18's I already had, not knowing much about tanks that may well be right):

It's amazing how quickly these can be painted and they look fine I think.

What accounted for the weight of the package though? Well almost without thinking the extra tanks I ordered were M26 Pershing's which were apparently used in the last few months of the war.

These were HUGE slabs of metal way bigger than any other 10mm tank I've seen. Again I have no idea if the M26 was so much bigger than the Sherman for example, these ones certainly are:

So a few new toys for my next few games with Andy and a bit more variety for the Americans.


Tuesday 26 February 2019

ADLG Late Roman v Romano-British

Another outing for the 28mm Late Romans and a first game for the newly painted additions. The opponent this time was Gordon's previously Sub-Roman- but now Romano- British army. Gordon kindly agreed to play at 230pts so I could accommodate my new figures (also apparently this is the right points total for a 6x4 table).

Assuming that Gordon (who won the initiative) would have a lot of terrain troops I chose minimum terrain. I was surprised therefore when Gordon also went for minimal terrain. We ended up with a fairly open table with just a hill and field on the Roman right and a plantation on the British left.

Anticipating that Gordon would deploy his cavalry on the right mainly as it was an open flank I deployed my cavalry and archers command on my left, the mixed command of cavalry and infantry in the centre and an infantry only command on my right where I assumed Gordon would have few mounted:

Again my assumptions were unwise as Gordon placed a large block of spearmen and light troops on his right and centre:

Gordon had in fact deployed his cavalry wing on the left and immediately dashed forward helped by a good command role. Lead by King Arthur the cavalry was a quality force and after a couple of moves things were already looking dodgy for the Romans:

King Arthur urges his men forward:

On the left the Roman cavalry and archers have started to move over to the right to counter Arthur's cavalry attack. While the Roman's still have a solid line on their left the light cavalry will not hold up at all against the British foot and will quickly be driven off leaving the flank of the Legions very exposed:

The British assault the Roman-held hill. This should be a fairly even fight as the Roman Auxilia are uphill, in the open the British would definitely have the advantage:

The combat on the hill goes badly for the Romans with the Auxiliary being destroyed. The Roman Javelin men have gained a little revenge though attacking a British cavalry unit in the field in the rear:

The right of the Roman infantry line attacks the British spearmen. The attack goes well with the Romans inflicting a lot of damage to the British line:

On the Roman left all the light cavalry apart from a single Hun left as a sacrifice to delay the British has retired to safety. The Remaining Legions have been charged by the British Spearmen and will soon have enemy arriving on the flank as the Romans have nothing to stop them:

On the right a single British cavalryman contests the hill with the remainder having been killed or driven off. The right flank has been stabilised but at what cost?
The Romans have also been suffering from indecisiveness regarding where to commit their cataphracts resulting in the armies most powerful troops aimlessly marching toward one area after another and achieving nothing:

The initial Roman attack with the Legions and Auxila had gone well but rapidly declined to disaster as the British fought back hard. All the troops committed have taken hits though one British unit has been destroyed:

The only positive area for the Romans is the right flank where more Legions are moving up to support the already committed Roman foot and there appears to be a bit of a gap in the British line:

Even this positive does not last long though as some Irish foot emerge from ambush in the plantation and menace the advancing Legions:

The Legions and Auxilia are being cut down and gaps are appearing everywhere in the Roman lines. Belatedly the cataphracts finally advance but are too far back really. The British have taken some losses but have a large army and are easily able to absorb them:

On the hill the single British cavalryman is still holding out preventing the Romans sending troops to support the outnumbered Roman infantry. The appearance of the Irish has proved decisive with the British having numerous opportunities for flank attacks:

Finally the British cavalry on the hill are cut down but it is too little too late:

The Roman lines are shattered and the army disintegrates in rout with victory going to the British:

For the second game in a row my opponent completely out-thought me. Both with his terrain choice and his deployment Gordon started off in a much better position which I compounded by my reaction to his moves. Normally I avoid the order-counter order-disorder situation but in this case I fell right into that by moving my cavalry from the left flank to the right and dithering with the cataphracts.

Gordon's aggressive use of his cavalry really paid off for him and the ambush was perfectly timed. In hindsight I think I'd have been better off attacking on the left and centre and perhaps just committed the cataphracts to hold off Gordon's cavalry. 

Another very enjoyable game all in all and some lessons for me to learn from it in future!


Saturday 23 February 2019

Muckleburgh Military Collection

I've been past the Muckleburgh Military Collection in Norfolk many times but never actually visited it. With my recent interest in Chain of Command and Rommel and being in Norfolk for a few days I thought I'd pay it a visit.

There was an interesting display about the history of the site as a military camp and especially as an AA training facility in WW2 illustrated by a great model of the site:

An amphibious jeep, like a tiny DUKW:

A Centurion tank:

The Chieftain:

M8 Greyhound armoured car:

The mighty German 88mm gun:

A Bren Carrier complete with Boys Anti Tank Rifle:

The M5 Stuart tank:

The M4 Sherman:

A T34/85 tank:

The M7 Priest:

A Comet:

So all in all an interesting small museum with most of the tanks I have recently painted up for the 10mm Americans. I don't know how accurate the paint schemes were but the green was certainly much darker and glossier than the way I painted mine. The vehicles were quite cramped in their displays and a little more space around them would have been nice.

The museum also had a vast display of model vehicles, planes and ships my favourite of which was this WW1 pigeon loft:

Apparently 95% of messages sent by carrier pigeon in WW1 got through and there were severe penalties for anyone shooting pigeons for the duration of the war.

Finally when we stopped at nearby Wells Next Sea for lunch I noticed this fishing boat named 'Blucher'. I wonder what the story behind the name is?

Tuesday 19 February 2019

The Avengers!

My favourite TV series when I was a kid was 'The Avengers' starring Patrick Macnee as John Steed and Diana Rigg as Emma Peel.

Every week they would defeat implausible plots to take over Britain in various nefarious ways. Steed was normally armed only with his trusty umbrella, his bowler hat and an impeccable dress sense. Mrs Peel was unusual for the time in that she wasn't just a pretty sidekick to be rescued but actually was probably smarter than Steed and an equal partner.

A while ago while flicking through the Artizan Designs website (as you do) I saw a figure pack which, while not named as such (presumably for copyright issues) bore a great resemblance to the duo together with 'Mother'. Inevitably I then had to place an order for the pack of course.

I finally got around to painting the two main figures:

Though not a character in the series Steed's Bentley often appeared. There is a Matchbox 'Models of Yesterday' version which is about the right size for the figures one of the later versions of which I picked up from eBay for a very small sum.

I painted some of it (the soft top, seats, dashboard, leather bonnet straps and the rather glowing chrome work) and can't quite decide if I want to matt varnish it or not. It seems to fit well with the figures:

I'm not quite sure what if anything I'll use them for. Steed and the Bentley would be appropriate for the CoC Operation Sealion collection but Mrs Peel would probably look a bit out of place!

Monday 18 February 2019

Rommel Mid War Americans v Germans

Andy and I played another Rommel game tonight. This time Andy had suggested we play a campaign which would consist of a linked series of four games (two mid-war and two late-war) with some constraints on the quality of the troops we could select. The first game was set in Tunisia.

As this was the first game my Americans were limited to 'green' infantry (apart from the armoured infantry) and the entire tank force was 'green' as well. We both chose a 110pt army then bid points for the game to decide on the scenario.

Since the Americans were so awful I bid only 90pts as I really wanted to defend while Andy went for the full 110pts. A 20pt difference allowed me to select the 'Scramble' scenario and defend.

Andy had to capture two objectives and the American line of supply that ran through some mountains before nightfall. With a decent terrain roll I put some hills and three towns down together with a river. I chose two of the towns as Andy's objectives. One of the interesting things with this scenario is that the defender can't deploy in the first four rows (which includes the supply source) so the attacker may be able to outflank the defender before they get to react.

The American deployment looked a bit thin especially with the huge space behind the lines. The furthest forward town and the town on the right are the objectives, Two infantry battalions on the left flank should stop the Germans using road movement to outflank the American line:

The Germans deploy across the battlefield with their stronger units on the right:

Immediately the American plan collapsed. Andy used 'intercepted signals' to move the American infantry on the far left allowing him to use road movement and a couple of tactical phases to totally outflank the American line. They almost capture the American supply line but can't quite get there. In response the Americans rush forces back to defend the supply line. It's certainly a scramble for the Yanks!:

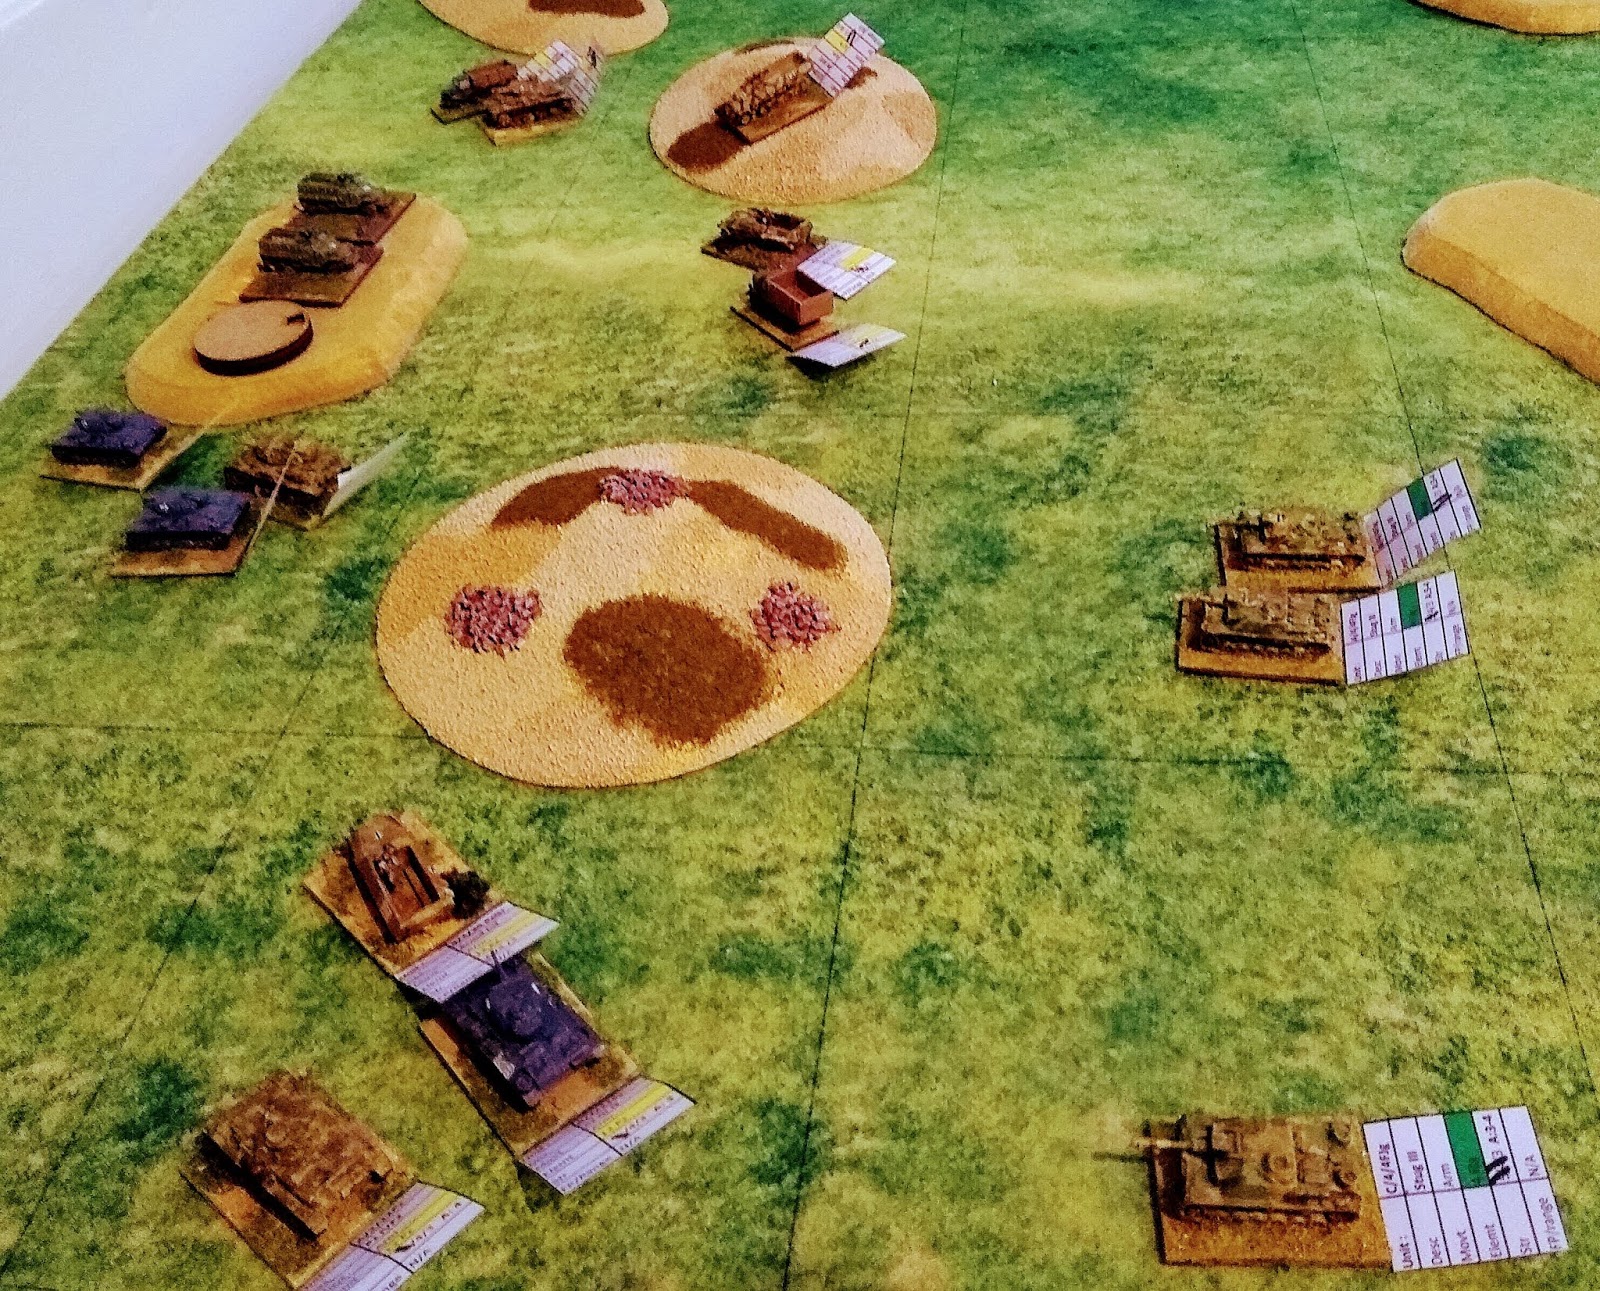
The German attack continues with heavy pressure on the American armour around the supply line and the armoured infantry holding the wood on the left:

The Americans dig in around the objectives and on the hill occupied by the artillery. So far no attacks have been made on the towns:

The Germans continue to attack the American armour around the supply line inflicting heavy losses on them:

On the left the armoured infantry have been forced to vacate the woods and are almost spent:

The first attack goes in against the American held town in the centre. It is easily beaten off though:

Further attacks on the town are more successful and the Americans are almost driven out. They have no reserves to move into the town:

The infantry battalion defending the hill and one of the artillery batteries has been destroyed by German attacks. One battery manages to hold on:

Around the supply line the German's flood forwards. Most of the American armour has been wiped out  with  just a few armoured infantry holding the supply line still. All the American forces remaining apart from those around the supply line are now isolated:

The central town falls to the Germans at last. They have their first objective and look likely to capture the supply line:

The only bright side for the Americans is that the second objective town has not been attacked yet and is strongly held. The Yanks are desperate for night to fall:

The first German attack goes in against the final objective but is easily beaten off:

There are only a couple of armoured infantry left holding the supply line. The Americans have taken horrific losses but have managed to hold out until nightfall:

American losses were two battalions of Sherman's, three of Stuarts, four of armoured infantry, six of green infantry and all their artillery! The Germans lost a mere two infantry battalions.

Andy really threw me with his use of intercepted signals ruining my plan and denting my already fragile confidence in the American's ability to hold out. The scenario certainly lived up to it's Scramble title as I desperately tried to shore up my positions and took huge losses.

Andy played very well being aggressive, concentrating on the objectives and keeping the pressure on me right to the end. I suspect that it was the location of the second objective that saved me, protected by the river it was not easy to attack and I did keep most of the Sherman's in support of it right to the end (partly as, being isolated, I had no ops spare to use them!).

So it is 2-0 to the Americans after the first game and we move on to Italy for the next one. I can upgrade some of my units following the hard-won experience from Tunisia and Andy's force won't be so highly rated. Looking forward to the next game!