My first Blucher game for a while, this time using my Austrians against Gordon's Italian army. The Scharnhorst campaign saw the Austrians achieve a slight advantage in VP (one point!) though there were two more VP available on table in towns so the Italians could win by capturing one of those by nightfall or breaking the Austrian army while the Austrians needed to hold the two towns or break the Italian army.
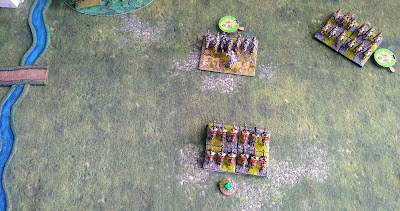
The Austrians had almost their whole army on table while the French had one column off board which would (hopefully for them) appear as the battle progressed. Initial deployment for the Austrians was the Advance Guard in the centre, the 1st Corps on the right and the 2nd Corps on the left. Each of the objective towns was garrisoned by a Grenadier brigade. The Italians appeared to have a weak right and centre with a strong left flank force. The Italian reinforcements would appear on their left flank:

Normally when defending I don't attack much but, looking at both sides deployment it appeared the best thing to do would be to withdraw my right flank units behind the stream, perhaps leaving a cavalry brigade to slow the Italians down. This would leave my centre quite congested (or well defended depending on how you look at it!) and the 2nd Corps on the left unlikely to get into action as they appeared to be facing a small holding force. So to put some early pressure on the Italians the 2nd Corps advances on them:
The 1st Corps has successfully redeployed behind the stream leaving a Dragoon brigade to hold the Italians up. The Italians have pushed a strong force forward in the centre with the Italian Guard and some veteran brigades leading the way:
The Advance Guard react to the threat:
On the Austrian left the 2nd Corps continues it's advance:
The lone Dragoon brigade on the right is facing four Italian brigades but so far they have not committed to move:
Two of the Italian brigades are revealed to be Dragoons, one charges the Austrians while the other advances. The Austrian Dragoons are driven back but with minimal losses:
The Dragoons fall back further allowing the artillery from their Corps to open up on the second Italian Dragoon brigade:
Again the Italian Dragoons attempt to drive off their Austrian equivalents and once again the Austrians put up a stout defence:
The Italians press their attack in the centre. They are somewhat disturbed to see that the town is defended by steadfast Austrian Grenadiers rather than the conscripts they were expecting:
Facing Italian heavy artillery and advancing infantry the centre Austrian infantry brigade decides that the only option is to charge the guns! If they win they will be in a vulnerable position but they will buy time and it is better than being shot at!:
The Austrian infantry force the guns back but are now weakened and have the Italian Guard cavalry in front of them and Italian infantry on their flank:
On the left the 2nd Corps continues to advance and reveals the flank hill is held by an Italian infantry brigade:
In the centre the Italians press on with the Italian Guard cavalry and an infantry brigade attacking the exposed Austrian infantry and some Neapolitan cavalry charging the Austrian horse artillery:
The Austrian infantry are defeated and dispersed:
The Neapolitan cavalry are also successful and destroy the horse artillery:
On the left the 2nd Corps infantry move up to engage the Italian infantry:
The Austrians move brigades up to fill the hole in their centre:
On the right the Austrian Dragoons are still heroically holding up the Italians and, combined with their artillery, slowly wearing down the Italians:
The battle around the two towns rages on! The Austrians have dispersed an Italian infantry brigade in the centre while, with little threat to the town on the left, the Grenadier brigade holding it has advanced out to put some more pressure on the Italians:
Initially at least the 2nd Corps infantry do well, inflicting heavy losses on the outnumbered Italians:
The advance of the Grenadiers has forced the Italians to divert some of their force to counter them. More in desperation the Neapolitan cavalry charge the Austrian Dragoons they are facing:
Unfortunately after the initial success the 2nd Corps attack appears to have stalled:
Equally the Italian attack in the centre is beginning to run out of steam:
On the right the Austrian Dragoons continue to frustrate the Italians, even when they are driven off the Italians won't be strong enough to achieve anything:
The Neapolitan cavalry are driven off leaving the Italian Dragoons vulnerable to being charged in the rear by the victorious Dragoons:
The Austrian Dragoons charge into the rear of the Italian Dragoons but fail to do any damage and fall back, however the Italian Dragoons are weakened now and faced by some Austrian infantry:
In the centre most of the Italians have stalled and the Austrians appear to be holding on:
On the left the Austrian Grenadiers are making short work of the Italians facing them:
The Italian reinforcements have finally arrived! However, it seems unlikely they will get into much action before night falls or the Italian army breaks:
The 2nd Corps is still battling with the Italian infantry. By now I had hoped to have dealt with this brigade and be moving on to the next one but, rather like the Austrian Dragoons on the right the Italians have held on stubbornly:
Their resistance is finally broken though and the Italian army is close to collapse:
The Austrian Grenadiers complete the victory by charging and dispersing the infantry facing them!:
Another great game of Blucher which really swung backwards and forwards! I managed to build a decent defensive position and put some pressure on the Italians with the attack on the left. Gordon was unlucky that his reinforcements took so long to arrive and, when they did, were a long way from the action plus the close terrain didn't really suit his cavalry heavy army. Next time I'll probably be taking on his Ottomans so will need to come up with an army and plan to take on the hordes!


