Saturday 28 May 2022

KMH Caribbean Broadside Spanish v British

Another scenario from one of the Lard specials, this one saw my Spanish (pretending to be French as usual) taking on Dave's British. Two Spanish ships (one merchant and one frigate) have run aground following a storm and the Spanish flagship is moored nearby salvaging crew and stores from the wreck.

Meanwhile the British arrive scenting the possibility of prizes.....

The Spanish fleet:


Five 74's prepare to defend the flagship while it carries out the rescue:

The 'Neptuno' is the ship carrying out the salvage:

The British appear, a tough force of four 3rd Rates and a Frigate. In a daring moved the Frigate races ahead to lead the attack:

The Spanish were hoping to get past the salvage operation and intercept the British before they could interfere but the speed of the British frigate will thwart this plan: 

The British shake out into line and the fleets prepare to engage in the narrow gap between the two islands. Deploying in two columns does not seem to be a good plan for the Spanish:

Battle is joined! The British frigate and lead 3rd Rate take a bit of a battering but so do the Spanish:

San Francisco and Argonauta lead the attack, San Justo and Monarca are badly placed to help out though:

The Santa Anna (the red and white ship) attempts to engage the British frigate:

Unfortunately British fire causes the Santa Anna to catch fire:

Unluckily the Argonauta and San Justo also catch fire!:

While the Santa Anna and Argonauta put the fires out the unfortunate San Justo's fire reaches the magazine and the ship explodes horrifically:

The British push through the Spanish lines with both sides firing furiously:

Masts have fallen, ships are battered but apart from the San Justo all the ships are still afloat and no one has struck:

The salvage attempt has failed largely but most of the Spanish fleet has broken through the British and got away:

Great fun again and the ships look fantastic. I think if I took a very strict interpretation of the victory points I could claim a 4-2 win (one move of salvaging and one mast destroyed versus one mast destroyed) because you only get VP for ships which strike which, presumably, does not include blowing up! I feel that would be harsh though and really Dave easily had the best of the encounter.

I need to work on my tactics as well, the two lines thing didn't work at all and I find it hard to figure out how far the ships are likely to go and come up with a better plan in future, Dave's use of the frigate really caught me out.

Sunday 22 May 2022

ADLG-R Holy Roman Empire v Restoration British

My club mate Simon recently finished his modifications for ADLG to allow the rules to be used for the Renaissance (ADLG-R!) so it seemed an opportune moment to get an army that hadn't seen any use for a while into action.

Thus my Holy Roman Empire (aka Austrian Hapsburg Imperial) took on Mike's Restoration British. As is often the case there was little terrain, just a waterway on one flank and a couple of enclosed fields. Both armies deployed in the traditional infantry centre and cavalry wings way:


Feeling that they may have an advantage on both flanks the Austrians advance while holding the centre for now:

The British advance all along the line:

The Austrian artillery has really found the range on the advancing British Horse (with included sub-general), one more hit will finish them off!:

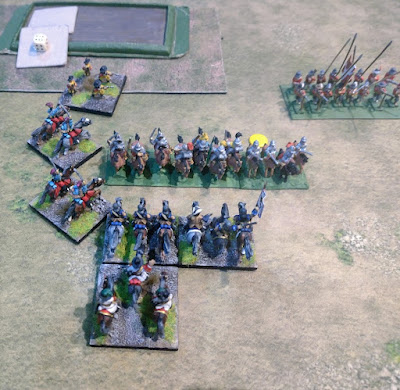
First contact: Croat impact light horse attack British Medium Horse:

The Croats inflict a hit on the British. Taking a chance the flank supporting Dragoons move to add to the fire of the artillery on the damaged sub-general but fail to get another hit:

The British Medium Horse are destroyed:


British Horse charge the Croats while the Austrian Cuirassiers attack the remainder of the British Horse:

Meanwhile the centre and right have been advancing cautiously with the Austrians hoping to get their Hungarian infantry (impact swordsmen) into the isolated British foot in front of them

The fight on the left continues:

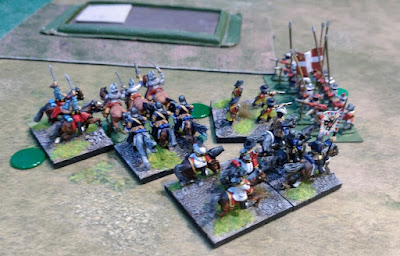
One Croat breaks off while the second charges into the flank of the British Horse. The Austrian Cuirassiers have finished off the British they were facing:

The Hungarians charge home! With overlaps, a disordered opponent and impact ability hopes are high for success:

Unfortunately the charge has little effect and the British manage to get two more units into the fight turning the tables on the Hungarians:

The Hungarians take and inflict losses:

Austrian foot mass to storm through the British centre:

On the left the Austrians mop up the rest of the British Horse:

One Hungarian unit has broken while the second is in trouble:

The Austrian foot continue to smash their way forward while guarding their flank in case the remaining Hungarians break:

While the Dragoons hold off the British foot the last of the British Horse on the left is mobbed:

The second unit of Hungarians has broken and the right flank cavalry has fallen back. They have done a good job though as all the British foot they were fighting is in poor shape now:

The British artillery is about to fall and the end of their infantry line is almost broken:

The Austrians launch a charge they hope will win the battle:

One British unit is broken:

Not much remains of the British right flank:

On the far right some Austrian Dragoons have been exchanging fire with a British Pike and Shot unit, getting the better of them. In exasperation the British charge home but the Dragoons hold firm in the fields:

Little remains of the British centre and the right is wiped out:

Victory goes to the Austrians as the British break and flee:

I think I'd lost around 15 out of 23 cohesion so it was a fairly close game and could have gone either way. 

We made one mistake with the rules (that I noticed later at least!) in that we gave the British Pike and Shot a +2 factor (fighting LMI) against the Hungarian Medium Swordsman Musket who are, in fact, medium infantry not LMI giving the British only +1 against them so the Hungarians could have done better, having said that I think they did very well on the dice so they did okay anyway!

Friday 20 May 2022

TMOCB USMC v NVA

Returning to the jungles of Vietnam saw Gary using the NVA against my US Marines. The NVA have not had an outing for a while and produce a rather different game in which the Marines are scattered around the villages looking for caches of food and arms when the NVA arrive.

It's quiet out there, too quiet!:


Lt. Donovan finds a cache of food and destroys it:

Sgt. Rambo finds more hidden food supplies that also go up in smoke:

Sgt. Elias locates some arms and ammunition, so far things are going well:

Sgt. Rambo excavates more food, the NVA will go hungry tonight:

Enemy in sight! Lt. Donovan spots NVA lurking in the jungle:

Remarkably accurate Marine shooting takes out three out of the four NVA bases leaving only the NVA Platoon Commander standing:


Not everything goes Donovan's way though as a VC ambush from the Temple results in one Marine base down:

Donovan quickly calls in the Medivac to take the casualties to safety:

Needing a single '4' on seven dice to move into the next village sector Rambo fails to move:

Lt. Donovan calls down an artillery strike on another NVA section:

More NVA appear, things are hotting up:

Sgt. Cowboy (standing in for Sgt. Barnes who is in Tokyo on R&R) appears but is ambushed by the VC:

The artillery strike downs an NVA base but also takes out an innocent peasant. As ever the press is there to record it:

Up to now pretty much everything has gone the Marines way. However, things can change quickly and one of Sgt. Elias' bases is taken out by the NVA:

Things escalate quickly for Elias, with two NVA sections pouring fire in from different directions only Elias and Pvt. Buster the dog team are still standing:

Elias and Buster are down, the situation is grim:

Lt. Donovan calls in another artillery strike which decimates one of the NVA sections:

Sgt. Cowboy was attempting to move to Sgt. Elias's assistance but was too late. Meanwhile Lt. Donovan has also lost another base. The situation is becoming desperate:

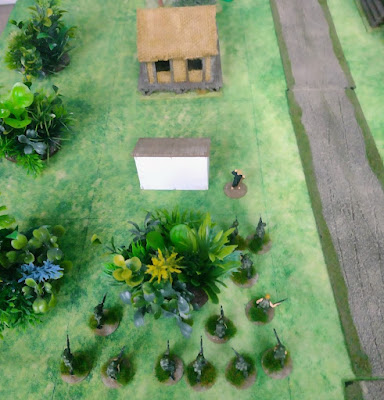
Sgt. Cowboy spots the NVA platoon commander (who had been hiding in a bamboo thicket!) attempting to join his men across the road:

The NVA commander goes down in a hail of lead:

Sgt. Cowboy leads his men into the temple, the other half of which is held by an NVA section:

One base is lost in the firefight:

Where is Sgt. Rambo while all this has been going on? Making little progress is the answer, he is still delayed in the village he started in:

The firefight in the Temple is brutal, more losses on both sides:

Another artillery strike lands perfectly but does no damage at all:

Sgt. Cowboy and his men are all down! That's two USMC sections wiped out, very bad news indeed for the Americans:

Carnage in the 'Temple of Doom':

The end, this is the end my friend. Huge losses on both sides in the Temple and the jungle opposite:

One of the most bloodthirsty games of TMOCB I've played, two sections of USMC wiped out and numerous NVA bases taken out. For a while it looked like it would be a walkover for the Marines but Gary fought back very aggressively and, crucially, prevented the Americans medivacing almost all of their casualties. 

The final VP count gave the outcome as a minor NVA victory, largely as I rolled very well on the VP for the food caches I'd destroyed earlier in the game. It certainly seemed like a serious loss to me with two sections wiped out!

TMOCB are a great set of rules, I really enjoyed the solo games I played initially and both Gary and Dave have taken to them. I should really paint up the 'Ruff Puff's' I have so we can try the Mountain Tribes scenario but next perhaps we will play out a Firebase attack for a change.