Thursday 31 March 2022

TMOCB ARVN Special Forces v Viet Cong

Dave's second game of TMOCB this time with him using the VC and me an ARVN Special Forces platoon in the search and destroy scenario. 

I'd never used veteran troops before in TMOCB so was interested to see how they did. While few in numbers they do have some significant advantages which should allow them to move fast and hit hard. Given their small numbers I spent the 5 asset points on an extra base for one squad and an artillery liaison team for the platoon HQ more for an extra base than any other reason!

There are initial reports of VC activity from an armoured convoy (I just wanted to put the tanks and M113's on the table really!):

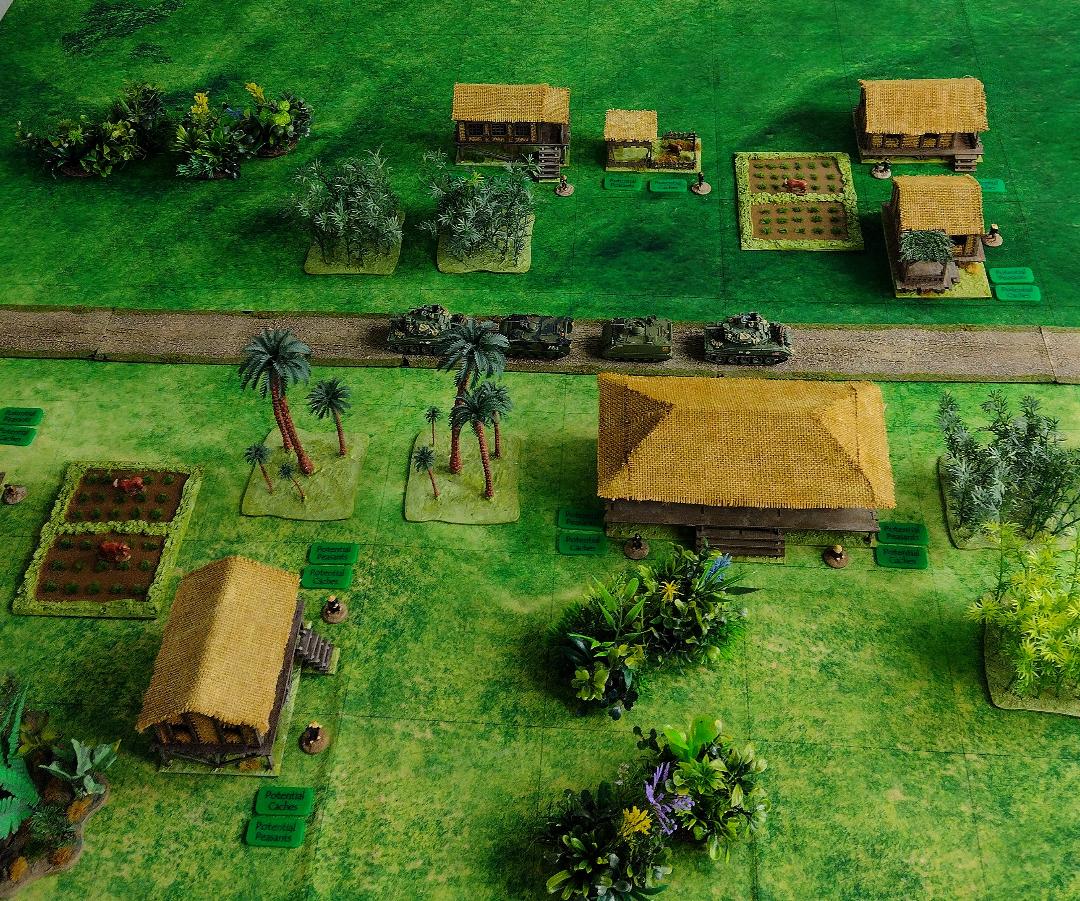
An ARVN Special Forces platoon is sent in to investigate:


VC mass in one of the villages, the reports were not wrong:

They sure were not! Sniper! The 2nd squad loses a base which is taken out by a VC ambush:

The casualties are quickly medivaced by chopper:

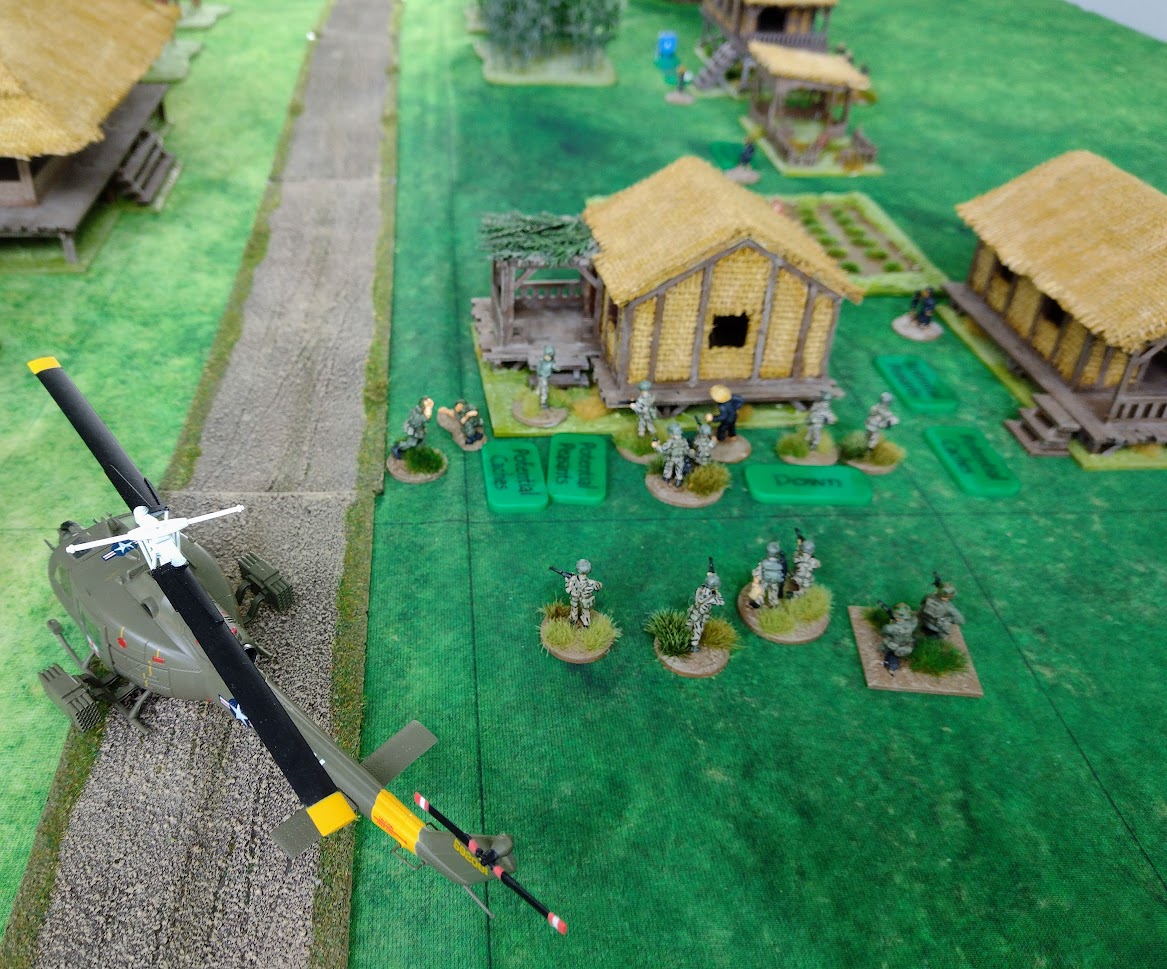
The first food cache is discovered:

The VC commander makes an error, two of his sections are hit by an artillery strike. One section is unscathed but the other takes very heavy losses:

To the right of the road the 2nd squad advances and finds some hidden weapons and ammo:

The 1st squad destroys more food stores:

The 1st squad moves up along the temple towards the VC hit by the earlier artillery strike:

The 3rd squad arrives but have got a bit lost and have some distance to cover before they can join in the fight:

The platoon commander destroys more food supplies:

The 2nd squad encounters VC, they are few in numbers though:

The 1st squad occupies the temple:

The 2nd and 3rd squads converge on the VC in the village:

With the VC being squeezed between the 2nd and 3rd squads they elect to fade back into the jungle:

Assault! A large VC section attempts to rush the temple!:

The attack is beaten off with heavy losses:

Undaunted a second VC section tries to rush the temple:

Again it is largely cut down though the ARVN take a base loss themselves. When calling don the medevac helicopter disaster strikes as the VC shoot it down! Truly this is the TEMPLE OF DOOM: 

Another ARVN artillery strike, less effective this time:

The 2nd squad clears more of the villages:

More food goes up in smoke:

Remarkably another attempt to medevac is stopped in it's tracks (literally):

Having cleared the temple the 1st squad resumes the advance:

They begin to explore another village:

Masses of VC casualties are in the area:

With few men left the VC quit the field:

A rather overwhelming victory for the ARVN Special Forces, they only lost two bases in the entire game one of which was evacuated (the medevac service did less well though losing a chopper and an M113!) with numerous VC casualties and several caches found. 

Dave was pretty unlucky with his casualty, shooting and assault rolls but the more I play the more I think that winning with the VC against a competently handled White Star force is difficult and the style of play required is rather negative, trying to minimize losses and prevent the villages being searched while picking off any isolated White Star forces. Of course this may well be realistic!

As regards using veterans they seem quite effective, they get an extra action dice, two more dice when shooting or assaulting and always count as 'down' improving their saving throw. 

Next time we will probably try the NVA rather than the VC and see how that goes!

Monday 28 March 2022

The Men of Company B Jungle Huts

Two more buildings for my TMOCB set-up, another hut painted in a slightly different way to the rest (basically without the hessian adding to the wooden panels):


Secondly a 'meeting hut' which turned out to be far larger than I expected, I thought it would be the same size as the larger huts but it is in fact twice as big:

Happy with these, the hut looks a bit different without the hessian panelling and was much easier to do so I ordered another one to go with it!  


Friday 25 March 2022

ADLG Palmyran v Sassanid Persian

My first game with the 'tribute' 25mm Hinchliffe Palmyran army against Gordon's Sassanid Persians. To use as many of the newly painted ones I went for an army of cataphracts, horse archers and foot archers with no Roman contingent. 

Winning the initiative I decided to attack in plains and was immediately surprised that Gordon appeared to want to close the table down suggesting he didn't have the masses of bow armed heavy cavalry I was expecting. This became very apparent on deployment:


Looking at both sides initial positions it seemed there was an opportunity for another of my 'let's redeploy the army' attempts. Moving my left flank cataphracts to the right centre would get them away from the elephants and allow me to delay Gordon's slow moving right flank troops with light horse. A decent command roll encouraged the attempt so the cataphracts began their march. In response Gordon moved his elephant and supports to attempt to counter:

One light horse on the left flank is trapped and attacked by Levy spearmen:

On the right both sides rush to try to gain an advantage:

The trapped light cavalry valiantly hold on:

Both sides light horse on the left engage, slight advantage to the Palmyrans:

A medium cavalry horse archer charges the Persian allied Arab swordsmen to stop them attacking the Palmyran archers:

The skirmish combat continues, the Palmyrans still have a small advantage:

Not so good here though as the Sassanids manage to get their elephant into a Palmyran cataphract with an overlap. Unlike the Palmyrans the Sassanid cataphracts are elite so they have an advantage there as well:

The light cavalry contest is starting to go against the Palmyrans and the first cataphract is down:

The remainder of the cataphracts are being overwhelmed:

Given the situation the Palmyrans start to fall back and the army flees:

So not the most auspicious start for the Palmyrans! I think the plan was solid in that redeploying the left flank cataphracts took a large portion of Gordon's army out of the game especially as once he had moved his elephant over to counter his general had serious problems with having his command split over a large distance. 

However, I failed in two areas, firstly I didn't really manage to get the redeployed cataphracts into action in time to support my right flank and secondly I failed to stop Gordon sliding his elephant to attack my cataphracts rather than the light infantry I'd hoped it would be fighting. I guess at least I realised he could do that but my troops couldn't quite move far enough to stop him!

Another enjoyable game though and I'm pleased with the way the army came out, it isn't the same as my long-lost first Palmyran army but they do look nice and I still really like the figures.

Finally a comparison between the Footsore cataphracts I bought for the Late Romans and the Hinchliffe ones!:


Friday 18 March 2022

Bag the Hun US Navy v Imperial Japanese Navy

Gary and I's second game of BtH, this time trying out the bombing rules with Gary taking the attacking Japanese and me the defending Americans. Gary had four Zero's and three dive-bombing Val's while I had four Hellcat's. 

The convoy with its combat air patrol:


The Zero's approach the convoy and the Hellcat's move to intercept:

Both sides zoom around trying to gain an advantage as the Val's appear:

The Val's manage to evade the Hellcat's attack:

The Hellcat formation splits up with two attempting to engage the Val's while the other pair head off the Zero's:

The situation is complicated!:

The first casualty of the encounter as a Zero explodes! The pilot is very lucky and is thrown clear, managing to open his parachute and land in the sea:

The Val's prepare to make their attack, picking out one of the larger merchantmen:

The merchantmen await the attack:

Two Hellcat's attempt to prevent the Val's attacking the convoy:

The Val's dive! Two bombs result in close misses, throwing water high into the air:

The third Val, piloted by an Ace, however lands it's bomb right on the ship! The result is engine room damage which will slow the merchantman down:

As the Val's attempt to escape one is hit by a Hellcat and explodes:

At this point the raid was over with the rest of the aircraft dispersing safely. The final count was one Val shot down, one Zero down and another probable kill (the pilot was a rookie and had lost control of his plane) for the Americans and one merchant ship damaged for the Japanese. The Hellcat's took no damage at all from the Japanese despite being fired on several times.

Adding the bombers into the game made it more interesting rather than just trying to shoot random planes down. However, after two games, it is obvious that the Japanese can't really cope with the much superior American Hellcat. The big difference is with the aircraft's robustness, rated at 3 the Hellcat is quite difficult to damage while the Zero and Val at only 1 are extremely fragile. The situation for the Japanese is made worse by the better firepower of the Hellcat. Having greater numbers of Japanese planes might help but might not as they would still find it hard to damage the Hellcats.

As for the rules I must admit I have been impressed with them. They are very comprehensive and well written being fairly easy to pick up (though I'm sure we miss a few things out as there is much to take in and several things we have ignored while trying to learn the rules basics). There is a lot of zooming about trying to get a shot in which isn't that easy and I suspect that if you played a lot you'd get to know all the different manoeuvres and the capabilities of the planes making it a very thoughtful game. The problem is that I can't see us playing enough games to get to this stage!

One thing I might do is invest in a few more planes, the Wildcat is much more comparable to the Zero than the Hellcat so some of those might be good and perhaps some larger bombers (probably Japanese) to add more variety.