Tuesday 28 February 2023

Sharp Practice Sudan Egyptians v Dervishes

After four games with the Dervishes taking on the British we thought we would try something different so I used the Egyptians and Dave took over the Dervishes. 

We basically replayed the second scenario in which an Egyptian column is attempting to return to it's base on the Nile, probably after an unsuccessful attempt to locate and punish a recalcitrant local tribal leader or preacher.

For the same points as the British had in the scenario the Egyptians mustered eight groups of Fellahin, two of scouting cavalry and a medium gun all with appropriate leaders.

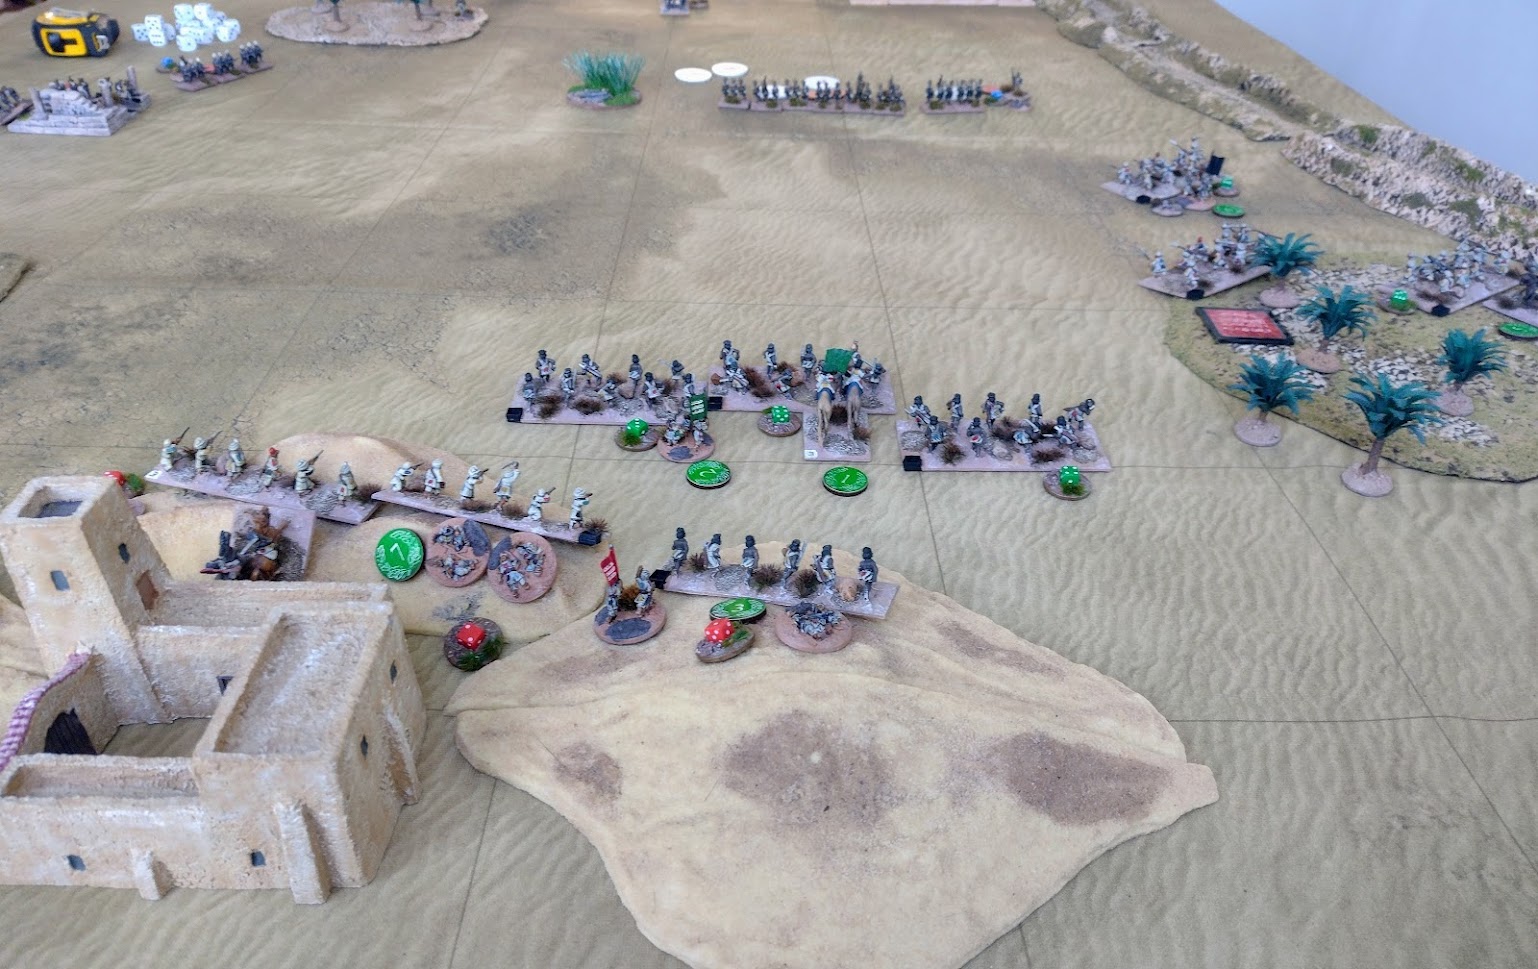
The battlefield set up. Scouts indicate the Dervishes approaching from the lower table edge (the Black and Green flag deployment points):


The Egyptians send their cavalry forward while half the infantry follow in column. The remainder of the infantry form a firing line to cover the advance:

A smaller force of two groups of Fellahin and the artillery defend the camp on the Nile:

The cavalry swing round to scout the hills and palm grove while the rest of the Fellahin form into line with surprisingly effective drill on display:

There are Dervishes in the hills! The cavalry draw their fire with one unit deciding discretion is best and retiring to the infantry line:

The Dervish skirmishers drawn out by the cavalry are forced to withdraw by accurate Egyptian fire. Meanwhile the main Dervish horde arrives and begins a rush towards the Egyptian lines. The Egyptians hope that they will get enough shots into the Dervishes to weaken (or ideally stop) them before they can contact the Egyptian line:

The Egyptians open fire and knock over numerous Dervishes, while in the distance the remainder of the Dervish horde arrives on table:

The Green Flag Dervishes suffer numerous casualties (but not so much shock) due to Dave's remarkable ability to throw sixes for his casualty rolls! 

The other Egyptian cavalry unit attempts to intercept a Dervish cavalry group that has worked it's way onto the flank of the Egyptians guarding the camp:

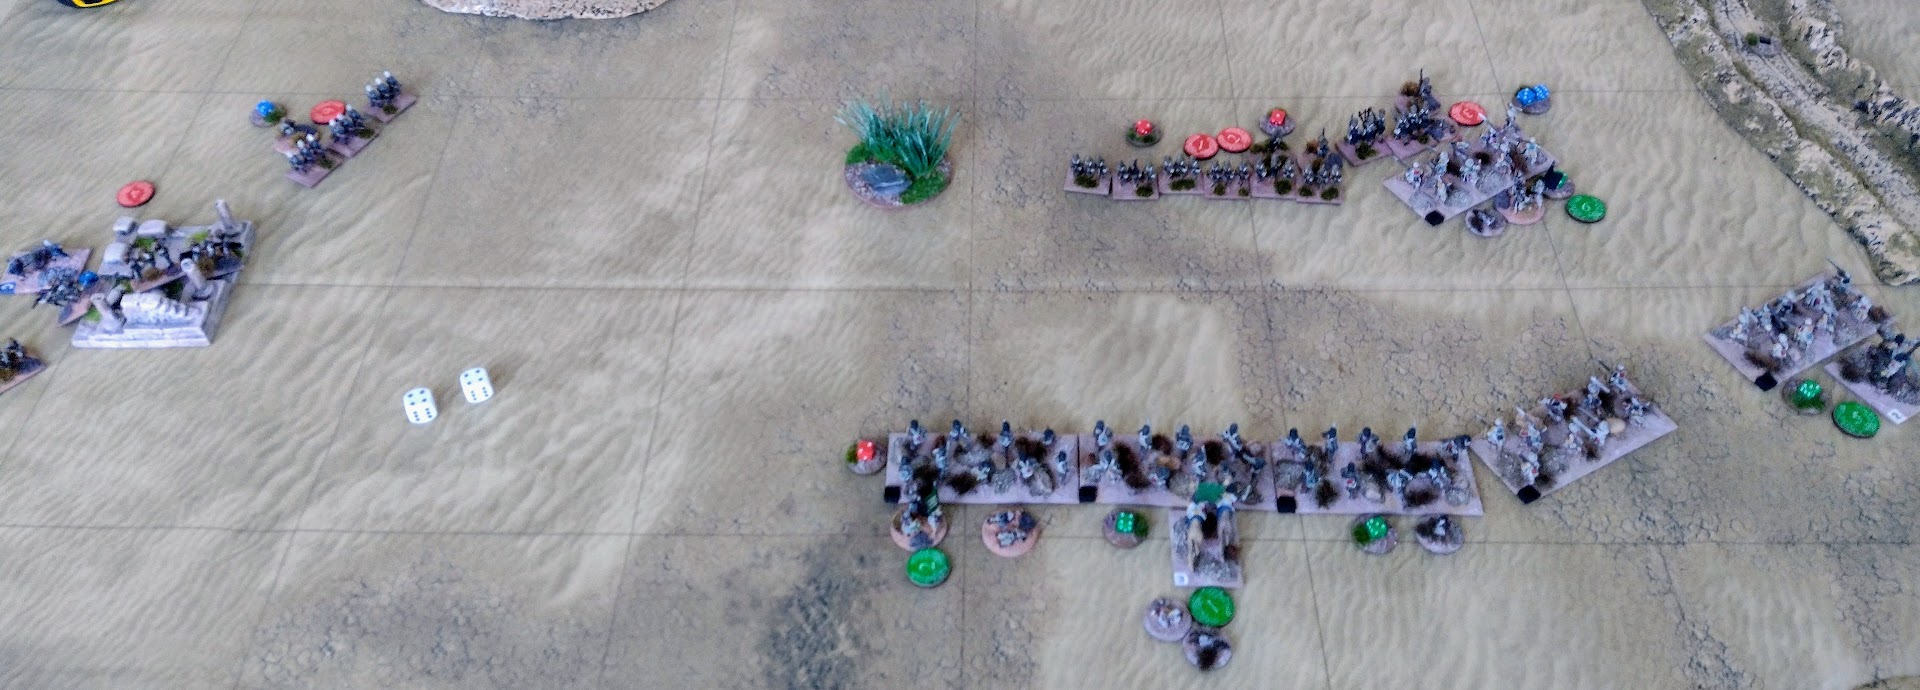
They don't arrive in time and the Dervishes hit the flank of the Egyptians:

Surprisingly the Egyptians fight back furiously and turn to face the Dervishes:

Further combat sees the Egyptians cut down to a man while the Dervishes also break after huge losses:

Meanwhile both the Green and Black Flag Dervishes begin to rush the Egyptian line. They have a considerable distance to cover over open ground though so speed is of the essence for them:

The Green Flags have taken heavy casualties and split up badly:

The Black Flags have also split up but one group manages to contact the Egyptian line with a second in support:

The Egyptians are wiped out but once again the Dervishes in combat take sufficient losses themselves to break and flee:

The Green Flags also manage to get a unit into combat but again the Egyptians fight off the weakened Dervish unit and break it:

Close range fire drives off the last of the Green Flags breaking the Dervish army's morale:

Another great game and I'm really enjoying these Sudan modifications to SP, with the Dervishes having to get into close combat it makes it a very different game from the usual SP shooting match. As with the last two games this one was quite close with the Egyptians ending up on 5 morale, a couple of Dervish close combat wins would have taken them over the edge. I also think Dave was a little unlucky with his movement rolls when trying to get into combat as some poor throws lead to the Dervishes making scattered attacks rather than charging in one mass.

As for how the Egyptians compare to the British (which was what I was most interested in) they lack the British special abilities (Sharp Practice and easy Crashing Volleys), fight much worse in close combat and tend to have a lower starting morale. However, they have numbers and more officers on their side which I suspect more than makes up for the disadvantages, six groups of Egyptian infantry with two Lvl III leaders and breech-loaders puts out an awfully large amount of firepower hardly affected by them being 'bad shots' at all.

Finally it has also been great to get these veteran (probably 20 years old plus) figures into action again! They are certainly not some of my best painting, having been done quickly with colours just blocked in and a wash of dilute black oil paint (aka 70's and 80's 'quick shade'!) but I think the overall effect is nice and they have something not all armies I paint develop, a bit of a personality! 


Sunday 12 February 2023

Sharp Practice Sudan Dervish v British

The final game in the mini SP Sudan campaign saw my Dervishes take on Dave's British again. In this scenario the British have to rescue a preacher and his daughter that the Dervishes are holding captive in a fort.

The table is more open than previously, the Dervishes have fewer men and are at least in theory defending though it is hard to defend when most of your force only fights in close combat.

The British base is on the Nile with the Naval Brigade and Highlanders making up the assault force:


One lot of Dervishes deploy behind the fort and watch the British advance:

The Naval Brigade makes a dash for the Dervish deployment point near the ruins while the Highlanders advance more slowly:

The Naval Brigade capture the Dervish deployment point, the Dervishes could have attempted to defend it but decided the time wasn't right to attack yet:

Dervish skirmishers appear in rifle pits in front of the fort:

A group of Highlanders makes a dash for the second Dervish deployment point in the palm grove. This time the Dervishes decide to contest the deployment point and deploy the rest of their force:

Having taken the deployment point the Naval Brigade forms a firing line to support the Highlanders:

Dervishes madly rush forward becoming split up as terrified Highlanders make a 'tactical retreat' after taking hits from the Dervish skirmishers:

The Dervishes all charge forward hoping there is safety in numbers against the inevitable hail of British fire:

Again their wild advance splits the groups up with one dashing far in advance of the rest:

The Dervish lines reform as they prepare to attack the highlanders:

On the right one group of Dervishes have almost caught the retiring Highlanders. The rest of the Dervishes are taking fire as they prepare to charge home:

CHARGE! The Dervishes rush into contact with the Highlanders:

Spears are jabbed, swords slash and bayonets are thrust in a wild melee: 

The Highlanders are forced back with heavy losses:

The group of Highlanders that was caught in the rear breaks and runs:

The vast number of casualty markers on the Dervish units show that the fight has been by no means one-sided:

More Highlanders break pursued by Dervishes:

The Naval Brigade look on in horror as the Highlanders are routed and British morale fails. Back to the Nile and hope for a steamer to evacuate us lads!

Carnage among the Highlanders:

The Dervishes have taken a lot of casualties themselves:

We've played four games now all of which have been Dervish victories. I must admit I couldn't see anything else Dave could have done in this game but, while the Dervishes did win, like the last game it was closer than it looked and could have gone the other way.

Much for the Dervishes depends on timing your attack, making sure you have the minimum of open ground to cover and hoping that your leaders activate before the British do! Adopting a square isn't really practical in SP though it is possible the British could use their flag cards to do different things (such as more crashing volleys) and a couple of the rule modifications are not that clear (the effect of having the Sharp Practice ability for the British, the loading time for Dervish captured rifles).

It's been great getting these old veterans (and a few newly painted ones) on the table again and hopefully we will play some more games, perhaps after thinking about the modifications and making some more adaptions!

Thursday 9 February 2023

Sharp Practice Napoleonic French v Spanish

Another SP game, this time set in the Peninsular with my French taking on Gary's Spanish. The objective of the game was for each side to capture as many supplies as possible from the variety of sheep, cows, pigs, pack donkeys and carts on the table!

Both sides begin to deploy their units:


Already a flaw in the French plan is evident in that the Horse Artillery gun has ended up behind the infantry line:

For the moment though this does not seem to matter. Some Spanish Guerrillas attempt to rush forward and take the pack donkeys before the French can get to them.  

A well-aimed volley from the French kills two Guerrillas, wounds their leader and forces them to scuttle off to safety:

Undeterred the second group of Guerrillas captures the donkeys and makes off with them:

Meanwhile the Spanish Line Infantry approach more donkeys:

The Horse Artillery make it to the end of the line but still don't have a valid target. French Dragoons have also appeared but dither as to where to commit themselves. The French skirmishers have taken the wood and started to fire at the Spanish line:

With nothing much in front of them apart from a sole group of British infantry in a house the French line advances (blocking off the Horse Artillery again). In the distance the Spanish Guerrillas make off with considerable loot and a Spanish cannon points ominously at the French line:

The Spanish line secure the donkeys and start to fire back at the French skirmishers:

The Spanish cannon opens fire as the Guerrillas move the loot off table:

The Dragoons dismount and enter the village. Maybe they can at least capture the table of food and the chickens in the distance!

The French line engage the British in the building:

The French skirmishers fire is largely ineffective against the Spanish line:

Losses mount for the French line, mainly from the fire of the Spanish artillery:

The British are forced out of the house but this does not achieve much for the French with all the loot having long gone:

One of the village houses catches fire!

The Dragoons make it to the edge of the village just in time to see the Spanish withdraw with considerable loot and a victory:

A crushing victory for Gary's Spanish, other than the loot above they also had a group of Grenadiers on the left who hoovered up a load more loot leaving the French with just a few chickens and a table of food to show for their efforts! Good fun though and another great example of Gary's terrain building on show (he made all the buildings and stalls etc).

Due to my mismanagement my artillery never got to fire, my Dragoons dithered ineffectively and my infantry failed to get very far forwards. A bad fay at the office for the French general overall!