Friday 28 June 2019

Blucher French v Austrian

Last night's Blucher game saw my Late French army taking on Simon's Austrians. I went for a corps of conscripts and light cavalry, a corps of Poles and a large Guard corps with Napoleon leading the army.

The Scharnhorst didn't go well for the Austrians with the French gaining an overwhelming number of VP and a much better battlefield situation:

The initial deployment. Unknown to the French the four Austrian units on the Austrian left were poor quality Landwher and Insurrecto:

The French quickly established a strong position:

Even with one more Corps arriving the Austrian line looks weak:

By this time the Austrians had spend half the day not really getting anywhere. They couldn't see how they could effectively launch an attack and conceded defeat.

As this had not taken long we then played a pick up game with the same terrain and the French attacking:

The French have decided to attack the Austrian-held hill with strong forces:

The Poles go into action:

On the French right the Austrians advance against the Guard:

Austrian Cuirassiers menace the Guard Horse Artillery who promptly discourage them with a well aimed hail of lead:

Austrian cavalry try to disrupt the Polish attack on the hill, riding down the Polish artillery:

The Austrian cavalry continue their rampage wiping out some French conscripts:

Battle rages all along the line:

 The French finally drive off the Austrian cavalry:

Superior Polish skirmishing is slowly whittling down the Austrians on the hill. They decide it is time for the bayonet and charge!:

Many units are now weakened on both sides. The Guard is starting to gain the upper hand on the right:

The Austrian left is collapsing quickly now:

On the French left the Austrians launch a series of desperate charges. Both sides are reaching the limits of their strength:

The Austrian attacks are repulsed and they fall back almost spent:

The Guard advances to mop up the Austrian right:

The French left follows up the retreating Austrians:

Victory goes to the French as the Austrian army morale breaks:

For the second game in a row Scharnhorst resulted in a very unequal battle. This is a risk of the map campaign system but I still think it is worth doing.

Stopping the first game was a good idea and we both enjoyed the second pick up game, it was very close and had a number of twists and turns. It could easily have gone the other way.

Monday 24 June 2019

Chain of Command Soviets v Germans 'The 04:30 to Koteinikovo'

Gary and I played the first scenario from the TFL 'Winterstorm' supplement 'The 04:30 to Koteinkovo'. This scenario involves Panzer Grenadiers from the 6th Panzer Division defending a train from an attack by Soviet Partizans.

I had looked at buying the Sarissa Productions train for this scenario but the expense and my lack of enthusiasm for making an MDF train put me off this idea. I did have an old Hornby train set that I thought would be too small for 28 mm figures but, on examination, it didn't look too bad. With a quick repaint in grey and an extra few cheap wagons from eBay it looked very presentable:

In this scenario the Partizans have blocked the rail line and are expecting to attack a lightly defended German supply train. The Germans have anticipated the attack however and loaded a full platoon of Panzer Grenadiers on the train to defend it.

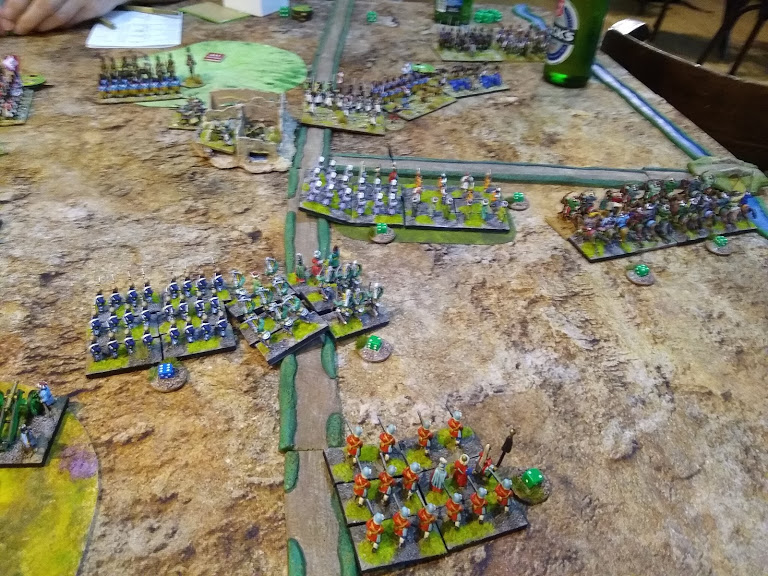
The terrain was fairly open with woods along the table edge and some areas of light cover along the railway line:

The Germans have three jump off points on the train while I placed the four Soviet jump offs two each on either side of the train.

My plan was to build up the attack slowly, setting up covering fire and trying to pin the Germans down. An initial double phase resulted in me throwing the plan out of the window and attempting to rush the train with a single Partizan section. Unfortunately they didn't make much progress and fell well short:

The Germans immediately responded by deploying a MMG and a Section of infantry both of which opened up on the Partizans. Considering the amount of fire the Germans put down the Partizans survived with relatively little damage:

The Partizans have inflicted some damage on the Germans aided by the deployment of the Soviet MMG on the opposite side of the train. However, due to losses, the Partizans have had to put down suppressing fire to slow the rate of casualties and deploy their only senior leader which will make it hard to deploy further Partizan units:

In response another German section deploys to take on the Partizan MMG. I'd thought that the MMG had a Junior Leader with it but was mistaken in that so when Gary put a load of shock on it there was no way for me to rally the shock off having already deployed my senior leader:

The initial Partizan squad finally broke and ran for the woods. They had held on bravely and done a lot of damage to the Germans opposing them but I had been unable to support them properly due to the early deployment of the senior leader:

The third German section has deployed and the Partizan MMG has been eliminated. Soviet force morale is falling quickly:

The second Partizan section finally manages to deploy together with a 5 cm mortar. The initial German section is quickly finished off. Is the tide starting to turn?

The German MMG and the second Partizan squad exchange fire:

With the third German section joining in the firefight the second Partizan section has to lay down covering fire to reduce their losses. In the background the second German section has captured one Soviet jump off point and is heading quickly towards the third:

Just in time the final Partizan section is able to deploy to defend the jump off point:

The Germans launch an 'handgrenaten' attack on the Soviet defenders:

The attackers are wiped out but the Partizans take heavy losses:

The third German section heads towards another Soviet jump off point. The Partizans have nothing left to defend it and their morale is almost broken:

The Partizans in the wood are winning the firefight against the German MMG but have few men left:

The Germans have captured another jump off point breaking the Partizans morale. The train has survived the attack!:

Gary and I both thought before the game that it was a tough ask for the Soviets to take the train. The Germans have two very effective LMG's per squad and also have two senior leaders enabling them to act on a number of command dice and rally off shock quickly.

I think I should have stuck to my original plan, having to deploy my single senior leader early made it difficult to bring on more forces and I wasted the MMG by deploying it with no leader nearby so I learned something from this game.

Despite that I think the Partizans put up a good fight, two German sections were pretty much wiped out and towards the end the Partizan position was perhaps slightly stronger but the loss of command dice resulting from their dropping force morale meant they couldn't really do anything.

The next scenario in the campaign sees the train pull into Koteinikovo while the Soviet 4th Cavalry army makes an attack on the town, hopefully we will get to play this soon as we both enjoyed this game.

Thursday 20 June 2019

Blucher Ottoman Turks v Persians

A return to Blucher this time with the rarely used Ottoman Turks against Gordon's Persians. The Ottomans are another army I didn't paint a lot of and acquired in exchange for a Thracian army.

They are really a FOG-R army but I painted up enough extras to be able to sort of use them in Blucher as well.

Gordon is a tricky opponent in the Scharnhorst phase and has had a lot of success mopping up VP using a column consisting of a single unit of cavalry. I thought I'd try to discourage this idea by trapping the small column and forcing it to fight. The plan worked to some extent at least:

The battlefield was the two squares in the last row and upwards meaning I had two commands on table and two which could not reach the battlefield at all. Gordon only had his single unit of cavalry on table plus a unit of scouts but had two more columns coming on if he could survive on table long enough:

The Persian cavalry fled to a hill in the corner but were quickly attacked by the Ottomans. The first Persian  unit is driven back allowing the Ottoman cavalry to follow up behind the second Persian unit:

The remainder of the Ottoman cavalry hit home wiping out the Persian cavalry and winning the battle in only two moves!

So having finished so quickly we decided to play a second game this time without Scharnhorst. I had choice of attacker or defender and elected to defend:

The battle opened on the Ottoman right where they advanced against what looked initially like a weaker enemy but was quickly reinforced by the Persians:

The Persians themselves began to advance in the centre:

Some of Gordon's beautifully painted and historically accurate Persians:

The fighting on the right intensifies with some Janissary's charging home:

Action in the centre is also hotting up:

On the right the Ottoman attack has stalled:

Fighting continues in the centre with neither side gaining the upper hand:

The Ottoman left begins to advance against the weak-looking Persian right in an attempt to draw the Persian commanders attention away from the struggling Ottoman right:

In the centre the situation is improving for the Ottomans with one valiant cavalry unit bursting through the Persian lines:

On the right the Ottomans have fallen back. They are battered but so are their opponents:

The Ottoman cavalry break-through in the centre:

On the right the Ottomans hold on grimly:

The action in the centre is now turning in favour of the Ottomans. Several Persian units have been destroyed or forced to retire and the Ottoman foot are ganging up on the Persian survivors:

The Ottoman right is almost gone but the efforts of the Persians have been exhausted and they can't quite achieve a knock-out blow:

The Ottoman left continues to drive forwards and the Persian centre is almost gone. Night is approaching:

The Persians make one last effort to win the battle with three (badly damaged) units charging a single Ottoman unit which is in good shape and almost as strong as the three Persians combined!:

The Ottomans survive the attack and night falls with them holding on to their two objectives. Both the Ottoman and the Persian armies were a single unit from breaking at the end!

The first game demonstrated how taking a risk in Scharnhorst can pay off or not. I had to wipe out Gordon's two units very quickly before his other troops could arrive and managed to do so. If Gordon had been able to survive even one more turn the result could have been very different.

The second pick-up game was also great fun. The armies were both huge with a lot of poor quality units which can't take many losses. For a while I thought it was looking bad for me but I managed to hang on and, towards the end, was probably more likely to have broken Gordon's army before he broke mine.

Gordon's army is certainly something different and beautifully painted compared to my rag-tag horde of Ottomans!