Tuesday 27 August 2024

ADLG Early Carthaginian v Hittite

A return to ADLG after a long gap saw my Early Carthaginians take on Gordon's Hittite army in a practice for a competition Gordon has entered. Looking at the Hittite list I felt I'd be heavily outnumbered in chariots and, with the Carthaginians not being the most mobile of armies, trying to protect the flanks of the army with terrain would be a good idea!

The terrain fell nicely for me with a hill and field to defend. The Hittites set up in much longer line with a strong force of chariots as expected:


The Hittites advance quickly sending some light horse to dispute the hill:

The Carthaginians prepare to occupy the hill:

They just manage to get over the crest giving them an uphill advantage against the attacking Hittite heavy chariots:

There isn't much facing the Carthaginian right who are confident they will be able to brush aside the Hittites facing them:

On the left there are large numbers of Hittites moving up but they will not be able to get into the fight for a while:

The whole battlefield from above. The situation looks promising for the Carthaginians:

The Carthaginians are cutting through the Hittites on the hill:

The last chariot resists:

On the left the Carthaginians pull back to gain time:

The hill is cleared of the enemy and the right pushes forward:

The Carthaginians turn to face the Hittites after their 'tactical withdrawal':

Battle rages on:

On the right the last few Hittite chariots are mopped up:

More chariot on chariot action:

The Hittite army breaks and flees:

A fun game and for once I seem to have picked a decent army composition and avoided making any serious mistakes! Gordon's mighty chariot force was a bit intimidating but, by luck or judgement, they got split up and attacked piecemeal allowing the Carthaginians to pick them off gradually.


Tuesday 20 August 2024

ADLG-R Later Polish v Ottoman Turks

Having just returned from a few days in Krakow it seemed appropriate to give Simon a game of ADLG-R using my Later Polish against his Ottoman Turks.

I went for an almost entirely mounted army with lots of shock and impact ability. The plan was to flank march one command and concentrate on that flank of the Ottoman army. Unfortunately the terrain didn't fall well to implement this plan so I reverted to 'let's charge forward and see what happens':


First action on the left where my sole infantry unit is attacked by Sipahis:

The Polish infantry hold the Ottomans but there are some Janissaries moving up quickly to join the fight:

The charge forward plan has already been abandoned with the Poles splitting to the right and left: 

The Polish infantry fight on supported by Lithuanian cavalry:

On the right the Poles are starting to suffer from Ottoman fire:

The second command of Hussars prepares to take on Janissaries:

Very quickly things go badly wrong for the Poles as red hit markers sprout all along the line:

The other command of Hussars is faring little better:

More bad news on the Polish left:

Losses from Turkish shooting are mounting rapidly:

The Poles are collapsing:

The Turks have not lost much at all, this is as good as it has got for the Poles:

The Polish army collapses and flees from the Ottomans:

A game in which pretty much nothing went right for the Poles! Turkish shooting was very accurate and, on the whole, when the Poles did get into melee they failed to make any advantage count. I suspect my force selection didn't help, having such expensive troops meant the army was very small and had very poor command and control. At least they looked great though!

A few pictures from one of the armoury museums in Krakow:

Winged Hussar:

Pancerni armour and weapons:

Hussar armour:


Saturday 17 August 2024

Bag the Hun Luftwaffe v RAF

A return to Bag the Hun, this time I took the Luftwaffe while Jerry had the defending RAF. My force was six JU188 escorted by 4 ME109's attempting to return across the channel from a raid while intercepted by six RAF Spitfires.

The Luftwaffe head home:


Achtung! Spitfire! The RAF approach head on:

The JU188's plod on while the ME109's attempt to distract the attackers:

A mass of planes whirling around trying to get off a shot. One ME109 is on the tail of a Spitfire:

Undeterred one of the Spitfires shoots down a JU188:

Another JU188 goes down:

A rather lacklustre performance from the Luftwaffe who lost three out of six JU188's while managing only minor damage to one Spitfire!

Good fun as ever, before our next game I might try to go to flying school (aka getting the hex mat out and trying out a few manoeuvres to expand my current repertoire of 'fly straight', 'simple turn' and 'tight turn') and hopefully be able to put more thought into my efforts next time!   

Sunday 11 August 2024

Longstreet Campaign 1862 River Crossing Union v Confederate

The second game in Dave and I's Longstreet campaign set in 1862 was the 'River Crossing' scenario with Dave's Rebels attacking. Perhaps part of the Seven Day's battles with General Hooker's brigade attempting to hold the Rebels back while the Union evacuates its baggage train.

Hooker deploys his brigade to defend the four potential crossing points on the river. There are two objectives which the Rebels place in the cornfield and woods on the Union left. The stream adds a complication in that it won't be easy to redeploy units if the Rebels elect to attack a single crossing point:


It is immediately apparent that the Rebel plan is to overwhelm the Union forces on the left where the crossing is widest. Will they manage to cross before Hooker can send more men over to contest the crossing?

Rebel cavalry cross the river with strong infantry columns following up:

The Rebel cavalry dismount while the defenders open fire. Hooker rushes troops across the stream in support:

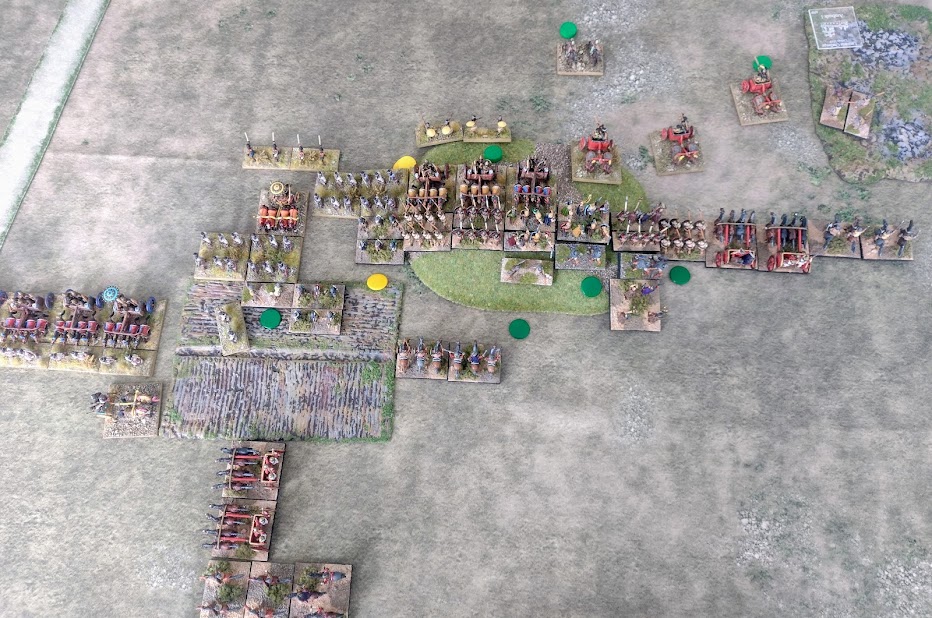
The Rebel cavalry get much the worst of the encounter in the field, they also prevent the following Rebel infantry from deploying properly. To increase the pressure the Rebels approach the other crossing in force:

With the Rebel cavalry largely dispersed their infantry charge across the field. Some Union troops have come up in support behind the field now though:

The Rebel charge is repulsed and casualties are strewn all over the field. The Rebels are also about to try to take the stone wall in front of the other crossing:

A mass Rebel charge sees them capture the stone wall and push the Union infantry almost out of the cornfield. They have taken heavy casualties though and the Union line has buckled but not broken:

The Union infantry are forced out of the cornfield but General Hooker has reserves ready to stabilise the line:

Co-ordinating fire and the bayonet Hooker recovers the cornfield and the Rebels break from their losses:

Another great game which, while it was not that close at the end, felt closer when the rebels stormed across the river! Dave's plan to attack in one place was interesting in that it immediately isolated half my force but it also resulted in his units getting in each other's way and blocked off his artillery support for much of the battle. 

I'd probably have attacked in two places or at least threatened to but I'm by no means sure that would have been a better option. We now have a second battle to play for 1862 and are continuing to enjoy the games greatly.

One other thing I'm trying to do is use as many of my varied 15mm ACW collection (built up over many years) as possible. The armies in the first game were mainly AB figures, in this one the figures were mainly inherited by me and I'm sure Mike who left them to me would have been happy to see them take the field again.

Finally here is a statue of our Hero, General 'Fighting Joe' Hooker:


and here is his very own entrance to the Massachusetts State Hall!