Saturday, 5 November 2022

Cold War Commander Warsaw Pact v Americans

My second game of CWC, this time using the newly finished Soviets against Simon's Americans. This time we played points (3000ish) and a scenario, 'Encirclement' where 25% of my units needed to exit from the opposite table edge by turn 12 to win with the Americans appearing on either flank to try to stop me. 

Scattered towns, woods and cultivation somewhere in Germany:


The Soviets rush forwards in numbers with tanks taking up position to cover the advance of the IFV. Some Americans appear on a hill to try to stop them:

The T-72's successfully suppress the American Abrahams:

The mighty Hind-E helicopter is called up but is quickly driven off!

On the left T64's observe American tanks moving through the woods:

The first Abrahams is knocked out! Fire from the T-72's has allowed the BMP-1's to close up, while not as effective as the tanks the BMP-1's produce a lot of firepower at close range:

The T64's continue to hold the left flank, both sides mainly concentrate on suppressing each other:

A BMP-1 blows up as the Soviets press on:

Numbers count! the remaining two Abrahams are destroyed and the way to exit the table is open apart from a couple of Bradleys that won't last long against the massed Soviets:

Another view of the American tanks burning on the ridge line:

The left flank Soviets held up the Americans successfully allowing the rest of the Soviets to exit the table for a win:

Playing with the Soviets was certainly different to the British, and there is definitely a quantity over quality factor. Despite their apparently complicated nature the rules are not that difficult to understand and I feel I'm picking up ideas with each game regarding the choices to be made and combining the various forces.

The scenario also seemed to work well, the game didn't end up being static and it added interest to the game. Hopefully I will get another game in soon and try out more ideas!

Sharp Practice Northwest Frontier British v Afghans

Having tried MWWBK for our second Afghan war armies Gary and I decided to give Sharp Practice a go and see how that worked. After some consideration we went for rifled muskets for the British rather than breech loaders so my force consisted of three groups of Sikh infantry, two of skirmishing Ghurkhas and a mountain gun.

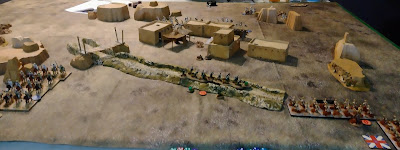
We went for the encounter scenario around an Afghan village:


The Sikh's advance onto the table:

In the distance vast hordes of Afghans appear:

The Gurkhas occupy a gulley and open fire. Hitting on 3's their fire should be devastating but is in fact ineffective:

As the Afghan cavalry attempt to outflank them the Gurkhas continue to shoot badly: 

The Afghan cavalry are now a serious threat and the Ghurkhas are under pressure: 

They are charged by some Afghan Ghazi's:

The Ghazi's are repulsed but several Gurkhas go down as well:

The Gurkhas are down to half strength and barely holding on:

The Gurkha officer reorganises them into a single group:

Fire from the Gurkhas when they were not fighting off the Ghazi's and a group of Sikhs has given the Afghan cavalry more shock than they can cope with:

The rest of the Sikhs press forward to support the Gurkhas:

Masses of Afghans charge home:

They are repulsed by the Sikhs:

The mountain gun finally arrives:

More Afghans pour through the village:

The British attempt to halt them with firepower:

The fail to and the Afghans muster another charge:

Again, it is repulsed and Afghan force morale fails giving the victory to the surviving Sikhs and Gurkhas:

A game which showed that the Afghans are very different to the Dervishes I've used when playing Dave. While the Dervishes fight well and shoot awfully the Afghans are more balanced, shooting quite well but not doing so well in close combat.

Gary's wonderful village didn't in fact do the Afghans any favours as they would probably be better off using their numerical superiority to engage in firefights, because of the buildings they couldn't use much of their firepower and were outshot by the Gurkhas and Sikhs.

The other thing the game really showed was that the biggest issue with SP is that there is little point in moving for groups with decent firearms once you can shoot at something, the British hardly moved from their initial deployment and just shot away at the Afghan attackers. I'm not sure which set of rules I prefer for this war at the moment!

Wednesday, 2 November 2022

Charlie Don't Surf NVA v Anzacs

My second game at the Lard day was 'Charlie Don't Surf', the TFL Vietnam rules. I'd contemplated them when starting playing Vietnam but was put off by the need to produce decks of cards and the requirement for more figures as it is a company based game unlike TMOCB which is platoon based.

As a result I was keen to try the rules at the Lard day and ended up playing as the NVA against two others with ANZAC's. The table was certainly spectacular:


Another view:

The village and paddy fields:

In CDS it appears that neither side knows what the other's objective is (which is sensible assuming you have an umpire). As the NVA I had 7 units and two blanks which I deployed on map in 'blinds'. The ANZAC's had some pre-planned actions. A Gunship deploys a smoke screen:

Next a load of napalm is dumped on an area of jungle!

It looks like the ANZAC's are arriving by chopper and head for a 'hot' LZ, the thin lines of smoke mark disruptive fire from the door gunners:

Another gunship has also arrived:

ANZAC's deploy and are hit by mortar fire from the NVA on the hill taking some losses:

Stung by this the ANZAC's charge up the jungle covered hill and engage the mortar crews. The odds are very much in the mortar crew's favour (which is slightly surprising):

The ANZAC's overcome the odds and slaughter the mortar crews:

An NVA platoon attempts to engage the ANZAC's on the hill while the second group of ANZAC's finally lands (they had been driven off the first time by NVA AA fire):

Gunships and NVA AA guns duke it out:

The ANZAC's at the LZ are still taking losses from NVA fire:

Civilians run for cover. I suspect the ANZAC mission is to round up and evacuate the civilians:

The heroic AA gunners take out one gunship! Another NVA platoon takes advantage of the situation and rushes forward to shoot at the vulnerable ANZAC's still on the LZ:

A third NVA platoon emerges from the jungle behind the ANZAC's (luckily the napalm just missed them) and adds to the fire pouring into the ANZAC's from all sides:

The ANZAC's have been trying to drop another platoon on the LZ but have been repeatedly driven off by NVA AA fire. The platoon already landed has been shattered and victory goes to the NVA:

The visuals for the game were certainly splendid, I was especially impressed by the napalm and smoke screen but the whole thing looked great with the helicopters as well. As for the rules they seemed much more complicated than TMOCB but with some interesting ideas such as the hidden troops and not knowing what your opponent was trying to do! Almost inevitably in these asymmetric games numbers seemed to count for a lot though I suspect the heroic AA gunners would not do so well that often! 

This game was in 15mm on a 6x4 table and was quite crowded so I'm not sure how well it would work in 20mm, I probably have enough figures if I combined my NVA/VC for one side and USMC/ARVN for the other but I'd certainly need a lot more helicopters for this scenario at least. 

I've bought a set of the rules and might look at incorporating some of the ideas into TMOCB. I might try a solo game but I'm not sure I'll actually change to CDS.

Cold War Commander Warsaw Pact

Having finished the CWC BAOR and enjoyed my game against Tim it was inevitable that I'd add some opponents for them, especially as Simon who also plays CWC only has BAOR as well (typical forethought on my part there choosing an army someone else already has!).

I've gone for a rather generic 'Warsaw Pact' force so far with the commonest types to which I can add later if I want to.

Command units:


BMP-1 IFV's:

Motor Rifle infantry for the BMP-1's to carry:

Assorted ATGW, SAM and HMG supports:

The main tank force, T-72's:

T-64's, oddly I think these are actually better than the T-72:

Two AA guns, I wrongly assumed these would be vehicle mounted and it took me a while to figure out they were not:

Two Hind helicopters, impressive in size and festooned with weapons. I bought the transparent discs for the rotors but can't decide if I prefer them to the metal ones so haven't fitted them yet:

As with the BAOR they were relatively cheap, even easier to paint (no camouflage!) and once I'd painted them I decided I wanted some more which I ordered but have not arrived yet.