Tuesday, 9 October 2018

ADLG Alexandrian Macedonian v Later Achaemenid Persian

Another ADLG game this week, this time using my 15mm Alexandrian Macedonians against Gavin's Later Achaemenid Persians. Alexandrian Macedonian is an army with limited choices compared to the later Macedonian and Successor armies so I went for a simple army choice of one command of Companions and light cavalry, one of Phalangites and one of Thracians and Thessalians.

The battlefield had a waterway on my left and an area of fields and plantations on the right. The Companions and Prodromoi deployed on my left under 'Alexander the Ordinary' (while he can be a Strategist in this list it really isn't worth the points upgrading him!)
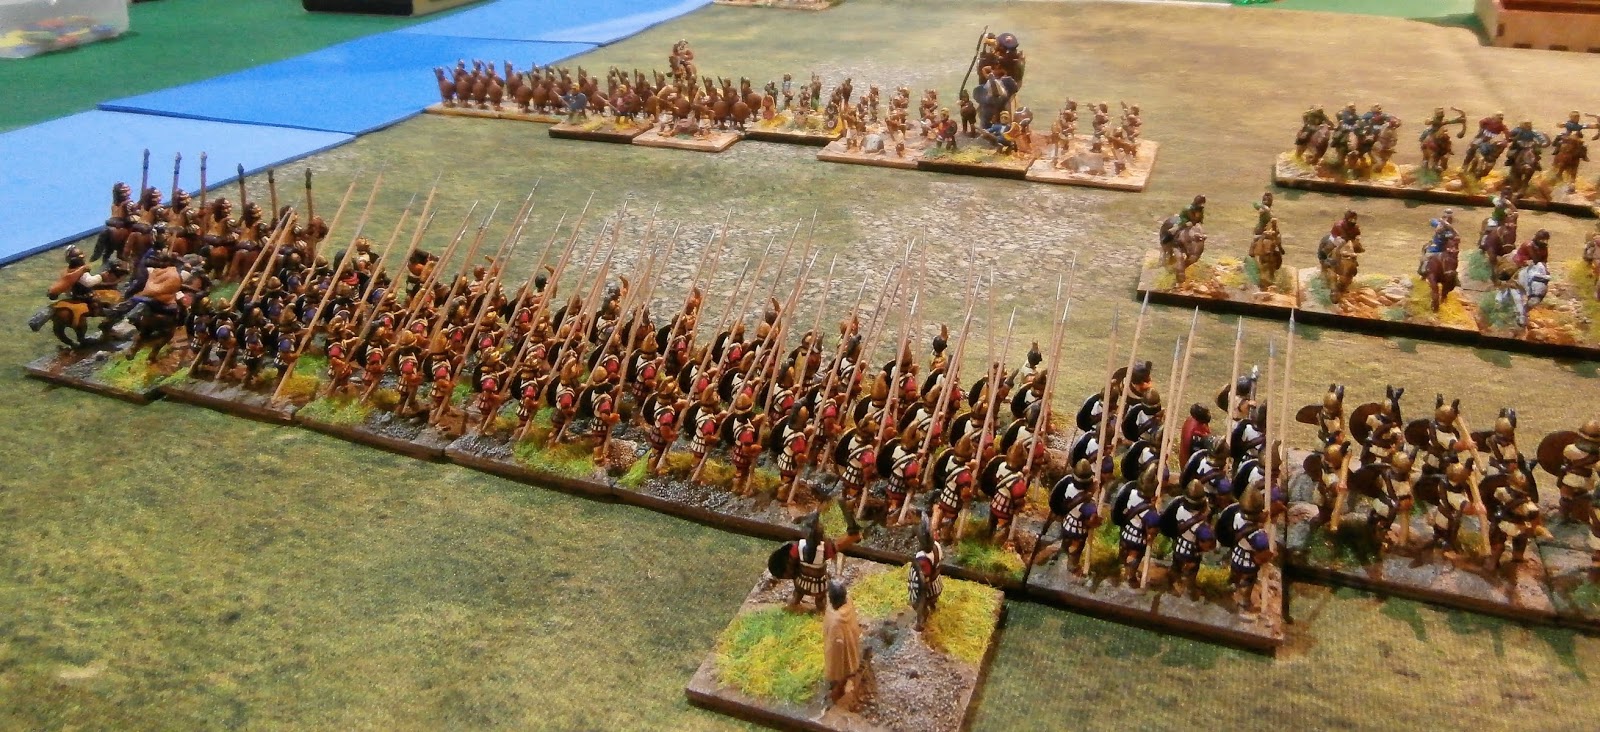
Next up for the Macedonians was the Phalanx with it's supports on the right of the Companions. The enemy can just be seen in the distance, some Thracians and an elephant.
Completing the Macedonian deployment the Thracians and Thessalians under Parmenion formed up on the right in front of the fields. 
The Persian army arrayed for battle with mercenary Hoplites on the right, the Thracians and Elephant in the centre and a sizeable force of cavalry and light horse bowmen on the left.
The Persians advanced quickly especially with their cavalry. Initially I was thinking of trying to swap over the Companion and Thracian commands but it became very apparent that there was going to be no time for such fancy movements!
 The full Macedonian battle line with the skirmishers on both sides coming into action.
On the right Parmenion attempts to hold up the superior Persian cavalry force which is aggressively advancing even into the plantation and fields.
The two lines clash! The Companions have held back as fighting Hoplites is not a good match up for them giving both sides an overlap at one end of the line. The initial combats don't go well for the Macedonians even though they have better factors and several units take hits, though the Persians do take some hits themselves.
On the right the Thracians are starting to take damage from the Persian cavalry archery. The Thessalian cavalry have moved into the plantation to try to support the Thracians but there are still some Persian cavalry unengaged who are beginning to outflank the Macedonian line.
The combat continues between the Phalanx, Companions and the Persian Hoplites and Thracians. One unit of Hypaspists has fallen to the Hoplites and the elephant is about to destroy part of the Phalanx.
On the right the Thracians keep taking hits from the Persian shooting and the Thessalian cavalry charges home against more Persian cavalry. Despite being overlapped the Thessalians do well and inflict a hit on the enemy.
The combat by the waterway rages on. Some Persian units have fallen but the Phalanx has also been damaged.
The elephant breaks through the Macedonian line! Phalangites and Companions continue to battle for supremacy on the left while the Phalangites to the right of the elephant have finally overcome their opponents.
One of the Agrianian javelin men behind the Phalanx has rushed the elephant and toppled it at last. The remaining light infantry dart about trying to weaken any surviving enemy, both sides have taken a lot of losses in this area.
On the right Parmenion and his force have also taken some losses but have held up well, with some of the Phalanx now free to move to support them help is in sight.
Both sides are now a few hits from breaking with units scattered all over the place. In the background a lone Prodromoi makes a dash for the Persian baggage, some Persian light cavalry try to cut them off but are not close enough.
The Prodromoi charge into the undefended Persian baggage winning the game for the Macedonians! "Alexander the Ordinary" can upgrade himself to "Great"!

This was a game of two halves, initially Gavin had much better die throws than me which reversed as the game wore on. It was an enjoyable game which could have gone either way but I remain unconvinced by ADLG, as ever it is fun to play now and then but I wouldn't want to play it every week.

Saturday, 6 October 2018

Maharbal and Mago!

Completing the new generals for the 28mm Carthaginian army from 1st Corps first up we have Maharbal and his standard bearer:

Not quite sure about the colours for these two especially the green cloak on Maharbal.

Finally Mago, no standard bearer for him as I only had two Carthaginian standard bearers:

I think the colour scheme for Mago worked better, but then he has no cloak so it was a simple choice of tunic and horse colour.

Hopefully they will get their first outing in a couple of weeks...….

Thursday, 4 October 2018

Rommel: Late German v Allies, Breakout scenario

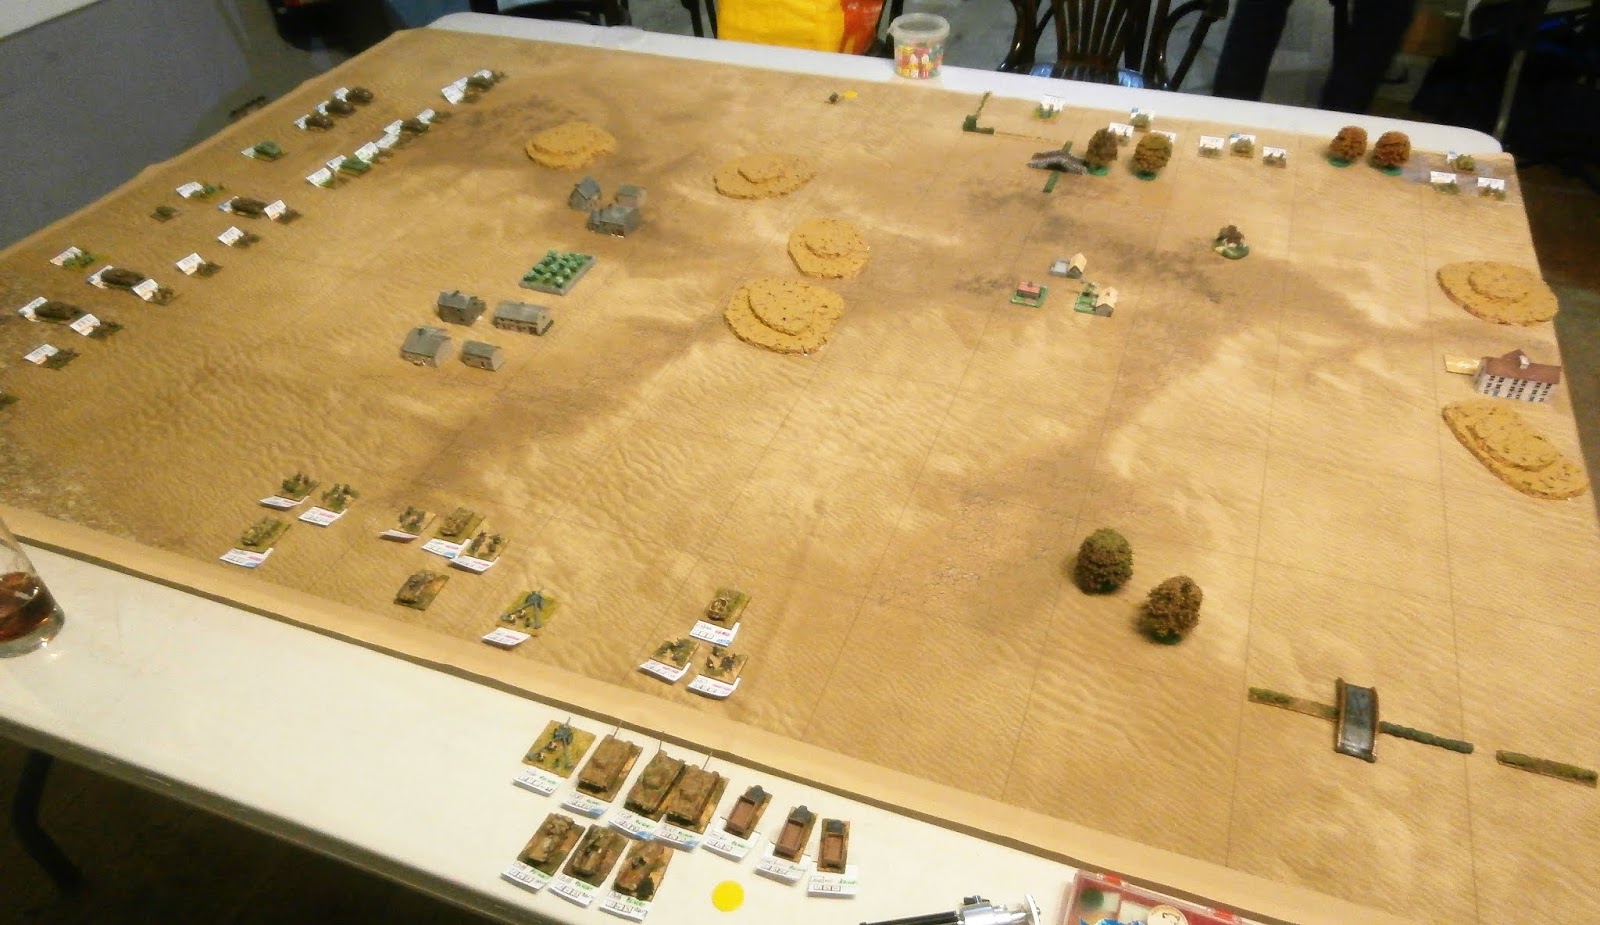
Having played all the scenarios in the rules with mid-war Western Desert armies in 3mm Andy and I thought we would have a change and play the Breakout scenario again with Late War Germans trying to stop the allies breaking out. We used Andy's 10mm figures for this game though unfortunately the only gridded cloth we have is the desert one so the battlefield looked a bit arid!

My force consisted of an Infantry KG supported by some Stug's, a Volksgrenadier KG with some attached Marders and a Panzer Grenadier KG equipped with Panthers. Andy's British consisted of a Paratroopers Brigade supported by some Churchills and a mixed Armoured Regiment of Shermans and Comets.

I wasn't too sure how to use the Germans to the best advantage, assuming that I'd have to attack the Infantry and Volksgrenadier KG's seemed weak and slow to move.

In this scenario the Germans have to keep 1/3 of their force off table to arrive as reinforcements while the remaining 2/3 are deployed on the flanks of the battlefield. Initially I was going to use the Volksgrenadiers as the reserve but decided to use the Panzer Grenadiers instead as they would be able to choose where to arrive and attack swiftly when they did.

The battlefield had a number of towns, hills and woods with the British objective being a town at the opposite end of the table. To win they had to hold the town until nightfall and exit at least 7 units from the table edge where the town was

The Para Brigade was deployed on the right and the Armoured Regiment on the left for the British.
 The Germans deployed the Volksgrenadiers on the right flank of the British with the Marders.
 The British Armoured Brigade ready to roll!
 On the British left flank the German Infantry KG deployed.
The British Armoured Brigade and around 1/3 of the Para Brigade dashed forward for the objective. The remaining 2/3 of the Para Brigade held back.
The idea behind holding this much of the Para Brigade back was to try to maintain a line of communication, isolated units are much harder to move.
Using more Op's to move the British take the objective with the Armoured Brigade.
After the initial moves by the British the Germans got to react. Elements of the Infantry KG on the left attacked a lightly held town not far from the objective and more infantry attacked some Shermans in mountainous terrain near next to the objective.
The attack on the town was successful with the German infantry moving in to take it giving the German forces an outpost behind much of the British army. The Shermans took some hits but held on to the mountains.
Meanwhile the Volksgrenadiers advanced to cut off the forward British forces from their line of communication.
The British had placed much of their artillery on a hill in the centre of the table, with little support nearby the Volksgrenadiers moved towards them to assault the hill.
All the British forces near the objective were now isolated. The British counter-attacked against the German Infantry KG but met with only limited success, causing some German losses but taking several hits themselves.
The Germans held on to the town in the middle of the British force.
The Para Brigade elements which had stayed back also attacked the Volksgrenadiers, again with little success.
At this point the Panzer Grenadier KG appeared on the British left flank. The British units were isolated and had already taken losses so it seemed unlikely they would be able to hold up the Panthers and Panzer Grenadiers for long.
Given this the British conceded that they would not be able to break out and would have to attempt to escape individually or surrender.

This game went better than I thought it would, deploying the Volksgrenadiers and the Infantry KG initially worked well as they isolated and weakened the British prior to the arrival of the Panzer Grenadiers who could also choose the best place to attack from.

I think Andy left far too much of his Para Brigade back to try to stop his attacking force being isolated. Having played this a few times now I don't think you can prevent your main force being isolated so it is best to accept this and put everything into the attack with nothing holding back. In our last game that worked well for me when I was the attacker. Having said that Andy did have miserable combat die rolls which probably didn't help.

Compared to the 3mm tanks we have used previously the 10mm ones did look nice but there were not many of them. You could certainly see the infantry bases better!

Monday, 1 October 2018

Blucher 1813 Prussian v 1812 French

Having enjoyed my last Blucher game against Ted I arranged another game, this time against Sean's French army commanded by Napoleon himself. Sean wanted to use 300 pts so I chose my 1813 Prussians with Blucher himself as C-in-C, three fairly equal corps of Prussians and one Russian corps. We dispensed with Scharnhorst again and played a pick-up game, I won the initiative and decided to attack.

The Prussians had two objectives, a hill on their right and a town on the left. The French objective was part of the large town on the Prussian right. The French deployed right across the table defending both the Prussian objectives. Blucher decided to try to take the town on the Prussian left initially, deploying the 3rd corps on the left, the 1st and 2nd Corps in the centre and placing the Russian corps defensively on the Prussian right.
3rd Corps advanced quickly on the left.
1st Corps moved up to support them and part of 2nd Corps deployed. The Prussian heavy artillery in the centre was placed to bombard the town prior to a planned Prussian assault.

In response the French started to move some Young Guard infantry from their centre to their right and deployed the Guard foot artillery to start bombarding the Prussians.
Undeterred the Prussian 1st and 3rd Corps continued to advance, with the Prussian heavy artillery bombarding the town successfully inflicting heavy losses on the French garrison.
The cavalry of the 3rd Corps then charged home, the Uhlans into some French Allied cavalry and the Dragoons into an unprepared French line Division.
The Uhlans brushed aside the French Allied cavalry but the Dragoons were repulsed by the French infantry.
 1st Corps continued to push forward as rapidly as they could.
On the Prussian right some more French Allied cavalry scouted the Russian positions but apart from that this section of the field was quiet.
The combat around the town on the left became more intense with both sides taking losses and the French defending the town being weakened by artillery fire.
 More French units were being drawn into the fight on the Prussian left, thinning out their centre.
The Prussian Reserve infantry attempt to storm the town. They almost manage it but are forced back, leaving the defenders almost spent.
 As the French centre thins out 2nd Corps starts to advance on the right centre of the Prussian line.
The Russian Corps also began to advance slowly, putting more pressure on the French.

The battle rages on for control of the town on the Prussian left. The French are faltering now but many Prussian units have taken losses.
Dragoons charge home on a weakened French infantry Division, breaking it. However, the French have managed to extricate the spent Division holding the town and replaced it with a fresh Young Guard Division. It certainly will not be easy to shift them!
 Further Prussian attacks in the centre continue.
On the Prussian left only a few scattered units of French now survive but they do hold the all important town. In the distance the French Guard cavalry can be seen moving up further thinning the French centre.
 French Dragoons attack in the centre breaking some Prussian cavalry.
Blucher now decided it was time to attack on the right, the French having seriously weakened their forces in the area to support their right flank. He therefore sent the Russians forward together with much of the 2nd Corps
There are few French defenders on the hill now, the artillery is almost out of ammunition and two of the three remaining Divisions have little strength left.
Urging his men on to one last effort Blucher pressed forward again.
On the left meanwhile the French Guard cavalry pushed back the Prussian Guard cavalry but with hardly any French forces left on this flank it seemed too late to have much of an effect.
 The French centre has pretty much gone now.
The hill on the Prussian left has been almost cleared of French and will soon fall to the advancing Prussians and Russians.
 More troops move up directed by Blucher himself!
At this point the French had very few units left and had no hope of stopping the Prussians and Russians on the right. The Ogre admitted defeat and withdrew his shattered forces, revenge was sweet for the Prussians and Russians!

This was another Blucher game that really felt like a Napoleonic battle. My plan (partly inspired by my last Blucher game against Ted!) to send a large force to attack the town on my left drew much of the French army into the fight on that flank and, while I did not take the town in the end, weakened the French centre and left so much that the relatively fresh Russians and Prussian 2nd corps could strike the decisive blow towards the end of the battle.