Thursday, 16 December 2021

ADLG Early Imperial Roman v Gallic

This week's game saw my Early Imperial Roman army take on Simon's Gallic horde in a 15mm ADLG encounter. I opted for a Western-themed army with one cavalry command, a strong Legionary command and a mixed Auxilia/Cavalry command.

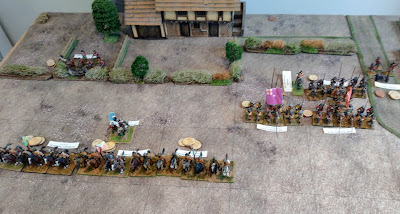
The Romans won the initiative and decided to attack in the plains, managing to get a river down to narrow the table and with the rest of the terrain falling nicely for them. The cavalry command deployed up against the river, the Legionaries in the centre and the Auxila on the right:


The deployment looked good for the Romans with my cavalry facing some weaker Gallic chariots, the Legionaries against medium swordsmen and the Auxila tasked with holding back the rest of the Gallic horde as long as possible:

The Gauls rush forward, their centre of very tough elite heavy swordsmen might have problems getting into contact though with the faster moving and impetuous medium swordsmen on either flank:

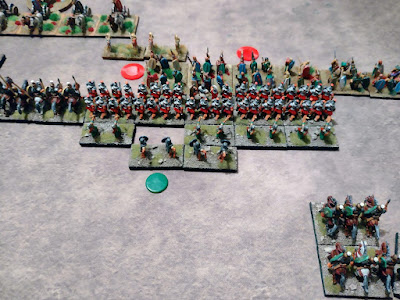
Legions and wild Gallic warriors clash! the Legions have an overlap on one flank while the Gallic heavy swordsmen can't quite make it into overlap for the Gauls:

The Legions hold the initial Gallic charge and wound a couple of elements at no loss to themselves:

The next round of combat sees two Legions breaking their opponents cutting down swathes of Gauls. The Romans have a few shooting hits but other than that are undamaged:

The Roman cavalry are assailed by more javelin throwing chariots and hits start to mount up:

Meanwhile on the right the Auxilia have been nervously watching the rest of the Gallic army close in on them. A few skirmishers have been sacrificed to slow the Gauls down but the crunch is approaching!:

On the left and in the centre things continue to go well for the Romans, most of the Gallic medium swordsmen have been dispersed and the cavalry is starting to cut through the chariots:

On the right one Auxilia has advanced to protect the Legion's flank. The rest of the Auxilia are about to be hit by a wave of Gallic warriors though:

The last few Gallic elements are mopped up on the right, the Gallic general is about to fall in combat with his chariots:

In the centre the Legions are turning to outflank the Gallic elite warriors. The Auxilia do well and mostly hold the Gauls charging them inflicting significant losses:

The last few Gallic chariots struggle on:

The Auxilia continue their good work despatching more Gauls:

It's all over for the barbarians as the Gallic army breaks:

I think that this game was mostly decided on the terrain and deployment, the narrower frontage allowed the Romans to have one secure flank on the river and to delay much of the Gallic army getting into combat on the other flank with a few skirmishers. The Legions ended up facing the much weaker Gallic medium swordsmen while the very powerful elite Gallic heavy swordsmen found it hard to get into contact. I suspect I also had the best of the combat dice though not perhaps the shooting ones!

Hopefully Simon and I will get in a few more games in the New Year, since it was over a year since I'd seen him was great to play again.

Sunday, 12 December 2021

ECW For King and Parliament Scenario 2 "Widbrooke Common" Royalist v Parliamentarian

 Dave and I played the second game in the "Marlowe to Maidenhyde" campaign, this one entitled "Widbrooke Common". In this scenario the Royalists have just crossed a stream when they are attacked by the Parliamentarians. 

The Royalists are stronger in Horse and weaker in Foot than their opponents with a number of the dreaded "untried" units (all the Foot and around 1/3 of the Horse).

The Royalist right flank Horse, facing a maze of hedges and a village:


Sir John Boulters with his Lifeguard and Foot in the background. It appears King Charles has leant Sir John his Standard!:

The left flank Horse in more open ground opposing their Roundhead counterparts:

The whole Royalist army deployed with their opponents ready to engage:

The Roundheads being their attack:

One Royalist Horse unit outflanks the Roundheads while a second charges into contact:

The Royalist right flank Horse advance but it isn't clear what they can achieve. The village is held by a Royalist Forlorn Hope for now at least! The Royalist Foot have also advanced, they are pike-heavy battalia so are better off in combat. They leave Oxford Musketeers behind as they have been dispirited by artillery fire:

As seems to be the usual case the charging Royalists gain a small initial advantage but fail to break their opponents:

The second Roundhead cavalry unit charges and breaks the untried Royalist horse they are facing. The third Roundhead horse ignore the infantry to their front and turn to support their colleagues:

The initial Royalist cavalry break their opponents, so far it's one unit down each:

Both victorious units gallop away in pursuit leaving the two units that were hoping to exploit a flank facing each other!:

In a rare burst of movement Sir John leads his Bodyguard to the opposite flank to help out his failing cavalry wing. In the centre the foot are about to clash:

The untried Royalist foot are unhappy at being fired upon and both lose a hit. The Royalist right flank cavalry still mills around with nothing much to do while the Forlorn Hope shoots it out with Roundhead foot:

More cavalry clash on the left:

The Royalist Purple and Green Regiments charge home! Being pike-heavy they have an advantage in melee but they are already suffering one hit. The Purple Regiment breaks and runs from a combination of defensive fire and combat:

Sir John and his Bodyguard charge the pursuing Roundhead cavalry in the flank breaking them:

The Royalist Red regiment moves up to replace the broken Purple foot. The Green regiment is on the verge of breaking:

Roundhead Dragoons shoot enough of the pursuing Royalist horse to break them:

The Red regiment breaks. The Royalist army is beginning to disintegrate:

The Greens flee as well!:

There is still time for another Royalist triumph though as Sir John and his men charge the sole remaining Roundhead cavalry in the rear while they are already engaged frontally. The Roundheads rout:

The respite is short though as Roundhead foot shoot up one of the right flank Royalist horse units to break the Royalist army:

A fun game and great to get the figures onto the table again. Dave had lost 9 out of 14 points so I was at least two units from breaking his army and in the end I think it was a comfortable win for him.

I'm still not that keen on the rules (but then I really liked FoGR so that probably prejudices me a little), they seem quite clunky with little scope for manoeuvre other than ploughing forward (which may be realistic of course) and the utter lottery of the "untried" category especially for the smaller two-hit units which can break very easily.

I think I've also been spoilt a little on the campaign front with the CoC PSC making CoC games much more interesting and Gary's SP campaign greatly improving SP as a game. This FK&P campaign isn't really a campaign at all, the results of each game have no influence on the next and, in reality, you are just playing a number of games where the army composition, deployment and terrain are pre-set so all you do is advance to combat taking out much of the game. Dave thinks that perhaps this is to introduce you to the rules slowly which it does but I'd hope for more from a campaign though really.

Despite the above I've enjoyed both games so far, the armies look great and I'm looking forward to playing more (and perhaps persuading Dave to try FoGR!) especially if we can pick our own armies and deployment (yes I will drop all the untried troops!).

Tuesday, 7 December 2021

Chain of Command PSC "Many Rivers to Cross" Game 3: "Farm and Road"

With two initial victories the Soviet counter-attack is going well. The next game against Gary's Germans sees the Germans attempting to blow up two culverts to slow the Soviets down.

The map is quite cluttered with a number of streams, fences, woods and buildings leaving few open areas to cross. With 12 support points this time I went in for an infantry gun (4), the ever-reliable MMG (3), the inevitable pre-game barrage (2), a flamethrower team (2) and a single entrenchment:


It appeared that the Germans had to blow up the nearest two culverts which wasn't going to be easy at all. They deployed a section covering the one nearest them. In response Soviets deployed into the forest opposite and by the road entering from the Soviet side of the table:

The Germans await an attack:

A couple of double moves result in the Soviets rushing forward to take the fence line next to the second culvert:

A German squad deploys near the bridge and opens up on the Soviets behind the fence with little effect. The Leytanant rushes up the second Soviet section to support their comrades:

Both sections line the fence and prepare to shoot it out with the Germans:

Despite being in hard cover German casualties are heavy and shock mounts quickly:

The Soviets take some shock but no other damage:

The German LMG team is wiped out and the rifle team are pinned:

The rifle team breaks fleeing the entrenchment:

Another German section appears by the house to continue the fire-fight:

They fare no better than the earlier squad and again the LMG team is wiped out:

More fire wipes out the rifle team leaving just the Corporal standing:

At this point Gary decided very sensibly to withdraw. The Germans had no luck at all, throwing many 6's for their death rolls and failing on several occasions to bring on more troops through the Soviet "Wrath of Gods" barrage. The Soviets on the other hand had all the luck with several multiple phases and only a single casualty.

I'm finding the large Soviet squads (13 men!) combined with their lack of teams which means they can run without accumulating shock (or having a small LMG team killed), the ability to entrench the entire squad for only one SP and the very effective pre-game barrage great fun to use, it really encourages you to be aggressive with them!

The scenario, "going with a Bang" from the Blitzkrieg book isn't one of the better scenarios either, it is hard to see how it is possible to blow up structures so near the enemy and, in this campaign at least, even if Gary had blown them up it wouldn't have helped him anyway as all it results in is the Soviets not having vehicles which they can't anyway until turn 5.

With only two maps left now and both German platoons rather battered it is looking tough for the Germans while the Russians are on a roll!