Saturday, 8 October 2022

Rommel 1940 British v German Scenario 5 'Recon in Force'

After succeeding in the 'Evacuation' scenario in the last game this one saw my 1940 British attempting a 'Recon in Force' against Andy's Germans.

In this scenario the Germans have to defend nine objectives, four of which are dummies. To win the British have to capture any three 'real' objectives. My force consisted of two infantry brigades and an armoured brigade well supported with artillery.

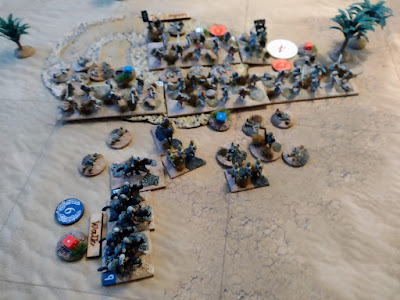
The British prepare to move. Unfortunately, I had brought along the only cloth I have that does not have a grid on it so we had to improvise with rather garish counters to mark the grid lines!


The first assault against a potential objective:

The first objective falls, unsurprisingly it is a dummy but the British press on deeper into the German lines:

A second objective falls, this isn't a dummy so two more to go:

The line of battle:

Resistance by the Germans is stiffening but a Matilda sneaks through their lines and takes another actual objective!

A third objective is taken in the town on the right. It's another dummy though:

The British drive forwards on their right:

A rare German counter-attack:

Progress on the left is slower though:

A breakthrough! If the objective behind the river is real (unlikely though that is) take that and the British will have a win:

It's a dummy unfortunately. The Germans have done an excellent job of drawing the British towards the fake objectives then pulling back to defend the remaining real ones in depth:

Attacks go in against the last objective the British might perhaps take, the wooded fields on the left:

They make no headway though and the Germans have plenty of reinforcements left to help hold on:

At this point I conceded defeat. With only a couple of turns left, few fresh infantry units to assault the terrain and Andy having numerous Op dice to defend his position I couldn't really see a way forward for the British.

Andy and I have played an awful lot of Rommel now (maybe around 20 games!) and, I think, have both become quite proficient at playing. One thing we have noticed is an increasing tendency for the defender in the scenarios to just sit back as, in general, there is little point in launching counter-attacks and shuffling troops between the objectives while maintaining your Ops dice is much more efficient. One solution might be to try some 'historical' scenarios though it is noticeable that these mostly consist of vast numbers of infantry and few 'toys' like tanks and artillery!

Sunday, 2 October 2022

Sharp Practice Sudan Dervish v British

Game two of Dave and I's mini-Sudan campaign saw the British, having been thwarted in their efforts to rescue the missionary and his daughter in the first game, attempting to fall back to their supply base on the Nile:


Not having a paddle steamer, we just used a baggage camp instead guarded by a detachment of the Naval Brigade supported by a maxim machine gun. Dave took the British again while I had the Dervishes. The British start on the left of the map and the Dervishes from the top left.

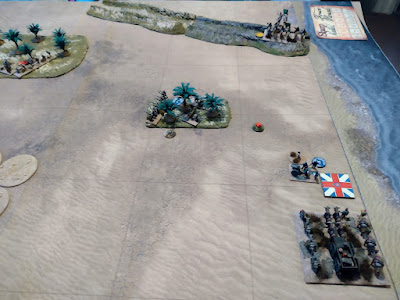
The British column arrives:

They are so far uninterrupted:

Not for long though as a mass of Dervish warriors attempt to cut them off before they reach the Nile:

Buoyed by their victory in the last battle and leaders who are figures not counters the Dervishes are full of fight: 

Another mass of Dervishes arrives while the British deploy into the palm grove to meet the attack:

The Dervishes rush forward, with hardly any firepower overwhelming the British in a charge is the only way forward for them:

The British open fire cutting some Dervishes down and reducing their fervour but not really slowing them down:

The rest of the Dervish army has been a bit split up having further to move and the British have turned to face it. The British cavalry have been scared off by a few Dervish skirmishers surprisingly accurate fire removing one dangerous risk to the warriors:

Dervishes storm into the palm grove! Hopefully their numbers and fanaticism will overcome solid British defence:

 The British are forced back with heavy casualties:

The Dervishes follow up to finish the job:

The remaining British flee taking their force morale down to zero and ending the battle:

The Naval Brigade have been exchanging fire with some Dervish skirmishers and watching carefully as camel riders attempt to outflank their position. How many of the fugitive British column will make it back to the Nile?

Another victory for the Dervishes, achieved I think with fewer casualties than last time. In the post-game chat we both felt it seemed very difficult for the British to stop the Dervishes despite the firepower of the British. 

With the addition of 'fervour' to the Dervish warriors they move faster and absorb shock very well allowing them to contact the British in one solid group, exacerbated by the fact that I had noticed the Dervishes could 'step out' for a single command card giving them the potential to move huge distances so long as they can stay in a single group of mobs.

However, I'm not convinced yet things are hopeless for the British, when we first started playing CoC it seemed impossible to attack but gradually we worked out the tactics to overcome most of the problems and produce a more balanced game.

In this case as the British you'd need to try to break up the Dervish mobs in some way and make sure they can't rush you easily from terrain (easier said than done of course!). One thing I did notice was that the British can fire a 'crashing volley' for only one command card which might be worth doing for their initial volley at least to try to reduce Dervish fervour before contact. 

The third and final game of the series has the British landing a force to try to rescue the missionary held captive in an old fort on the Nile by the Dervishes. For some reason the Dervishes get less units in this game so perhaps they will have a tougher time!

Thursday, 29 September 2022

Sharp Practice Sudan extra figures

Having just managed to finish the BAOR for CWC in time to play a game next up were some additions to my 15mm Sudan armies to make them more suitable for SP.

The Mahdists were lacking in command bases so I added three commanders on foot to add to the four mounted I already had:


The British too needed some sergeants and officers on foot (plus two heliograph groups):

Again for the British two groups of Naval Brigade plus officers. Most references seem to think they wore blue uniforms (though some do suggest white), these were painted in white as it was quicker basically!

I also added some more casualty figures for both sides. The paint was barely dry on the Naval Brigade before they went into action for the first time!


Cold War Commander BAOR v Warsaw Pact Polish

Tim kindly agreed to give me an introduction to Cold War Commander with some of my newly painted BAOR taking on his Warsaw Pact Polish. We didn't use points values or play any particular scenario as it was very much a learning experience for me (having read the rules I still didn't have much of an idea how it played!).

The British prepare to halt the Polish onslaught somewhere in Germany:


Chieftains and British infantry hold the line:

Large numbers of Polish tanks appear in the distance. Two of them are knocked out as is one Chieftain:

Hordes of Polish tanks attack!

On the left due to poor command rolls the Polish infantry have made little progress:

More Polish tanks are destroyed or suppressed:

An airstrike by the Harriers! It has little effect though:

The Polish finally call up their own air support in the form of a scary looking helicopter:

Having failed with the Harriers two Jaguars try their luck:

With the Polish infantry still refusing to move the British redeploy three more Chieftains to support the lone one on the right:

It's a Polish air strike this time:

Polish tanks attempt to rush the British, the situation looks bad for the British, but they do at least have Harrier support:

Recovering from being suppressed the Chieftains are back in action:

Ten Polish tanks are burning wrecks leaving only two in action against four Chieftains. The Polish infantry have finally advanced a little but with no real armour support the Poles withdraw and the British hold the line:

After a few moves I picked up how to play (and realised how much I was doing wrong!) and we used most of the various troop types (armour, air support, artillery and AA fire) though the infantry didn't get into action really.

With the Poles being second-rate troops, the British have a considerable advantage in command and control allowing them to do more while the Poles struggle to activate regularly. The British also have better kit with the Chieftain being much superior to the Polish tanks which is balanced to some extent by their superior numbers.

As a learning game it was great, I enjoyed playing and would like to play again. The aircraft and artillery didn't seem very effective but then I suspect you have to combine attacks much better than I did. I might even invest in a Warsaw Pact army to give me a choice of sides and also to play solo games, rather like TMOCB Vietnam rules I think CWC would suit solo play.

Tuesday, 27 September 2022

Cold War Commander British Army of the Rhine

With the recent release of version two of Cold War Commander by Pendraken there has been a resurgence of interest in this period at the club. It's not something I've had much interest in really but, caught up in the enthusiasm and putting in an order to Pendraken for some 10mm tanks anyway, I ordered a copy. 

When they arrived the rules seemed rather complicated and the army lists utterly incomprehensible! So rather than try to flog through them I just asked Simon what to buy for a 6mm British army. A couple of orders to Heroics and Ros and Scotia Grendel followed giving me the nucleus of a mid 1980's British force.

Some HQ bases and forward observers:


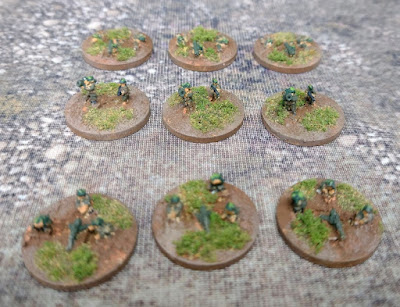
Nine infantry bases:

FV432 to transport the infantry:

Infantry supports, HMG, Blowpipe and Milan:

Heavy metal! 12 Chieftains:

More support, Scimitar, Swingfire Strikers and Starstreaks (which apparently were not introduced until 2000 and I should have bought Rapiers!):

Air support from two Jaguar GR-3 (decals to be added!)

You can't have a British army without Harriers:

Being 6mm the army was cheap, easy to paint (apart from the infantry to some extent) and I think looks nice enough especially once I get some decals for the aircraft. I also have two Lynx and one Gazelle helicopters to add to the force. The next part sees me attempting to get an idea of the rules in a teaching game!