Thursday, 29 May 2025

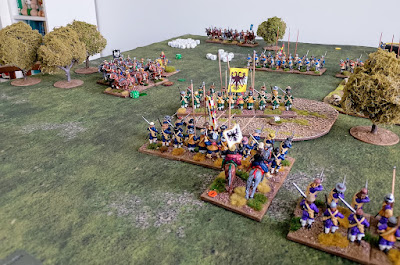
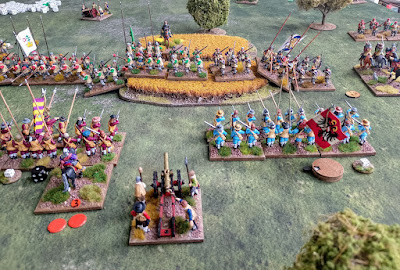
Never Mind the Matchlocks Imperialist v Swedish game 2

As predicted another game of Never Mind the Matchlocks took place quite quickly with Dave and I basically repeating the previous game:


Swedish Horse engage Imperialist Cossacks:

Surprisingly the Cossacks gain the upper hand but the dastardly Swedes have another Horse unit ready to join in the fight:

Disaster for the Imperialists as the Cossacks rout and the neighbouring Cuirassiers decide that they will rout with them in sympathy: 

The foot have not made much progress so far

With their left flank Horse routed the Imperial Foot need to do some redeploying:

More mounted action on the right flank:

The Imperial foot on the left neutralise the Swedish mounted:

Push of Pikes! 

Heavy fire all along the line:

As last time we finished at this point having played for around four hours. Again it appeared very difficult to actually break the foot units though, as we used the VP system this time, both armies were not that far off breaking. Next time we will probably play to a points total and introduce varying unit quality.


Never Mind the Matchlocks Imperialist v Swedish

Having tried and failed to get anyone interested in playing FoG-R again, being unwilling to rebase the armies for ADLG-R then been not that impressed by 'For King and Parliament' Dave and I thought we would try out the 'Never Mind the Matchlocks" variant of the popular "Never Mind the Billhooks" rules for the ECW/TYW. Dave took the Swedes while I had the Imperialists.

For an initial game we just lined up two similar armies with all the units 'average' to see how the rules played:


Swedish Horse crush their Imperialist opponents:

The Imperialist left advances:

Pike and Shot close while the Swedish cavalry rush forward in pursuit:

Fire is exchanged:

More infantry action:

Imperial Cuirassiers unsuccessfully charge Swedish foot:

At this point we called it a day with neither side having suffered serious losses. The foot units seemed very difficult to break while the mounted were quite fragile (One routed without taking any losses!). There were probably too many troops for the table size and the vanilla nature of ECW/TYW armies didn't help when we had two very similar armies but on the whole it was an interesting game and I'm sure we will give it another go.


Chain of Command Japanese v British

Not having played Chain of Command for a while and with Jerry having painted up some 20mm Far East British we thought we'd play a game to get back into it before Version 2 of the rules was available.

I used my Japanese and we took a scenario from the 'Jitra' PSC called "Roadblock at Nangka" where the Japanese are facing a delaying action by the British and have to capture the British Line of Communication marker.

The Japanese deploy from their forward JoP hoping to rush the British before they can react:


Immediately the plan collapses as a British section appears almost on the flank of the Japanese:

More British appear and casualties/shock mount for the Japanese:

More Japanese arrive:

They are supported by a Chi-Ha tank:

Which promptly explodes when hit by British AT gun fire:

At this stage the Japanese decide to withdraw. As this miserable defeat had taken so little time we decided to have a repeat game!

This time the Japanese prepare more carefully with sections deploying on overwatch on the jungle line together with the tank: 

This gives them a much improved firebase for when the British do appear:

A complete turn around from the first game as this time it is the British who suffer heavily and withdraw:

Two games that really show the value of preparation in CoC! The first one with my hurriedly put together plan to rush the British failed dismally (though it could have worked...), the second where I prepared carefully and did much better. 

It was nice to get back into CoC and with the revised rules coming out soon there will probably be a revival of interest in playing again.


Wednesday, 14 May 2025

ADLG-R Imperial Austrian v Ottoman Turks

ADLG-R this time with my Austrians taking on Simons Ottoman Turks. The Austrians were please to get a waterway and a large hill, promptly deploying in the gap between them in at attempt to neutralise the Ottoman's greater maneuverability: 


The Austrian centre and right advance quickly:

The Turks move through the enclosures:

On the right the Austrians press their advantage in numbers:

The Austrian cavalry charge:

Austrian infantry and Janissaries exchange fire:

The situation looks good for the Austrian right:

Grenzers join in the firefight from the hill:

Turkish cavalry join in but take some hits:

On the right the Austrians have mostly dispersed the enemy:

They are also winning the firefight in the centre:

Janissaries charge:

The charge fails and the firefight continues:

The Turkish left flank has been destroyed:

Grenzers continue to hold the hill:

It's all over for the Ottomans as they collapse to a heavy defeat:

A comprehensive victory for the Austrians possibly aided by some poor scouting/spying from the Ottomans (Simon thought I was going to use Polish, I said I'd use Polish or Austrians!). The battalion guns and having a couple of elite units meant we comfortably outshot the Ottoman infantry and only a couple of units got into contact to use their 'impact' advantage. The terrain certainly helped as well, greatly narrowing the fighting frontage and preventing the Ottomans using their much more numerous cavalry effectively. 


ADLG Early Carthaginian v Pergamon

More ADLG practice for Gordon, this time my Early Carthaginian took on his Pergamon army. Gordon deployed right across the table while I went for a more compact position:


No problem with allied generals this time for Gordon, the Pergamon army advances quickly while trying to outflank the Carthaginian right which redeploys to face them:

There are some good things here (warband facing spearmen) and some bad (chariots which are great against warband behind cavalry who are not!):

Infantry lines crash into each other! The Gallic warband gets the better of it's opponents:

Perhaps the chariots will get their chance once the cavalry have been destroyed? 

Perhaps not as the chariots are forced to scuttle away:

Fighting rages on with both sides taking losses:

Finally the chariots manage to get into the fight and the Pergamon army is broken:

A close game that was great fun, my chariots drove around aimlessly for ages but finally managed to make a difference at the end. The other notable thing was the abysmal performance of the elite, armoured, very expensive Carthaginian Citizen Spearmen who put up no fight at all!