They are really a FOG-R army but I painted up enough extras to be able to sort of use them in Blucher as well.
Gordon is a tricky opponent in the Scharnhorst phase and has had a lot of success mopping up VP using a column consisting of a single unit of cavalry. I thought I'd try to discourage this idea by trapping the small column and forcing it to fight. The plan worked to some extent at least:

The battlefield was the two squares in the last row and upwards meaning I had two commands on table and two which could not reach the battlefield at all. Gordon only had his single unit of cavalry on table plus a unit of scouts but had two more columns coming on if he could survive on table long enough:

The Persian cavalry fled to a hill in the corner but were quickly attacked by the Ottomans. The first Persian unit is driven back allowing the Ottoman cavalry to follow up behind the second Persian unit:

The remainder of the Ottoman cavalry hit home wiping out the Persian cavalry and winning the battle in only two moves!
So having finished so quickly we decided to play a second game this time without Scharnhorst. I had choice of attacker or defender and elected to defend:

The battle opened on the Ottoman right where they advanced against what looked initially like a weaker enemy but was quickly reinforced by the Persians:

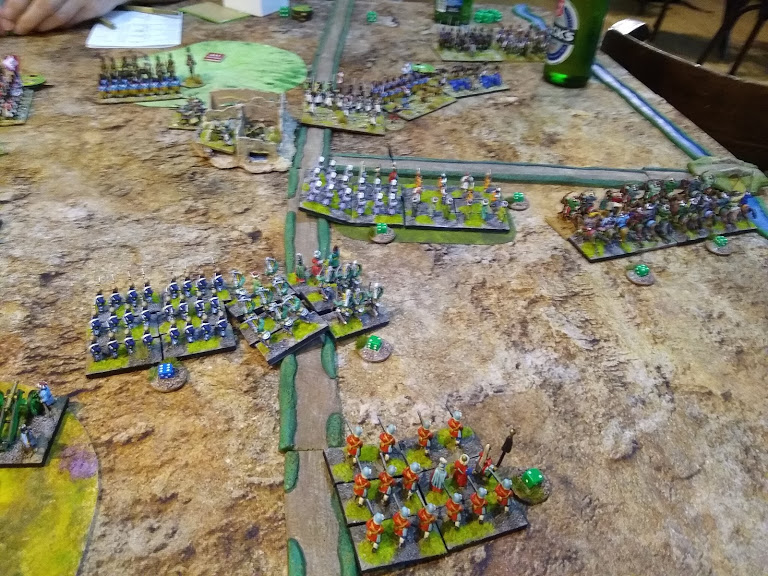
The Persians themselves began to advance in the centre:

Some of Gordon's beautifully painted and historically accurate Persians:

The fighting on the right intensifies with some Janissary's charging home:

Action in the centre is also hotting up:

On the right the Ottoman attack has stalled:
Fighting continues in the centre with neither side gaining the upper hand:

The Ottoman left begins to advance against the weak-looking Persian right in an attempt to draw the Persian commanders attention away from the struggling Ottoman right:

In the centre the situation is improving for the Ottomans with one valiant cavalry unit bursting through the Persian lines:

On the right the Ottomans have fallen back. They are battered but so are their opponents:

The Ottoman cavalry break-through in the centre:

On the right the Ottomans hold on grimly:

The action in the centre is now turning in favour of the Ottomans. Several Persian units have been destroyed or forced to retire and the Ottoman foot are ganging up on the Persian survivors:

The Ottoman right is almost gone but the efforts of the Persians have been exhausted and they can't quite achieve a knock-out blow:

The Ottoman left continues to drive forwards and the Persian centre is almost gone. Night is approaching:

The Persians make one last effort to win the battle with three (badly damaged) units charging a single Ottoman unit which is in good shape and almost as strong as the three Persians combined!:

The Ottomans survive the attack and night falls with them holding on to their two objectives. Both the Ottoman and the Persian armies were a single unit from breaking at the end!
The first game demonstrated how taking a risk in Scharnhorst can pay off or not. I had to wipe out Gordon's two units very quickly before his other troops could arrive and managed to do so. If Gordon had been able to survive even one more turn the result could have been very different.
The second pick-up game was also great fun. The armies were both huge with a lot of poor quality units which can't take many losses. For a while I thought it was looking bad for me but I managed to hang on and, towards the end, was probably more likely to have broken Gordon's army before he broke mine.
Gordon's army is certainly something different and beautifully painted compared to my rag-tag horde of Ottomans!
No comments:
Post a Comment