Using the Insurrection Hussars to win the scouting the Austrians managed to capture the majority of objectives in Scharnhorst though the French got to choose the battlefield:

Both sides had two columns on table with the Austrians having two arriving on the left flank of the battlefield and one French column arriving on their right giving a somewhat crowded battlefield:

The French centre advances while the Austrians respond by using a reserve move to attempt to outflank the French on the Austrian right:

The French continue to push forward supported by their artillery on the hill. Some of the French attackers are drawn off to meet the Austrian advance on the French left though:

A powerful French Cuirassier Corps heads for the Austrian centre:

The last few Austrian reserve brigades in the centre deploy to counter the Cuirassiers:

A second French Corps has arrived on the French right. The remainder of the Austrian II Corps has also arrived on the Austrian left and moves up to support the hoped-for arrival of the Austrian Reserve Corps:
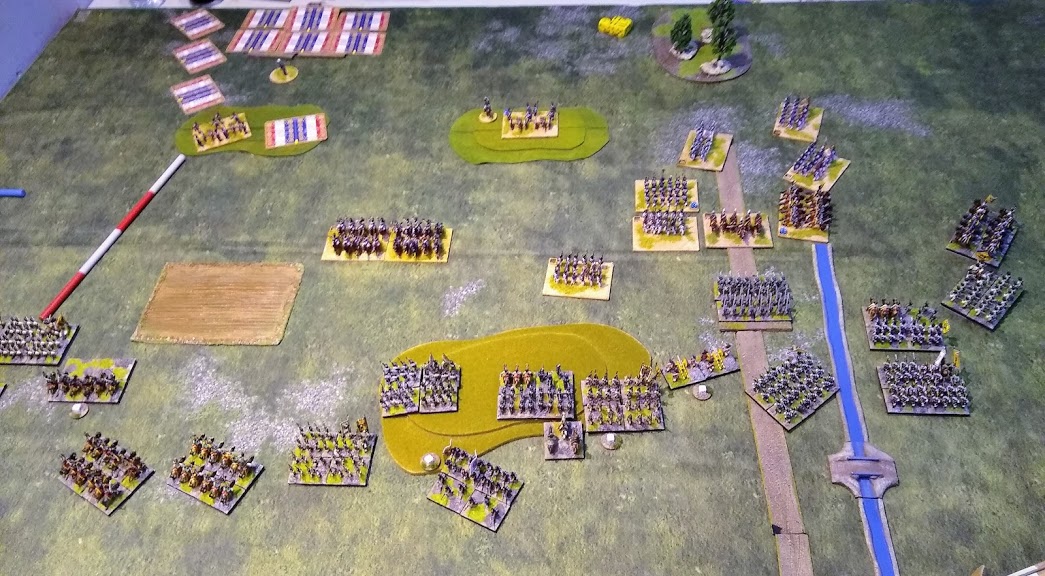
The French 2nd Corps moves forward on the French right. The Austrian Reserve Corps arrives and looks well placed to crash into the French right but is facing the Middle Guard and some powerful artillery. In the centre the fight has died down somewhat with the French thrown back but the Austrians looking shaky themselves:

Initially at least the situation looks good for the Austrians:

The Austrians suffer from lack of space to maneuver. To try to gain space Austrian Kuirassiers charge the French guns but are repulsed. The Grenadiers and Kuirassiers are taking losses from fire and the situation has deteriorated quite quickly!:

The battle overall:

The Reserve Corps leaves a couple of brigades to delay the French and retires more off the table before they are destroyed stabilising the situation somewhat:

In the centre and on the right the Austrians are now gaining the upper hand with French brigades being destroyed and forced back:

On the Austrian left some desperate French attacks are repulsed, night will fall soon and the Austrians will probably hold on:

The Austrians push on in the centre and on their right:

The Austrian lines hold firm:

Night falls and the French are forced to fall back:

300 points of Blucher certainly gives you the impression of a large Napoleonic battle! The rules bring out issues such as deciding where you really need to influence the battle, which areas can be left with less attention for a while and maintaining a reserve to change the situation and support success or limit disaster.
As in reality the skill is in juggling all of the above while keeping focused on your actual aim and what you need to achieve.
It is tempting to get pulled in to managing the details while ignoring the big picture, committing your reserve too early and even battle fatigue as the game goes on.
In this game for example my aim was to survive with my army intact until nightfall. I had one complete Corps on table in the centre with a decent position to defend and half a Corps on their left. Neither side had any troops on my right.
The rest of my army would arrive on my left. Sean initially sent an attack in against my centre where I felt rather outnumbered. First decision for the Austrians: take the attack on the chin or move the half Corps from my left to my right outflanking the French attack on my centre but leaving an open space on the Austrian left the French could exploit. I chose to move the half Corps to the right and develop an attack there hoping that fresh Austrian forces would arrive on my left before the French could exploit the gap left.
Initially the choice went well, it forced the French to draw off a substantial number of battalions from their attack on the Austrian centre and allowed the centre to hold on successfully. The next real decision for the Austrians was when the remainder of the half Corps arrived on my left: leave them on the left to link up with the Reserve Corps when it arrived, move them to the centre to shore up my forces there and maybe throw the French back or move them to the right to join the rest of their corps. This time I decided to leave them on the left and use them to support an attack by the Reserve Corps when it arrived. I'd lost sight of my objective there, I didn't need to attack but had visions of sweeping the French from field and marching on Paris!
The next crisis was when the second French Corps arrived on the French left behind some as yet un-scouted but probably Imperial Guard (as Napoleon was on the field) brigades awaiting the arrival of the last Austrian column. Sean then had to choose where to commit this Corps. Before he could commit it the Austrian Reserve Corps arrived.
A tidal wave of Austrian Grenadiers, Kuirassiers, Hussars and artillery appeared on the French flank and prepared to attack. Again I was distracted by the hope of glory and had not considered that while I had a lot of units they had a very limited space to deploy in and were indeed facing some decent French units. At this point the initiative passed to the French in the form of their second Corps, where would it be committed?
At the time I think it seemed obvious to both of us that it would move to support the French Guard hold off the Austrian Reserve Corps and this indeed is what Sean did, as would I have done in his place.
However, with the benefit of hindsight and a clear head that was not in the middle of a battle, that was perhaps the decision that lost the French the battle. To win the French needed to destroy eight Austrian brigades before nightfall. The Reserve Corps was undamaged as were the units of the half Austrian Corps supporting them. As a result while Sean put a big dent in the Reserve Corps most of the units just withdrew off the table (see later!) and, while my dreams of victory by breaking the French army (which as I would have needed to break ten brigades were unrealistic) were shattered Sean only managed to destroy a single artillery battery.
I suspect that had Sean instead sent his second Corps to attack the already battered Austrian centre he might have had much more success, the contest there was close and another entire Corps might well have tipped the balance.
The French Guard could have been left to hold off the Austrian Reserve Corps and the French Cuirassiers used to prevent the Austrian left reinforcing the centre leaving it isolated with the Reserve Corps unable to intervene in time and no Austrian reserves left.
So as ever with Blucher (and Rommel) much to contemplate after the game to try to do better next time and at least make new mistakes not old ones!
One final thing which came up was the ability in Blucher to "juggle" your losses between destroyed brigades and brigades withdrawn from the field. Sean had to destroy eight brigades or force me to withdraw enough units so that I'd have less on table than I had withdrawn (the destroyed ones don't count as withdrawn for that count) and by the end while I'd only had one unit destroyed I had withdrawn 5 or 6 (mainly from the Reserve Corps).
It is difficult to get your head around the fact that destroyed brigades don't count as 'withdrawn' and withdrawn brigades don't count towards the destroyed level. One of the first things I learned playing Blucher was when to withdraw units rather than having them destroyed and the importance, especially if you are attacking, of actually destroying brigades rather than having your opponent withdraw them (easier said than done of course).
Yes I agree, if I'd left the guard to die and then the cuirassiers to hold the space I could have launched a 'devastating' attack on the centre. Again I'd forgotten that the loss of the guard would have meant nothing (apart from me crying curdled up in the corner of the room) and the destruction of your reserve corp would still not have one the game. Hey ho good game and fun all round Sean
ReplyDelete