Thursday, 27 September 2018

Hannibal and Massinissa!

After my last game with the literally ancient 25mm Carthaginians it was apparent that the general figures were very much on their last legs and that any more use would result in broken legs. They seemed too fragile to repair either so it was time to recruit some new ones to take the strain!

Looking at a few manufacturers 1st Corps seemed the best bet to fit in with my older style figures plus they did some Bren Gun teams I needed for my CoC BEF so I ordered a 'Hannibal' pack, a pack of Punic Cavalry Command and a pack of Numidian Cavalry Command plus the Bren Gun teams.

Hannibal and his standard bearer were the first to be painted:
He looks like a grizzled veteran in this sculpt and the figures do fit in well with my old ones. The standard bearer I think disturbingly looks a bit like Lemmy from Motorhead with that moustache, ready to burst into 'The Ace of Spades' at the slightest opportunity!

Next up was Massinissa with his standard bearer:
There was an option with 1st Corps for a 'Numidian General' but that figure was mounted on the same armoured horse as the ones above which I wasn't too keen on, preferring the simple look for the Numidian King.

With the remaining figures I will do Hasdrubal and Mago to give four generals for the army.

Monday, 24 September 2018

Chain of Command BEF v Germans

Another outing for the Durham Light Infantry against Dave's Germans. This time we used the newly published Blitzkrieg 1940 supplement army lists and additional rules. We played Scenario 1 'Going with a bang' and I chose to use the 'Motor Infantry' list. With 12 support points I chose 2 demo teams, an extra section, the Matilda and the Adjutant. Dave chose a first-wave German platoon and also had 12 support points.

The terrain consisted of a road running across the table with one culvert and a bridge on it which the DLI needed to destroy before the Germans could capture them. There were a scattering of buildings and the usual hedges, walls and woods.
The patrol phase ended with us both having decent jump off points with the Germans a fair way forward. They started off by deploying two squads in a wood on the right and another in the ruined house near the road.
Somewhat surprised by the numbers and closeness of the Germans the DLI deployed the 2" mortar team which put down smoke to cover the first culvert from further down the road and No.1 section behind a hedge on the right to defend the bridge.
One of the German squads in the woods ran forward and took fire from the waiting DLI behind the hedge. The demolition teams started to prepare the charges on the culvert and the bridge.
Suddenly some German armour in the form of a Stug III appeared on the German held end of the road and began to advance.
The DLI demo team at the culvert desperately tried to finish the setting the charges before the tank could get into action, the smoke laid earlier by the mortars would cover them for a while but not long. The German squad advancing from the wood took more hits from No.1 section and ground to a halt.

To counter the Stug and put some more pressure on the German left the Matilda arrived and joined in firing at the Germans.
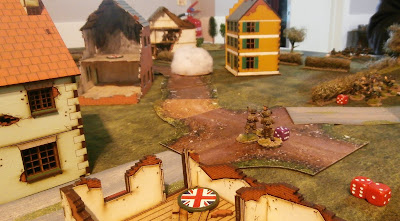
No.2 section was deployed in the furthest forward building the DLI controlled as another German squad had managed to get into the large yellow building.
 The demo team on the culvert continued their work.
Pushing forward the Stug broke through the smoke screen. The DLI on it's left had no AT ability so were unable to stop it. The culvert was successfully blown up though.
However, help was at hand in the form of No.3 Section who had been lying in wait behind the hedge with a Boy's anti tank rifle as the Stug passed by.Taking it's shot the rifle hit the Stug damaging it's gun sight and rattling the crew somewhat.
While this had damaged the Stug No.3 section was now hit by heavy fire from the Germans in the building opposite and took many losses quickly putting them out of action.
Undeterred by the anti tank rifle the Stug pressed cautiously ahead and began firing  HE at the bridge to try to disperse the demo team before they could blow it up.

Setting the charges on the bridge was taking a long time so the DLI deployed No.4 section in the ruined buildings to try to suppress the German infantry in the yellow house who had started firing on the bridge with the Stug.

The Stug was now almost upon No.1 section and the demo team was taking hits. Sensing that the situation was serious Captain Hawkins ran to the bridge to personally supervise the setting of the charges and rally the men.
Just in time the charges were finally set and exploded. Having achieved their objective the DLI retired.

This was a close game with Dave's German's pressing forward relentlessly and the Stug III making a big impact. The change to the rules allowing the Germans to buy an extra 'red' command die for only 2 points meant the Germans could activate their units a lot better and sadly for the British the Matilda has been downgraded. The British only started off with a force morale of 8 so when No.3 section was wiped out this fell to 4 which lost them a command die and left them with 3 command dice versus 6 German. 

I don't think I played well in this game, again the patrol phase baffled me a bit and I didn't realise just how quickly the Germans would be approaching the culvert and bridge. I deployed my sections in general with poor fields of fire and didn't have much of an answer to the Stug as I didn't manage to get the Matilda into action until the last turn and, perhaps, wasted time machinegunning German infantry instead of advancing to take on the Stug earlier.

Friday, 21 September 2018

Chain of Command - BEF v Germans

My second CoC game against Gary's Germans, this time we reversed our previous 'Probe' scenario game so the Durham Light Infantry of the BEF were defending and the Germans attacking. With a 10 support point difference in forces I chose an extra section, the Bren Carrier and a sniper team (after it's effect on the last game I agreed not to use the Matilda!). I didn't really think about what Gary would sepnd his 3 support points on at the time.

The battlefield was a little more open than previously with a number of hills, a T shaped road, some damaged buildings at the junction and sparse woodland.
As is becoming apparent I still have not got the hang of the patrol phase with the Germans ending up with more useful jump off points allowing them to occupy the buildings on the left immediately and to have good cover for all their deployments.
Initially the Germans deployed a squad in one of the buildings on the right.
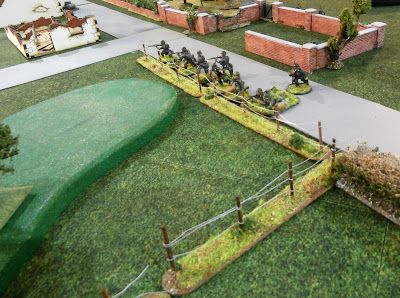
A second squad appeared at the fence line aiming to take the relatively intact buildings at the T junction, the squad also had the German mortar and Feldwebel in support in the walled enclosure behind them.
The DLI deployed No.1 section and the mortar team with Sergeant Baker commanding behind a solid looking wall to dispute the buildings.
Further support was provided by the Bren Carrier which arrived on the road. Both No.1 section and the Carrier went on to over watch to cover any possible German advance.
The German squad on my right then made a dash forward to try to get into the damaged first building. Due to the hill and the building neither No.1 section or the Carrier could see them.

The Carrier started to advance cautiously to try to get a shot at the Germans before they reached the building but failed to get far enough forward.
On my left the DLI deployed No.2 section behind the hill in case the Germans moved out on that flank.
The action then began in earnest on the left flank! Firstly a German Armoured Car appeared on the road and fired at No.2 section of the DLI but with little effect. Then the initially deployed German squad in the damaged building rushed forwards to try and gain the small wood in front of them. Unfortunately for them they ended up stranded in the open, allowing No.3 section of the DLI (which had the Boy's AT rifle with it) to be deployed on the hill. The AT rifle took a side shot at the armoured car hitting it and causing damage which would slow it down. The rest of No.3 section fired on the German squad in the open causing some shock but not as much damage as expected.
The Germans were slow to react so No.3 section continued to fire into them, pinning the LMG team and putting a lot of shock on the whole squad.
The Boy's AT rifle also took another shot, hitting again and destroying the Armoured Car's main armament effectively putting it out of the game!
Finally the Germans pulled themselves together and reacted, though not before the LMG squad broke and ran in part due to the efforts of the DLI sniper team which picked off the NCO of the squad. No.3 section took heavy losses in men but valiantly stayed in the fight despite being reduced to 50% strength.
To try to rescue the remains of their squad in the open on my left another German squad appeared and advanced to support the first one. Again however they failed to gain cover and were left exposed in the open. 
No.3 section of the DLI retired over the hill and with No.2 section fell back to form another defensive line behind a nearby hedge.
The German force morale was now collapsing rapidly with No.1 section and the Bren Carrier engaging the second German squad in the open on the left at long range and the Sniper Team picking off the remaining members of the very depleted squad behind them it was apparent that the German probe had failed causing the Germans to withdraw from the field.

This game showed something which is becoming very apparent in CoC, the difficulty of attacking when as soon as you move forwards the defender can almost always deploy a squad opposite you and decimate you immediately. Even if you have covering squads on 'over watch' you still don't get to fire until the deployed squad has. In the last game I tried using smoke which worked to some extent to cover advances but that takes time. 

I suspect that if you can successfully attack in CoC it takes a lot of preparation, building up CoC dice first, laying smoke (though that's not an option for the Germans), moving tactically and perhaps deploying as much of your force as you can initially (which Gary did in this game) but in a three hour club night game how practical this is remains to be seen. I think there also might be more potential in the Patrol phase but I really have not got the hang of that yet certainly compared to Gary.

The DLI will be taking on Dave's Germans on Monday, will the "Mighty Matilda" make a return? Will an attack actually succeed? Find out next week!


Tuesday, 18 September 2018

Blucher 1813-14 French v 1813-14 Prussians

I haven't played Blucher for a while so was happy to accept a game set in 1813 with my French against Ted's Prussians. Ted not being a fan of Scharnhorst we played a simple pick up game.

I chose to take Napoleon as my commander and have three Corps. One consisted of Bavarians, the second mixed Poles and 'Marie Louise's' and the third of Guard infantry, cavalry and artillery.

The French ended up defending on a battlefield consisting of a few hills on my right, one of which was a Prussian objective, scattered woods, another Prussian objective on my left and a road running centrally on which the French objective was placed.

The Prussians initially advanced a large force of Line infantry and Landwher split into two groups on my left.
Facing them was the Bavarian Corps, initially it appeared the Bavarians might have an advantage in cavalry as the Prussians didn't seem to have any.
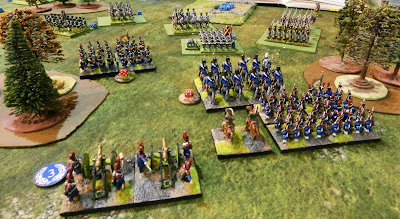
Realising that the Bavarians would quickly be outnumbered the Guard infantry and Foot artillery advanced on their right in support. Brigades of Poles and Marie Louise's also advanced to support the Guard.

The Prussians continued to push forward on my left towards the Bavarians.
They also brought up some Uhlans and the end Landwher unit prepared to receive cavalry.
In the centre the Guard infantry continued to advance and the Guard cavalry and Horse artillery followed behind them.
On the left the Prussians moved their Uhlans up to face the Bavarian horse and the infantry began to exchange fire.
Meanwhile on my right desultory skirmishing occurred with the terrain limiting the possibilities for an attack by either side.
The Prussian Uhlans charge home! The Bavarian cavalry were obviously dispirited and took 5 hits from the Prussians almost breaking them in a single attack and throwing them back utterly spent as a force.
In the centre the Guard infantry and Horse Grenadiers take on a mixed Prussian force of Landwher, Reservists and Dragoons.
The Uhlans advance past the Bavarian infantry flank. Their six combat dice, all of which hit, can be seen in the background!
The shattered Bavarian cavalry attempt to hold on a little longer.
The Prussians are now pushing past the end on the Bavarian line on the left and attacking frontally to increase the pressure. They have taken heavy losses but have enough numbers to continue to press.
In the centre the Guard pushes the Prussians back though one brigade of Guard infantry is almost finished and in an exposed position.
The Horse Grenadiers charge home against a weakened Reserve Prussian brigade but fail to break them and are forced to fall back behind the Guard infantry.
With the Bavarians being outflanked and in danger of imminent collapse the Guard Light Cavalry and Horse Artillery are committed to try to hold the Prussians up and hopefully mop up some of their weakened brigades that have been in combat for a while.
The Prussians push forward again in the centre having finally broken the weakened Guard infantry on the left centre. The remaining Guard are relatively fresh however and await the attack. On the right the skirmishing continues with little effect on either side.
The situation on the left is becoming critical. One Bavarian brigade and the Bavarian artillery have been forced to retire and another Bavarian brigade in on the verge of collapse. The Prussians have almost taken their objective with only the Guard Light Cavalry and the Guard Horse Artillery to dispute it. However the Prussians have also taken heavy losses with many brigades close to breaking and all their reserves on this flank committed.
Another Bavarian infantry brigade retires. The Guard Light Cavalry charge the Prussian Reservists disputing the objective but an heroic effort from the Prussians throws the cavalry back.
In the centre the Prussians are starting to run out of steam and the Guard should be able to hold on.
On the left the French and Bavarians have managed to pull together some sort of defensive line. Both sides are close to breaking on this flank and the objective is still disputed.
This was the last action in the battle as we had started late night fell with both sides just hanging on. Napoleon would live to fight on but the Bavarian Corps was shattered as a fighting force and the abject flight of their cavalry suggested that perhaps the Bavarians had lost faith in Napoleon. The Prussians took heavy losses themselves and would probably have to retire to lick their wounds, doubtless Blucher would have them pressing on again soon!

I must admit I much prefer using Scharnhorst to set up Blucher games but this quick set up game worked really well. Ted chose an interesting army with loads of low quality Landwher and Reservists, all his artillery attached to brigades and not that much cavalry. He then threw everything into an attack on my weakest corps, the Bavarians, and very nearly broke them by continuing to attack regardless of losses. A very Prussian performance of which Blucher would have been proud!

As for the French the Bavarian cavalry and the Guard cavalry seemed especially dispirited and did not fight with the enthusiasm you'd expect, the Guard cavalry especially charging home against weakened opponents several times but failed to break them. My attempt to counter-attack in the centre didn't really work out though it did keep some pressure on the Prussians.

All in all another great game, Blucher and Rommel both give interesting and different games compared to a lot of other rules I've played.