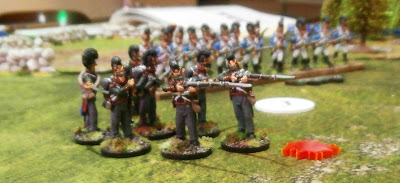
We rolled for scenario and got 'Defence in Depth' with the Austrians as the defenders on a battlefield with a farm near my base edge, another building near the Bavarian base edge and a number of enclosed fields and woods in between. I placed my primary deployment point behind the farm and used the spare 6pdr gun as the marker so Steve's objective was to capture the damaged gun.
Initially I deployed a group of Jaegers in an enclosure near the far building.
The Bavarians responded by deploying their two groups of musket armed skirmishers in the woods in front of the Jagers and opening fire. Two groups of Bavarian line infantry also appeared on my right.
The Jaegers immediately started taking hits and the officer was knocked out. To support them the Austrian Hussars began to move forward.
The Bavarian skirmishers moved forward to take advantage of the Jaegers confusion with their officer knocked out and for reasons only known to themselves ignoring the advancing Hussars. Seeing an opportunity to charge the Hussars dashed forward into the skirmishers!
Meanwhile the Bavarians had continued a strong push down my right flank with all 5 groups of their line infantry. The Austrians put the rest of the Jaegers in a wood on the right to try to slow the Bavarians down and placed the Line Infantry behind the farm defending the gun.
On the right the larger formation of Bavarian line had swept aside the Jaegers in the wood with minimal losses and were starting to advance on the Farm and the gun.
Beset on all sides the Austrian line started taking casualties from two directions.
They were also imminently going to be outflanked by the Bavarian skirmishers.
Realising that the position was untenable the Austrians withdrew from the field leaving the gun to the Bavarians.
Having said that I think I made a lot of bad decisions in the game, I deployed my Jaegers far too far forward and with little support which firstly didn't make best use of their longer range and secondly left them open to taking a lot of fire which, even though they are harder to damage, quickly mounted up. My vague idea was to delay the Bavarians with them but, with no time limit in SP, delaying them was pointless.
Another error was my placement of the deployment point behind the farm. This meant when I deployed my Line infantry there many of them were blocked from sight by the buildings leaving a few visible to the Bavarians who could therefore target them with impunity. It also made it very difficult to move them as a formation. I keep doing this and it is something I really need to improve upon.
Steve's plan was much better with the Bavarians supporting each other both by fire and movement which committed his force as a whole while mine was rather piecemeal.
The one bright spot for the Austrians was the charge of the Hussars. SP seems to rate Napoleonic light cavalry very poorly, even charging skirmishers in the open at the gallop the Hussars were no better off than the skirmishers which seems odd. I also suspect I'd have been better off taking 3rd rank skirmishers at 4pts per group compared to the very expensive Jaegers at 12 per group.
Hopefully lessons will have been learned!


No comments:
Post a Comment