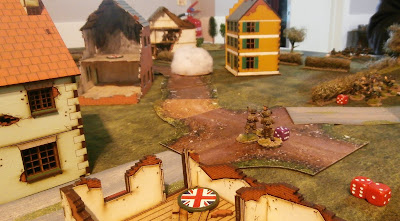
Another outing for the Durham Light Infantry against Dave's Germans. This time we used the newly published Blitzkrieg 1940 supplement army lists and additional rules. We played Scenario 1 'Going with a bang' and I chose to use the 'Motor Infantry' list. With 12 support points I chose 2 demo teams, an extra section, the Matilda and the Adjutant. Dave chose a first-wave German platoon and also had 12 support points.
The terrain consisted of a road running across the table with one culvert and a bridge on it which the DLI needed to destroy before the Germans could capture them. There were a scattering of buildings and the usual hedges, walls and woods.
The patrol phase ended with us both having decent jump off points with the Germans a fair way forward. They started off by deploying two squads in a wood on the right and another in the ruined house near the road.
Somewhat surprised by the numbers and closeness of the Germans the DLI deployed the 2" mortar team which put down smoke to cover the first culvert from further down the road and No.1 section behind a hedge on the right to defend the bridge.One of the German squads in the woods ran forward and took fire from the waiting DLI behind the hedge. The demolition teams started to prepare the charges on the culvert and the bridge.
Suddenly some German armour in the form of a Stug III appeared on the German held end of the road and began to advance.
The DLI demo team at the culvert desperately tried to finish the setting the charges before the tank could get into action, the smoke laid earlier by the mortars would cover them for a while but not long. The German squad advancing from the wood took more hits from No.1 section and ground to a halt.To counter the Stug and put some more pressure on the German left the Matilda arrived and joined in firing at the Germans.
No.2 section was deployed in the furthest forward building the DLI controlled as another German squad had managed to get into the large yellow building.
The demo team on the culvert continued their work.
Pushing forward the Stug broke through the smoke screen. The DLI on it's left had no AT ability so were unable to stop it. The culvert was successfully blown up though.
However, help was at hand in the form of No.3 Section who had been lying in wait behind the hedge with a Boy's anti tank rifle as the Stug passed by.Taking it's shot the rifle hit the Stug damaging it's gun sight and rattling the crew somewhat.
While this had damaged the Stug No.3 section was now hit by heavy fire from the Germans in the building opposite and took many losses quickly putting them out of action.
Undeterred by the anti tank rifle the Stug pressed cautiously ahead and began firing HE at the bridge to try to disperse the demo team before they could blow it up.
Setting the charges on the bridge was taking a long time so the DLI deployed No.4 section in the ruined buildings to try to suppress the German infantry in the yellow house who had started firing on the bridge with the Stug.
The Stug was now almost upon No.1 section and the demo team was taking hits. Sensing that the situation was serious Captain Hawkins ran to the bridge to personally supervise the setting of the charges and rally the men.
Just in time the charges were finally set and exploded. Having achieved their objective the DLI retired.
This was a close game with Dave's German's pressing forward relentlessly and the Stug III making a big impact. The change to the rules allowing the Germans to buy an extra 'red' command die for only 2 points meant the Germans could activate their units a lot better and sadly for the British the Matilda has been downgraded. The British only started off with a force morale of 8 so when No.3 section was wiped out this fell to 4 which lost them a command die and left them with 3 command dice versus 6 German.
I don't think I played well in this game, again the patrol phase baffled me a bit and I didn't realise just how quickly the Germans would be approaching the culvert and bridge. I deployed my sections in general with poor fields of fire and didn't have much of an answer to the Stug as I didn't manage to get the Matilda into action until the last turn and, perhaps, wasted time machinegunning German infantry instead of advancing to take on the Stug earlier.


No comments:
Post a Comment